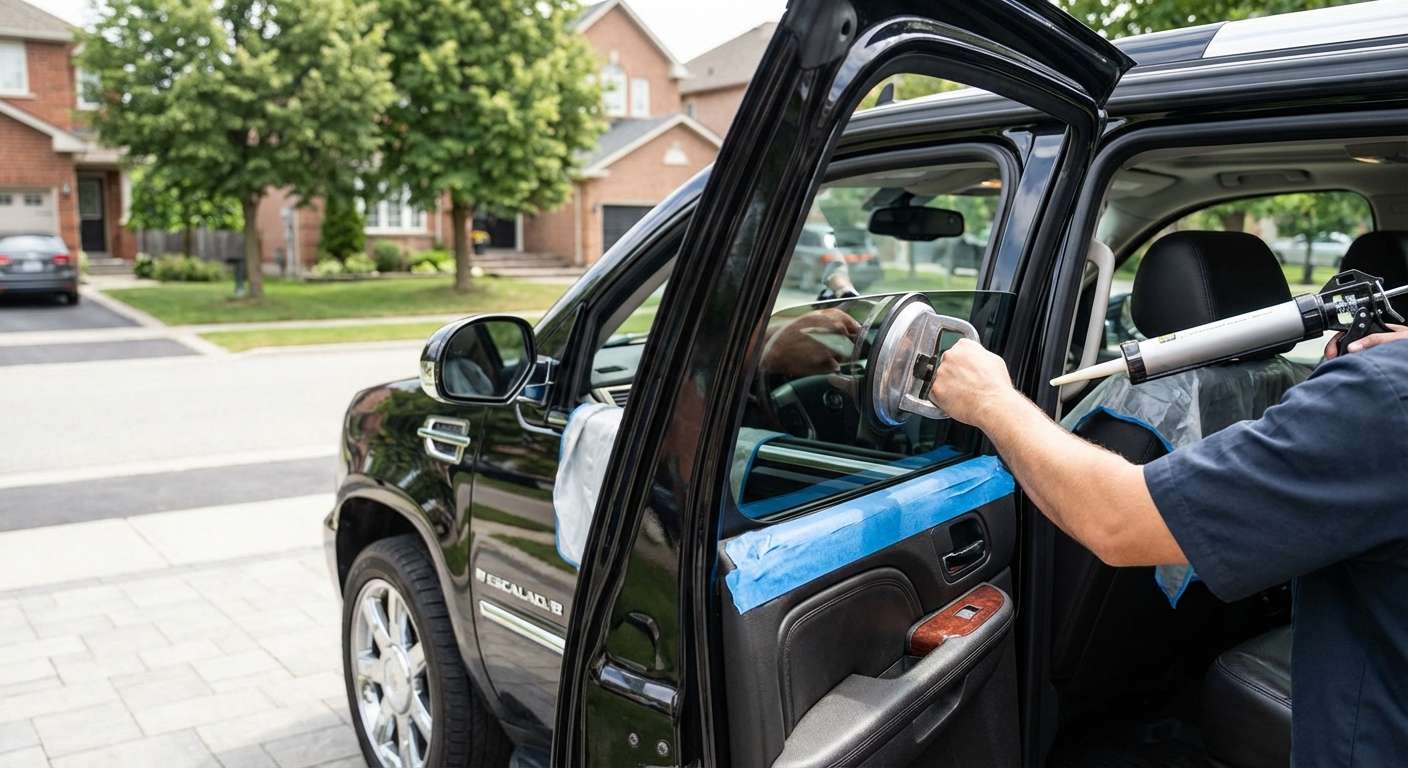
The 2007-2014 Cadillac Escalade Vent Glass: A Small Profile with Massive Security Implications
The 2007-2014 Cadillac Escalade, built on the robust GMT900 platform, remains an enduring symbol of American luxury, sophisticated design, and commanding road presence. However, its premium status and highly sought-after interior components unfortunately make it a frequent target for break-ins. When thieves attempt to bypass the Escalade’s advanced electronic security systems, they rarely target the heavy, laminated windshield or the thick roll-down door windows. Instead, they shatter the smallest, seemingly most vulnerable point of entry: the vent glass.
Whether it is the rear door vent glass or the rear quarter vent, this small pane of glass plays a disproportionately large role in your vehicle's structural integrity, cabin acoustics, and overall security. A shattered vent glass not only exposes your plush leather interior to unpredictable weather elements but also leaves your luxury SUV vulnerable to further theft. As a Master Technician at AlexWindshield, I have replaced countless vent glasses on this specific generation of the Escalade. We understand that restoring your vehicle to its factory-original condition requires far more than just slapping a new piece of glass into a frame—it demands meticulous technical precision, a deep understanding of Cadillac’s luxury trim assemblies, and uncompromising attention to detail.
Why Immediate Vent Glass Replacement is Critical for Your Escalade
Driving a 2007-2014 Cadillac Escalade with a broken vent glass is not just an aesthetic eyesore; it is an active hazard. This vehicle is renowned for its whisper-quiet cabin, achieved through active noise cancellation and heavy acoustic insulation. A missing vent glass destroys this acoustic seal, resulting in deafening wind noise at highway speeds. Furthermore, the exposed opening completely neutralizes your tri-zone climate control, forcing your HVAC system to overwork.
More importantly, the gaping hole left by a shattered vent glass is an open invitation for water ingress. Rainwater entering the door cavity or rear quarter panel can instantly short out the Escalade’s complex wiring harnesses, window regulators, and premium Bose audio speakers. Immediate replacement is not a luxury; it is a vital necessity to protect your automotive investment.
Premium Mobile Auto Glass Services Across the Greater Toronto Area (GTA)
We know that dealing with a break-in or accidental glass damage is highly stressful, which is why we bring our master-level technician services directly to you. AlexWindshield proudly offers comprehensive mobile auto glass replacement across the Greater Toronto Area (GTA). Whether your Escalade suffered a break-in while parked at a shopping mall in Vaughan, shattered due to debris in a residential driveway in Richmond Hill, or requires immediate emergency replacement outside an office complex in Markham, our fully equipped mobile service vans arrive on-site, ready to execute a flawless, factory-standard installation.
Master Technician’s Guide: Step-by-Step Vent Glass Replacement for the 2007-2014 Cadillac Escalade
Replacing the vent glass on a luxury SUV like the 2007-2014 Escalade is a complex procedure. Because this is a door/side glass component rather than a windshield, there is no ADAS (Advanced Driver Assistance Systems) camera calibration required. However, the process demands an incredibly rigorous interior tear-down and cleanup protocol. Here is the exact, A-to-Z step-by-step technical process we follow at AlexWindshield:
Step 1: Thorough Damage Assessment and Interior Protection
- Vehicle Inspection: We begin by assessing the damage to the vehicle's body. Thieves often use pry bars or screwdrivers to shatter vent glass, which can easily scratch the Escalade’s paint or bend the metal window frame (pinch weld).
- Interior Shielding: The 2007-2014 Escalade features premium materials, including Nuance leather seating and genuine wood trim. We lay down heavy-duty, scratch-resistant protective covers over the seats, center console, and exterior door panels to ensure zero collateral damage occurs during the repair.
Step 2: Interior Trim and Door Panel Removal
- Hardware Extraction: To access the mounting points of the vent glass, the interior door panel or rear interior quarter trim must be removed. We carefully extract the hidden Torx screws located behind the door handle bezel and the pull-cup under the armrest.
- Unclipping the Panel: Using specialized, non-marring nylon pry tools, we gently disengage the fragile plastic retention clips securing the door card to the steel door shell, ensuring none of the clips snap.
- Disconnecting Electronics: We carefully disconnect the wiring harnesses for the power locks, window switches, heated seat controls, and the Bose speaker system before lifting the panel safely away.
Step 3: Meticulous Glass Shard Vacuuming
- Deep Cavity Extraction: When a vent glass shatters, thousands of tempered glass fragments fall directly into the inner cavity of the door shell. If left behind, these shards will cause a persistent, maddening rattle every time you close the door or drive over a bump.
- Industrial Vacuuming: We use high-powered industrial vacuums with specialized micro-crevice attachments to meticulously vacuum all broken glass shards from the vehicle's interior. We clean the seats, the carpets, the window regulator tracks, and the deepest corners of the interior door cavity.
- Track Lubrication: Once the glass is entirely removed, we clean and re-lubricate the rubber window run channels to ensure the primary roll-down window continues to operate flawlessly without grinding against hidden glass dust.
Step 4: Removing the Old Glass Frame and Urethane
- Cutting the Seal: For encapsulated vent glasses that are bonded to the frame, we use precision cold knives and specialized wire-cutting systems to cleanly slice through the old factory urethane adhesive.
- Extracting the Frame: We remove the remaining shattered glass, the old rubber encapsulation, and any bolted-in track dividers that separate the vent glass from the main door window.
- Trimming the Pinch Weld: We carefully trim down the old urethane bead on the vehicle's body to a thickness of about 1-2 millimeters, creating a perfect base for the new adhesive to bond with.
Step 5: Precision Surface Cleaning and Preparation
- Decontamination: The bonding surface is thoroughly scrubbed using an alcohol-based, specialized auto glass cleaner to remove all dirt, grease, road grime, and moisture. Any contamination on the pinch weld will critically compromise the adhesive bond.
- Scratch Repair: If the vehicle's paint was scratched by the thief's tool, we treat the bare metal to prevent future rust and corrosion from forming inside the door frame.
Step 6: Primer Application
- Chemical Priming: We apply a highly specialized, fast-drying glass and body primer to both the newly exposed metal of the Escalade's frame and the ceramic frit band of the new vent glass.
- Activation: This primer application is a mandatory chemical step that promotes total cross-linking adhesion between the urethane and the glass, ensuring a leak-proof, factory-grade seal. We allow the primer to flash-cure for the exact manufacturer-specified duration.
Step 7: Installation Using High-Quality Adhesive
- Urethane Extrusion: We utilize a high-modulus, non-conductive, premium automotive urethane adhesive. Using an electric caulking gun, we lay a structurally perfect, uniform "V-bead" of adhesive around the perimeter of the frame.
- Setting the Glass: The new, OEM-quality vent glass is precisely aligned and pressed firmly into the urethane bead. We ensure the glass sits perfectly flush with the Escalade's exterior body lines to prevent wind noise and maintain the vehicle's sleek aesthetic.
Step 8: Reassembly and Final Quality Check
- Putting It Back Together: We re-install the door dividers, re-connect all electrical harnesses, and carefully snap the premium interior door panel back into place, securing all hidden screws.
- System Testing: We test the power windows, door locks, and audio speakers to ensure all electronic components are functioning flawlessly after reassembly.
- Curing Time and Cleaning: While the high-quality adhesive cures to achieve safe drive-away strength, we perform a final cleaning of the new glass, polishing it to a streak-free shine.
Uncompromising Quality: The AlexWindshield Standard
For a luxury vehicle like the 2007-2014 Cadillac Escalade, cutting corners is never an option. We exclusively source OEM-equivalent glass that matches the exact tint, acoustic thickness, and solar-reflective properties of your factory original glass. A cheap, aftermarket piece of glass will immediately stand out, degrading the look of your SUV and failing to properly insulate the cabin from outside noise.
Attempting a DIY vent glass replacement on an Escalade often results in broken interior trim panels, severed wiring harnesses, and severe water leaks due to improper urethane application. By trusting a Master Technician, you are guaranteeing that the structural integrity of your vehicle is restored without compromising the luxury interior you love.
Book Your Mobile Cadillac Escalade Vent Glass Replacement Today
Do not let a shattered vent glass leave your luxury SUV exposed to the elements and potential thieves for a moment longer. When you need absolute perfection, speed, and reliability, AlexWindshield is your definitive choice for auto glass repair and replacement.
As the most trusted experts for mobile auto glass services across the GTA, we bring the repair shop directly to your doorstep—whether you are at home in Vaughan, at work in Markham, or anywhere in Richmond Hill. We stand proudly behind our craftsmanship, which is why every single vent glass replacement we perform is backed by our comprehensive Lifetime Warranty against leaks, wind noise, and manufacturer defects.
Restore the security, silence, and prestige of your 2007-2014 Cadillac Escalade today. Contact AlexWindshield to schedule your mobile vent glass replacement and experience the pinnacle of professional auto glass service.


