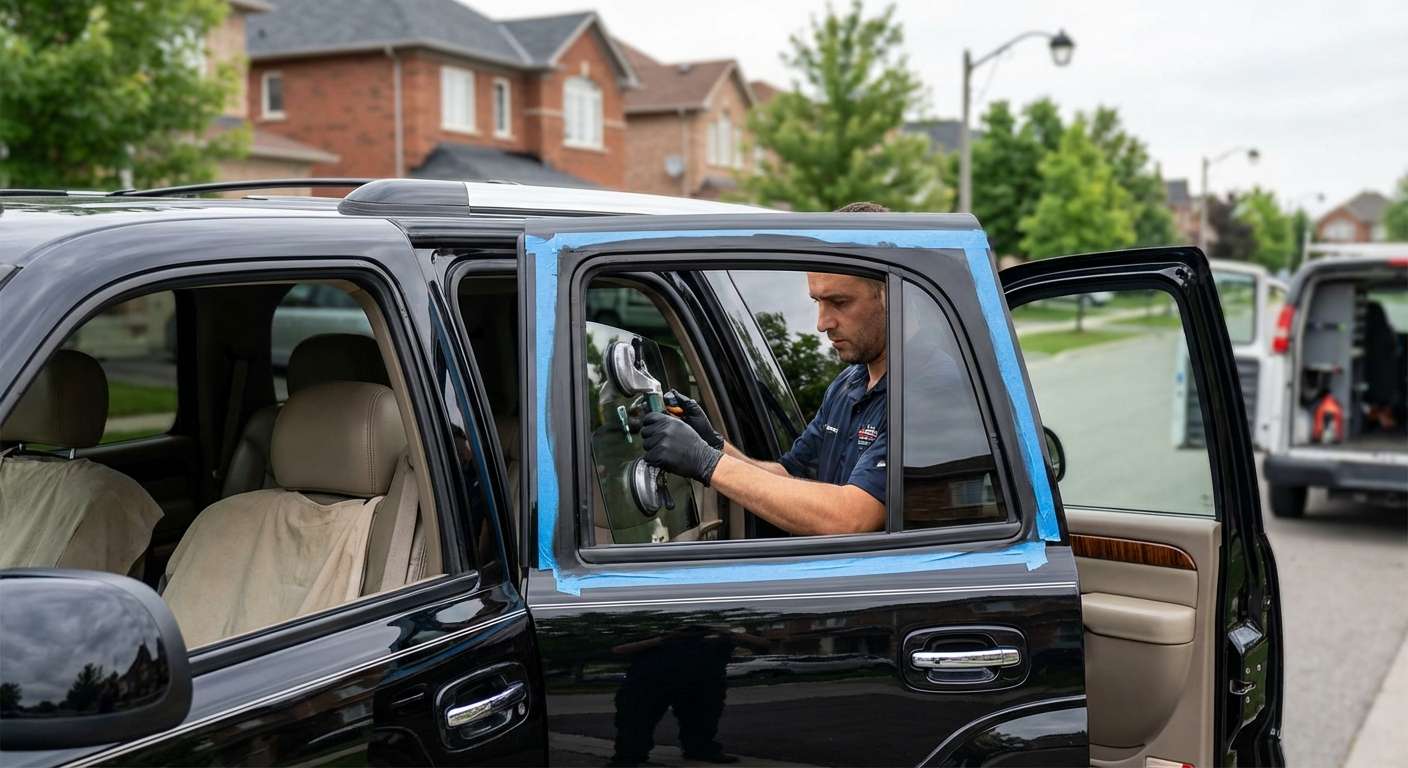
Reviving the Legacy: Flawless Vent Glass Replacement for Your 2002-2006 Cadillac Escalade
The 2002 to 2006 Cadillac Escalade did not just participate in the luxury SUV segment; it completely revolutionized it. Built upon the legendary and unyielding GMT800 platform, this second-generation Escalade brought bold, unapologetic styling, a commanding road presence, and an incredibly plush, whisper-quiet interior to the forefront of American automotive luxury. Even today, these vehicles command respect on the road. However, preserving that premium factory elegance requires meticulous maintenance, particularly when it comes to the vehicle's specialized auto glass. The vent glass on these specific model years—whether it is the fixed rear door vent or the power-operated rear quarter vent window—is intricately designed to complement the vehicle's acoustic dampening and aerodynamic profile. Unfortunately, because of its relatively small size and strategic placement, the vent glass is frequently targeted by thieves looking for a quick, low-profile entry point, or it falls victim to flying road debris.
When the unmistakable sound of shattering glass compromises your Escalade, you cannot rely on generic, one-size-fits-all repair methods. The complex interior trims, heavy-duty window regulators, and premium leather finishes of the 2002-2006 Escalade demand the touch of a Master Technician. As a senior auto glass specialist, I understand the precise tolerances and unique structural characteristics of this iconic SUV. Restoring your Cadillac to its original glory requires far more than just fitting a new piece of glass; it involves an exhaustive, step-by-step technical restoration process to ensure absolute structural integrity, perfect acoustic sealing, and a pristine interior.
Premium Mobile Auto Glass Service Across the Greater Toronto Area (GTA)
Driving a luxury SUV with a shattered vent window is not just a major security risk; it exposes your luxurious interior to the unpredictable and often harsh Canadian elements. We understand that your time is valuable, which is why AlexWindshield brings our state-of-the-art auto glass shop directly to your driveway, workplace, or preferred location. Our premium mobile auto glass replacement service operates extensively across the Greater Toronto Area (GTA), with dedicated rapid-response technicians serving communities including Vaughan, Richmond Hill, and Markham.
Whether you are parked at a commercial plaza in Vaughan, resting at your home in Richmond Hill, or at a corporate office in Markham, our fully equipped mobile service vehicles arrive with all the specialized tools, premium OEM-equivalent glass, and advanced adhesives required to complete the job on-site. We eliminate the hassle of navigating GTA traffic with a compromised vehicle, providing you with a seamless, stress-free, and highly professional repair experience right at your doorstep.
Master Technician's A-to-Z Guide: The Escalade Vent Glass Replacement Process
Replacing the vent glass on a 2002-2006 Cadillac Escalade is a precise, multi-stage procedure. Because vent glass is constructed from tempered glass, it is designed to shatter into thousands of tiny, blunt fragments upon impact. This safety feature prevents lethal glass shards in a collision, but it creates a massive cleanup operation and requires meticulous dismantling of the vehicle's interior. Here is the definitive, step-by-step technical process we execute at AlexWindshield to ensure a flawless replacement.
Step 1: Pre-Inspection and Extensive Interior Protection
The moment our technician arrives, a comprehensive pre-inspection is conducted. We assess the damage, verify the correct dimensions and tint of the replacement vent glass, and inspect the surrounding metal frame for any impact deformations. Because the 2002-2006 Escalade boasts premium materials like Zebrano wood trim and supple leather upholstery, interior protection is paramount.
- We drape heavy-duty protective drop cloths over the leather seats, center console, and carpeting.
- We apply specialized protective automotive tape to the exterior painted surfaces surrounding the vent glass frame to prevent any accidental scratches during the extraction process.
- Safety Gear: The technician equips heavy-duty cut-resistant gloves and safety glasses to handle the hazardous environment safely.
Step 2: The Crucial Vacuuming Process and Shard Removal
When a vent glass shatters, it does not just fall onto the seat; it explodes outward and inward, infiltrating every crevice of the Escalade's cabin. Shards fall deep into the door cavity, window regulator tracks, and hidden floorboard areas.
- We utilize a high-powered, industrial-grade shop vacuum equipped with specialized micro-crevice nozzles to extract every visible piece of glass from the seats, floor mats, and interior trim.
- We pay special attention to the seat rails and the folds of the leather, ensuring no hidden shards remain to cause future injury or interior damage.
- Internal Cavity Cleanup: As we prepare to remove the interior panels, we systematically vacuum the internal recesses of the door or quarter panel to ensure no glass remains to cause annoying rattles down the road.
Step 3: Door Panel and Interior Trim Removal
To properly extract the remaining glass fragments embedded in the window channels and to access the mechanical mounting points of the vent glass, the interior panels must be carefully dismantled.
- Using non-marring nylon bone tools, we carefully pry away the cosmetic trim pieces, window switch bezels, and door handle surrounds without scratching the Escalade's luxurious interior plastics or wood grain.
- We locate and extract the hidden 7mm and 10mm bolts securing the primary door panel or rear quarter interior cladding.
- The panel is lifted off its retaining clips, and all electrical harnesses (such as power lock, window, and speaker connections) are safely disconnected.
- Once the panel is removed, the vehicle's vapor barrier is carefully peeled back, allowing full access to the bottom of the door cavity to vacuum out the remaining thousands of broken glass shards that have collected at the base.
Step 4: Removing the Damaged Vent Glass Frame and Old Adhesive
Depending on the specific location (rear door vent vs. quarter vent), the glass is either bolted to a regulator or encapsulated in a urethane bond.
- If encapsulated, we use advanced cold-knife technology and specialized oscillating cutout tools to slice through the original, hardened factory urethane bead that holds the vent glass frame to the vehicle's pinch weld.
- If it is a mechanical mount (common in pop-out quarter vents), we carefully unbolt the Torx screws holding the motorized hinge and latch assemblies, ensuring the motorized arm is not bent or damaged.
- The remnants of the broken glass and its weather-stripping frame are completely extracted from the vehicle.
Step 5: Surface Preparation, Cleaning, and Primer Application
A new piece of auto glass will only adhere properly if the bonding surface is surgically clean. Skipping this step leads to severe wind noise, water leaks, and catastrophic structural failure.
- We use specialized urethane scrapers to trim down the old adhesive bead on the pinch weld to a uniform thickness of roughly 1-2 millimeters. This thin base layer is known as the "bed," which helps the new urethane bond effectively.
- The entire bonding area and the surrounding metal are scrubbed with an alcohol-based, lint-free glass cleaner to remove any dirt, grease, or residual dust from the shattering event.
- Next, we apply a high-performance black glass primer to any exposed bare metal scratches on the pinch weld. This step is non-negotiable; primer prevents the formation of rust, which could secretly eat away at the Escalade's frame over time.
- We also apply primer to the ceramic frit band of the new vent glass to promote a flawless chemical cross-linking reaction with the adhesive. We allow the primer to flash-off (dry) completely according to strict manufacturer specifications.
Step 6: Applying High-Quality Adhesive and Installing the New Vent Glass
With the surfaces meticulously prepped, we move to the installation of the OEM-equivalent replacement vent glass.
- We load our heavy-duty battery-operated caulking gun with a premium, high-modulus, fast-curing high-quality adhesive (urethane).
- The technician expertly runs a consistent, V-shaped bead of urethane along the perimeter of the pinch weld (or directly onto the encapsulated glass frame, depending on the specific vent application). The height and width of this bead must be perfectly calculated to match the factory specifications of the 2002-2006 Escalade.
- The new vent glass is then carefully lifted and precisely set into place. We apply gentle, even pressure around the perimeter to compress the urethane, ensuring a watertight and airtight seal.
- If the glass features mechanical hinges for a power pop-out function, we align the mounting holes, apply thread-locker, and torque the bolts to the exact factory specifications.
Step 7: Reassembly, Curing Time, and Final Quality Check
The installation is only complete once the vehicle is put back together exactly as it left the factory line.
- We re-secure the vapor barrier and meticulously reconnect all electrical harnesses for the door locks, speakers, and window switches.
- The interior door panel or quarter trim is carefully guided back onto its mounting brackets, pushed into the retaining clips, and bolted firmly into place. All cosmetic trims are snapped back in.
- We perform a final, rigorous cleaning of both the inside and outside of the new vent glass using streak-free professional cleaners.
- System Testing: If the vent is power-operated, we test the motor mechanism to ensure smooth opening and closing without binding. We also roll the main door window up and down to ensure the tracks are completely free of microscopic glass dust.
- The technician will brief you on the Safe Drive-Away Time (SDAT), detailing how long the high-quality adhesive needs to cure before the vehicle can be safely driven, washed, or subjected to pressure changes.
Why Choose AlexWindshield for Your Cadillac Escalade?
Your 2002-2006 Cadillac Escalade is a machine of presence and prestige, and it deserves nothing less than master-level craftsmanship when repairs are necessary. Attempting DIY glass replacement or trusting discount providers often results in damaged electrical components, ruined leather interiors from hidden glass shards, and irritating wind whistling at highway speeds due to poor urethane application.
By choosing AlexWindshield, you are partnering with the undisputed experts in mobile auto glass services across the GTA, including Vaughan, Richmond Hill, and Markham. We pride ourselves on executing every step of the meticulous process outlined above on every single job. We use only top-tier adhesives, OEM-equivalent glass, and advanced surface preparation techniques to ensure that your vehicle is as safe, silent, and luxurious as the day it was manufactured.
For absolute peace of mind, every vent glass replacement we perform is backed by our comprehensive Lifetime Warranty. This warranty covers you against any air leaks, water leaks, or manufacturer defects for as long as you own your Escalade. Do not let a shattered vent window compromise the security and luxury of your vehicle. Contact AlexWindshield today to schedule your expert, mobile auto glass replacement, and let our Master Technicians restore the unyielding legacy of your Cadillac Escalade.


