Expert Quarter Glass Replacement for Buick Regal TourX & Sportback (2018-2020)
The Buick Regal TourX and Regal Sportback (2018-2020) represent a unique era in modern automotive design, blending the utility of a wagon or liftback with the sleek, aerodynamic lines of a European-styled tourer. These vehicles were engineered with distinct pillars and rooflines that rely heavily on the integrity of their fixed glass panels to maintain their sophisticated silhouette. Unlike a standard door window, the quarter glass on these models is a stationary structural element, bonded directly to the vehicle's body frame. When this glass is damaged—whether due to a break-in attempt, road debris impact, or vandalism—it disrupts the vehicle's aesthetic flow and compromises the cabin's security and weatherproofing.
At AlexWindshield, we understand that replacing the quarter glass on a 2018-2020 Buick Regal is not a simple "pop-in" repair. It requires the precise hand of a Master Technician to ensure the vehicle’s interior trim remains pristine, the body pinch weld is protected against rust, and the new glass is sealed with factory-grade precision. As the premier auto glass specialists in the Greater Toronto Area (GTA), we provide a seamless, technical solution that restores your Buick to its original glory.
The Critical Role of Quarter Glass in the Buick Regal
The quarter glass on the TourX and Sportback is located just behind the rear doors, integrated into the C-pillar or D-pillar architecture. Because these vehicles feature a more aggressive roofline taper than standard sedans, the quarter glass is often specifically shaped to aid driver visibility while reducing blind spots. It is manufactured using tempered safety glass. Unlike the laminated glass found in your windshield, tempered glass is designed to shatter into thousands of small, blunt pebbles upon impact. While this is a safety feature to prevent deep lacerations during an accident, it creates a significant cleanup challenge and leaves your vehicle's interior vulnerable to the elements immediately.
For owners in Vaughan, Richmond Hill, and Markham, finding a technician familiar with the specific trim removal procedures for the Buick Regal Sportback and TourX is essential. Improper removal can lead to broken interior clips, scratched paint, or wind noise caused by air gaps in the urethane seal.
Comprehensive Replacement Process: A Master Technician’s Approach
At AlexWindshield, we do not cut corners. Our protocol for quarter glass replacement is rigorous, ensuring that your vehicle is returned to you cleaner than when we arrived. Below is the detailed, step-by-step technical process we follow for the 2018-2020 Buick Regal.
Step 1: Initial Assessment and Interior Protection
Before touching the glass, we perform a pre-inspection of the vehicle. We check the operation of the rear door (if adjacent) and inspect the surrounding paint for any pre-existing scratches. Once cleared, we prepare the workspace:
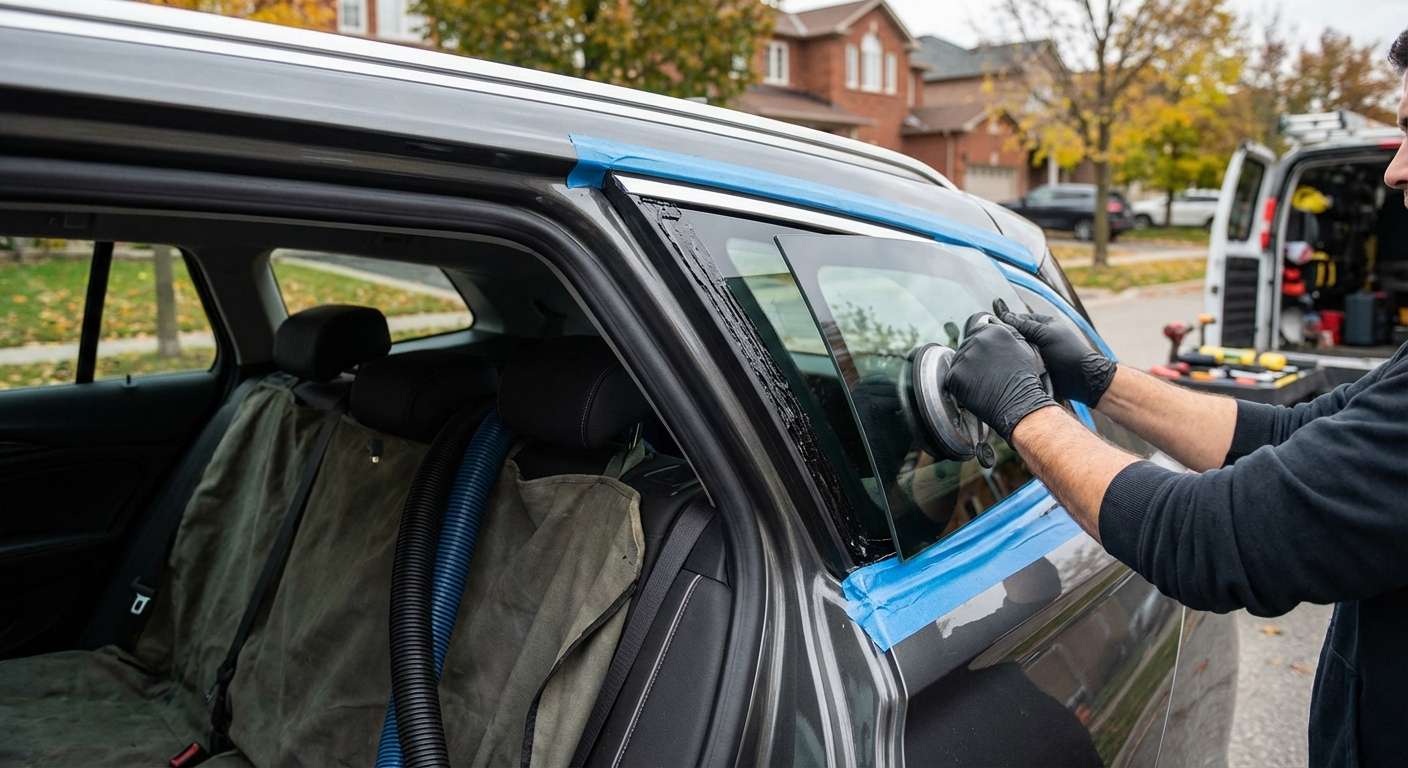
- We apply protective tape around the exterior window frame to prevent accidental contact between our removal tools and your vehicle’s clear coat.
- Inside the cabin, we cover the rear seats, floor mats, and cargo area with heavy-duty protective coverings. This is crucial because shattered quarter glass can fly into unexpected crevices.
- If the quarter glass is located on the rear door (fixed), we protect the door panel leather and plastics. If it is body-mounted (common on the TourX), we protect the cargo lining.
Step 2: Interior Trim and Panel Removal
To access the urethane bead that holds the glass in place, and to ensure we can clean up all broken glass, we must often disassemble parts of the interior.
- Trim Disassembly: We carefully release the interior pillar trim (C-pillar or D-pillar covers) using non-marring pry tools. This exposes the pinch weld from the inside, ensuring we don't accidentally cut the interior fabric or leather when slicing the old adhesive.
- Door Panel Removal (If Applicable): If the fixed glass is part of the rear door assembly, we must remove the inner door card. This involves disconnecting the window switch wiring harnesses and releasing the locking cables. This step is mandatory to access the bottom of the window frame and to vacuum glass shards that have fallen inside the door shell.
Step 3: Shattered Glass Extraction and Cleanup
This is the most labor-intensive part of quarter glass replacement. Tempered glass shards travel everywhere. We utilize industrial-grade vacuums with specialized narrow attachments.
- We vacuum the seats, the floor, under the seats, and inside the seat belt retractors.
- Cavity Cleaning: If the glass fell inside the door or the body panel, we use flexible vacuum hoses to extract debris from the bottom of the cavity. Leaving glass inside a door shell can cause annoying rattling noises while driving, which is unacceptable at AlexWindshield.
- We ensure the window run channels (rubber seals) are completely free of glass dust and fragments.
Step 4: Old Adhesive Removal and Pinch Weld Preparation
Once the debris is cleared, we focus on the frame.
- Cut-Out: Using a specialized "cold knife" or a reciprocating auto glass cutting tool, we slice through the existing urethane bead that bonded the old glass to the car body. We cut as close to the pinch weld as safety allows to leave a thin, level layer of the original urethane.
- Full Cut-Back: We trim the old urethane down to approximately 1-2mm. This "old" urethane acts as the best bonding surface for the new adhesive.
- Inspection: We inspect the metal pinch weld for any nicks or scratches caused by the glass breakage or removal tools.
Step 5: Priming and Corrosion Prevention
A durable installation depends on chemical preparation. We use a multi-stage primer system:
- Surface Cleaning: We clean the mounting surface and the new glass perimeter with a specialized activator to remove silicone, grease, or dirt.
- Black Primer Application: If there are any bare metal scratches on the pinch weld, we apply a high-quality body primer. This prevents rust from forming under the glass, which could lead to leaks years down the road. We also apply primer to the ceramic band (frit) of the new glass to ensure the adhesive bonds molecularly to the surface.
Step 6: Urethane Application and Glass Installation
We use only OEM-equivalent high-modulus urethane adhesive (Sika or Dow), which offers superior holding strength and rapid cure times.
- V-Bead Application: We apply a high-profile "V" shaped bead of urethane directly to the glass or the vehicle body (depending on the specific mounting style of the Sportback vs. TourX). The V-shape ensures that when the glass is pressed in, the adhesive spreads evenly without trapping air bubbles, preventing potential water leaks.
- Setting the Glass: Using suction cups, the new quarter glass is carefully positioned and pressed into the aperture. We align it perfectly with the vehicle’s body lines and the adjacent door glass to ensure wind noise reduction and aesthetic symmetry.
- Retention: We use retention tape to hold the glass firmly in position while the adhesive begins its curing process.
Step 7: Reassembly and Final Inspection
Once the glass is set, we reverse the disassembly process.
- Interior trim panels and door cards are reinstalled, ensuring all clips engage with a satisfying "click."
- We reconnect any wiring harnesses for power windows or speakers that were disturbed.
- A final "white glove" vacuum is performed to ensure no stray glass particles remain.
- We clean the new glass inside and out with streak-free cleaner.
Service Coverage in the Greater Toronto Area (GTA)
A broken quarter glass leaves your vehicle exposed to rain, snow, and theft. You cannot afford to wait days for an appointment or drive a vehicle with a plastic bag taped over the window. AlexWindshield brings the repair shop to you. Our fully equipped mobile units operate across the entire GTA, with specific focus on high-demand corridors including:
- Vaughan: From Woodbridge to Maple, we service residential driveways and office parking lots.
- Richmond Hill: We provide rapid response to all neighborhoods along Yonge Street and Bayview Avenue.
- Markham: Whether you are near Unionville or the tech hubs, our technicians can perform the replacement while you work.
- Toronto, Mississauga, Brampton, and Scarborough: Our fleet covers the entire metro area.
Why OEM Quality Matters for Buick Regal Owners
The 2018-2020 Buick Regal TourX and Sportback are sophisticated machines. Using substandard aftermarket glass can result in poor fitment, visible distortion, or a mismatch in the solar tint color compared to the rest of your vehicle’s factory glass. At AlexWindshield, we prioritize the use of OEE (Original Equipment Equivalent) or OEM (Original Equipment Manufacturer) glass.
This ensures that the curvature of the glass matches the aerodynamic profile of the car perfectly. Furthermore, specific to the "Sportback" design, the flushness of the glass is critical for reducing wind drag and noise at highway speeds. Our installation techniques guarantee that the new glass sits exactly as the factory engineers intended.
Lifetime Warranty and Peace of Mind
We stand behind our craftsmanship. Every quarter glass replacement performed by AlexWindshield comes with a Lifetime Warranty on the installation. This covers you against any water leaks, air noises, or loose moldings for as long as you own the vehicle. We believe that a service isn't complete until the customer is fully satisfied and the vehicle is safe to drive.
Don't let a shattered quarter glass compromise the look or safety of your Buick Regal TourX or Sportback. Trust the Master Technicians who understand the intricacies of your vehicle.
Contact AlexWindshield today regarding your Buick auto glass needs. We are the trusted experts for mobile auto glass services in the GTA.


