Restoring the Integrity of Your Luxury SUV: Vent Glass Replacement for Audi Q7 (2007-2015)
The Audi Q7 (2007-2015), built on the robust PL71 platform, is a masterpiece of German engineering, known for its "Quattro" all-wheel-drive capability and a cabin that feels more like a fortress than a car. However, even a fortress has its vulnerabilities. Often, the smallest window on your vehicle—the vent glass or quarter glass—becomes the primary target for theft, accidental breakage, or vandalism. Because the main door windows are laminated or highly reinforced, intruders frequently target this smaller, triangular piece of tempered glass to gain access to the interior door handles.
If you are staring at a shattered vent glass on your Q7, you are likely dealing with two problems: a gaping hole in your vehicle's security and an interior littered with thousands of tiny glass shards. At AlexWindshield, we understand that replacing the vent glass on a First Generation Audi Q7 is not a standard "pop-in, pop-out" job. It requires the precision of a Master Technician to navigate the complex door assembly, the window division bars, and the bonded urethane seal that holds the glass in place. We are here to restore your vehicle to factory specifications.
Understanding the Complexity of the Audi Q7 Vent Glass
Many vehicle owners assume that the smaller the glass, the easier (and cheaper) the replacement. On the Audi Q7 2007-2015, the opposite is often true. Unlike the main roll-down window, which sits in a regulator track, the vent glass is a stationary encapsulated part. It is structural.
This glass is permanently bonded to the vehicle’s door frame using high-viscosity automotive urethane. To replace it, we must surgically remove the old adhesive, dismantle the door’s internal skeleton to move the division bar (the pillar separating the moving glass from the fixed glass), and rebuild the seal from scratch. This is why you need a specialist.
The AlexWindshield Guarantee: specialized Mobile Service in the GTA
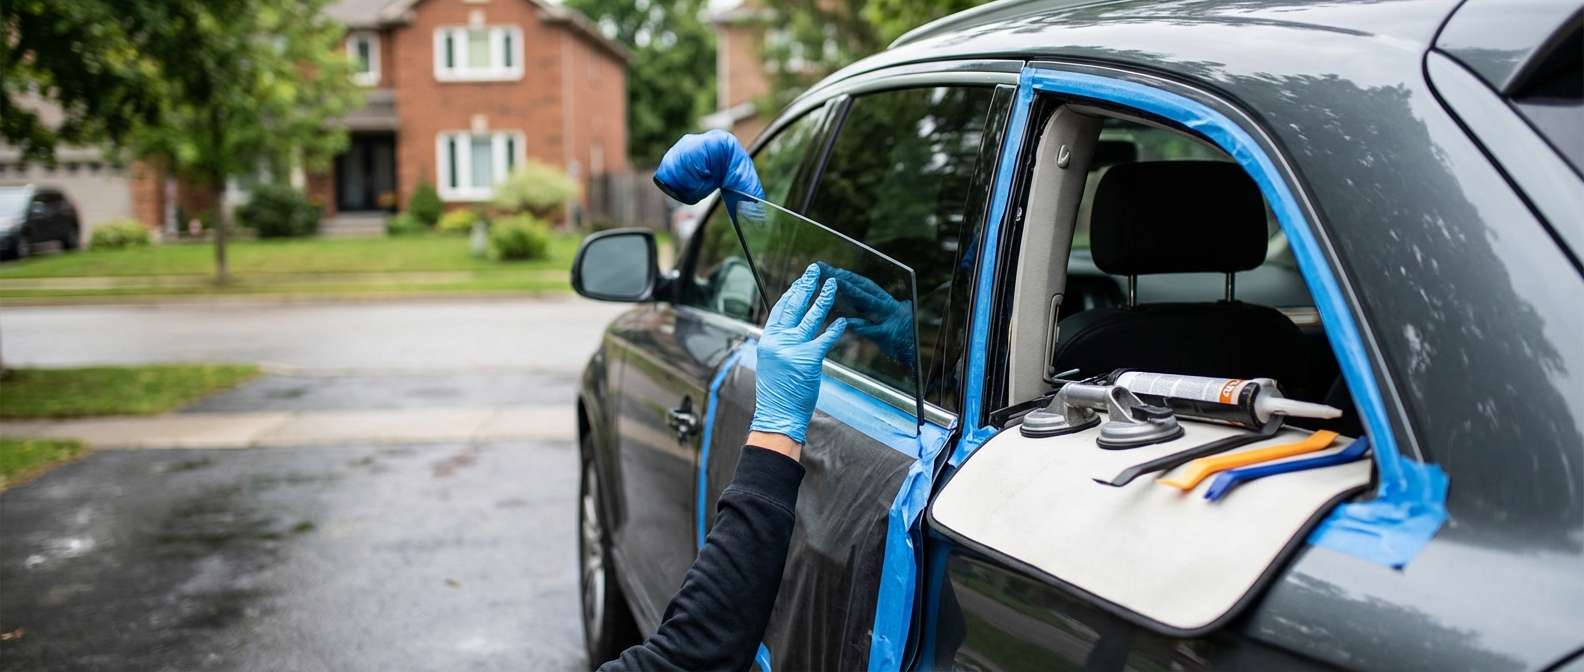
Driving a luxury SUV with a taped-up window compromises your safety and the vehicle's interior electronics. That is why AlexWindshield brings the repair shop to you. We offer premium mobile service across the Greater Toronto Area (GTA). Whether you are parked in a driveway in Vaughan, at your office in Richmond Hill, or a shopping center in Markham, our fully equipped mobile units arrive ready to perform a dealership-level installation on-site.
Step-by-Step Replacement Process: The Master Technician Approach
We believe in transparency. When we work on your Audi Q7, we follow a rigorous protocol designed to protect your leather interior, ensure a watertight seal, and eliminate every shard of broken glass. Here is the detailed A-Z process of how we handle a Vent Glass Replacement.
Phase 1: Site Preparation and Vehicle Protection
Before any tools touch your car, we ensure the environment is safe for the repair.
- Exterior Protection: We apply protective tape and heavy-duty coverings to the exterior door paint and the B-pillar and C-pillar trims. This prevents accidental scratches from glass shards or tools during the removal process.
- Interior Shielding: The Audi Q7 (2007-2015) often features premium leather and wood grain inserts. We drape the seats, steering wheel, and center console with protective covers to prevent glass dust from embedding into the upholstery.
Phase 2: Disassembly of the Door Panel (Door Card)
Replacing the vent glass on a Q7 requires access to the internal door frame. This involves removing the interior door panel, also known as the door card.
- Trim Removal: Using non-marring pry tools, we carefully remove the decorative wood or aluminum trim pieces that hide the mounting screws.
- Fastener Extraction: We locate and remove the specific Torx screws securing the panel to the door shell. Audi hides these well, usually behind the armrest and the door latch handle.
- Electronics Disconnection: We gently detach the door panel, unplugging the wiring harnesses for the power windows, door locks, ambient lighting, and the speaker system (often Bose or Bang & Olufsen in these models).
- Cable Detachment: The mechanical latch cable is unhooked, allowing us to set the door panel aside in a safe location.
Phase 3: The Critical Cleanup (Glass Shard Removal)
When tempered vent glass breaks, it explodes into thousands of cubes. If these are not removed, your door will rattle every time you close it or hit a bump in Richmond Hill.
- Vapor Barrier Removal: We carefully peel back the vapor barrier (water shield) to expose the inner door cavity.
- Deep Vacuuming: Using industrial-grade vacuums with flexible crevice attachments, we extract glass from the carpet, the seats, and deep inside the window run channels.
- Internal Door Cavity Cleaning: We insert vacuum hoses into the bottom of the door shell. We also manually inspect the drain holes at the bottom of the door to ensure no glass is blocking water drainage, which could cause rust later.
Phase 4: Removing the Broken Assembly and Division Bar
This is the most technical part of the operation for the Audi Q7.
- Releasing the Run Channel: The rubber channel that guides the main window often runs continuously around the vent glass. We must carefully pull this rubber out of the way without tearing it.
- Adjusting the Division Bar: The vertical metal bar separating the vent glass from the main window must be loosened. On the 2007-2015 models, this involves removing bolts at the top and bottom of the frame inside the door. We slide this bar slightly to create clearance.
- Cutting the Urethane: Using a specialized cold knife or an oscillating cut-out tool, we slice through the factory urethane that bonds the remaining glass shards or the frame of the vent glass to the vehicle body. This requires extreme precision to avoid scratching the pinch weld (the metal frame).
Phase 5: Surface Preparation and Primer Application
A new piece of glass will not stick to a dirty or old surface. Bonding is chemistry.
- The "Full Cut" Method: We trim the old urethane down to a thin, even layer (approximately 1-2mm). This provides the perfect base for the new adhesive to bond to.
- Cleaning the Pinch Weld: We use an alcohol-based activator to clean the metal frame, removing dirt, grease, and silicone.
- Primer Application: If there are any bare metal scratches (caused by the glass shattering), we apply a high-grade anti-corrosion primer. This prevents rust and acts as a bonding agent for the adhesive. We also prime the ceramic band on the new vent glass to ensure maximum adhesion.
Phase 6: Installation and Bonding
We use only OEM-equivalent automotive glass and high-modulus urethane adhesive (typically Sika or Dow) that meets Audi's safety standards.
- Adhesive Application: A fresh bead of high-viscosity urethane is applied directly to the glass or the vehicle body (depending on the specific molding type of the replacement part). The bead must be triangular and continuous to ensure a watertight seal.
- Setting the Glass: The new vent glass is carefully maneuvered into the opening. We press it firmly against the pinch weld to ensure the adhesive wets out properly.
- Securing the Division Bar: Once the glass is seated, we slide the division bar back into its original position and torque the bolts to factory specifications. This locks the vent glass in place mechanically as well as chemically.
- Reinstalling Run Channels: The rubber window run channels are pressed back into position, ensuring the main window still slides up and down smoothly without friction.
Phase 7: Reassembly and Functional Testing
Before we hand the keys back, we ensure everything works as if the damage never happened.
- Vapor Barrier Reseal: The moisture shield is re-adhered to the door to prevent water leaks into the cabin.
- Panel Installation: The door panel is reconnected (wiring and latch cables) and snapped back onto the door. All Torx screws are tightened, and trim pieces are replaced.
- Operation Check: We test the main power window to ensure it does not bind against the new vent glass assembly. We also check the door locks and speakers.
- Final Polish: The new glass is cleaned with professional glass cleaner, and any remaining fingerprints on the door panel are wiped away.
Why Local Expertise Matters in the GTA
The weather in the Greater Toronto Area is unforgiving. From the freezing winters in Markham to the humid summers in Vaughan, your vehicle's glass is subject to extreme thermal expansion and contraction. A poor installation will lead to air leaks (whistling noises) or water leaks that can damage the sophisticated electronics in your Audi's floorboards.
By choosing a local expert like AlexWindshield, you are ensuring that the materials used—specifically the primers and adhesives—are selected to perform in our specific climate conditions. We strictly observe the "Safe Drive-Away Time" (SDAT) to ensure the urethane has cured sufficiently before you drive the vehicle, guaranteeing the structural integrity of the cabin remains intact in the event of a rollover.
Trust AlexWindshield with Your Audi Q7
Your Audi Q7 (2007-2015) is a luxury investment that deserves more than a quick fix. It requires the touch of a Master Technician who respects the engineering behind the vehicle. At AlexWindshield, we combine technical precision with the convenience of mobile service.
Our Promise to You:
- Lifetime Warranty: We stand behind our workmanship for as long as you own the vehicle. If you ever experience a leak or a noise issue related to our installation, we fix it for free.
- Mobile Convenience: We serve the entire GTA, with a focus on Vaughan, Richmond Hill, and Markham.
- Insurance Approved: We work with all major insurance providers to make your claim process seamless.
Don't let a broken vent glass compromise the security and comfort of your Audi. Contact AlexWindshield today for a quote and let us restore your view and your peace of mind.


