Restoring a Design Icon: Vent Glass Replacement for the Audi A6 (C5 Generation, 1998-2004)
The Audi A6 C5 generation (1998-2004) was a watershed moment in automotive design. With its distinctive Bauhaus-inspired curves and a drag coefficient of just 0.28, this vehicle didn't just look like a melted bar of soap—it redefined what an executive sedan could be. However, even the most aerodynamic engineering cannot deflect the unfortunate reality of vandalism or road debris. Often, the smallest piece of glass on the vehicle—the rear vent glass or quarter glass—becomes the target of break-ins, under the mistaken assumption that it is the cheapest or easiest entry point. At AlexWindshield, we understand that replacing glass on a German classic requires more than just a quick swap; it requires surgical precision to preserve the integrity of a vehicle that is now becoming a modern classic.
If you are driving this legendary chassis in the Greater Toronto Area (GTA), specifically in Vaughan, Richmond Hill, or Markham, you need a technician who understands the specific intricacies of the C5 platform. This is not a job for a generalist; it is a job for a Master Technician.
The AlexWindshield Mobile Advantage in the GTA
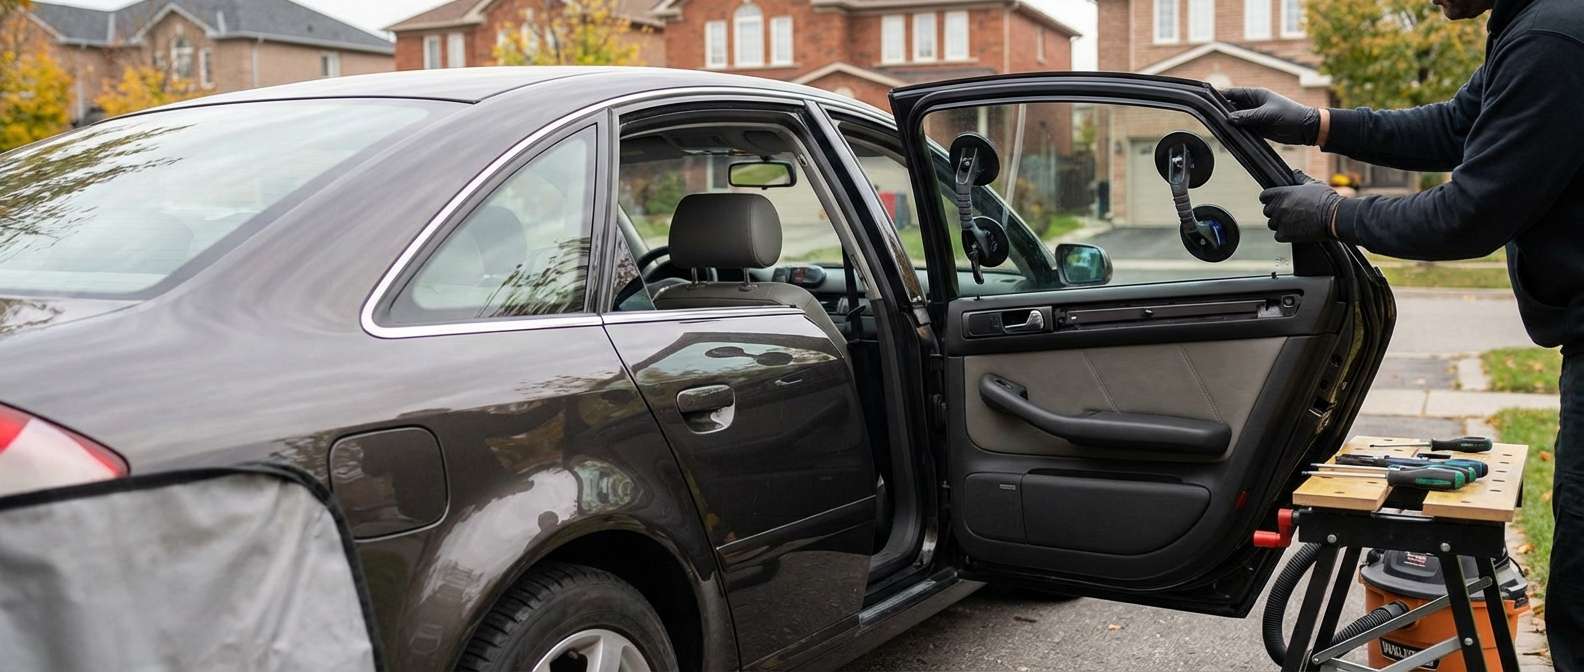
When you are dealing with a broken vent glass, the last thing you want to do is drive your Audi A6 through the elements, risking water damage to your leather interior or wood trim. AlexWindshield brings the workshop to your driveway. Whether you are parked near the promenade in Vaughan, at an office in Markham, or in a residential driveway in Richmond Hill, our fully equipped mobile units arrive ready to perform a factory-spec installation.
We specialize in mobile auto glass services that prioritize your convenience without sacrificing technical rigor. Our technicians carry everything from high-powered industrial vacuums to specific Torx drivers required for German door panels, ensuring the job is done right the first time.
Technical Deep Dive: The Replacement Process Step-by-Step
Replacing the vent glass on an Audi A6 (1998-2004) is significantly more complex than replacing a standard drop window. This stationary piece of glass is integrated into the door frame system and often requires the manipulation of the window run channel (the "division bar"). Below is the comprehensive, A-to-Z procedure we follow at AlexWindshield to ensure a leak-free, rattle-free installation.
Phase 1: Site Preparation and Interior Protection
Before a single tool touches your Audi, we secure the perimeter. The C5 interior, often comprised of aging leather and soft-touch plastics, is prone to scratching. We take extreme care to protect your investment.
- Exterior Masking: We apply protective tape around the window frame and the painted door pillar to prevent accidental scratches during glass removal.
- Interior Shielding: We place heavy-duty covers over the rear seats and the front seat backrest to protect the upholstery from falling glass shards and debris.
- Door Card Assessment: We inspect the door panel (card) for any pre-existing damage, such as loose leather inserts or broken speaker grilles, common in vehicles of this vintage.
Phase 2: Door Panel Removal and Disassembly
To access the mounting points for the vent glass, the interior door panel must be removed. Audi engineers in the late 90s hid fasteners effectively to maintain a clean look, making this step tricky for the uninitiated.
- Hardware Removal: We locate and remove the small screws hidden beneath the interior door handle trim and the armrest. On the C5, there are often screws located at the very top edges of the panel trim (near the window seal) that must be removed carefully to avoid cracking the plastic.
- Clip Release: Using specialized non-marring pry tools, we pop the perimeter clips holding the door card to the metal frame. These clips can be brittle on older Audis; we treat them with care.
- Electrical Disconnection: We carefully disconnect the wiring harness for the window switch, the door lock actuator, and the puddle light.
- Bowden Cable Detachment: The cable connecting the interior handle to the latch mechanism is unhooked without stretching or damaging the plastic retainer.
- Vapor Barrier Management: We carefully peel back the foam vapor barrier to expose the inner door cavity, ensuring the adhesive remains tacky for re-sealing later.
Phase 3: Broken Glass Mitigation and Cleanup
This is arguably the most critical step for driver comfort. Tempered glass shatters into thousands of cubes that find their way into every crevice of the door shell. Failing to remove them results in an incessant "rattle" every time you close the door.
- Cavity Vacuuming: We use a high-suction industrial shop vacuum with a flexible crevice tool to reach deep into the bottom of the door shell.
- Drain Hole Clearance: We check the water drain holes at the bottom of the door to ensure no glass shards are blocking them. Blocked drains can lead to water accumulation and rust inside the door.
- Run Channel Cleaning: We use compressed air and detailed brushes to clean the rubber window tracks (run channels). Any glass left here will screech against your main window when it rolls up and down.
Phase 4: Division Bar Manipulation and Glass Removal
The vent glass on the rear door of the Audi A6 C5 is typically held in place by the main window guide rail (division bar). This bar separates the main drop glass from the stationary vent glass.
- lowering the Main Window: We lower the main window glass to a specific position to access the bolts securing the division bar.
- Loosening the Division Bar: We locate the bolts securing the vertical division bar at the top of the door frame and inside the door shell. These are typically Torx or Hex bolts.
- Seal Removal: We carefully pull away the weatherstripping surrounding the vent glass area. If the old rubber encapsulation is damaged, we prepare to install the new unit which typically comes with fresh molding.
- Extraction: By tilting the division bar slightly forward (toward the front of the car), we create enough clearance to wiggle the remains of the old vent glass frame out of the door aperture.
Phase 5: Installation of the New Vent Glass
We use only OEM-equivalent glass that matches the tint and curvature of your original Audi glazing.
- Lubrication: We apply a silicone-based lubricant to the rubber edges of the new vent glass assembly to facilitate a smooth slide into the frame without binding.
- Insertion: The new vent glass is carefully angled into the door frame. This requires a precise "up and in" motion, ensuring the bottom of the glass seats correctly into the mount inside the door.
- Securing the Division Bar: Once the glass is seated, the division bar is pushed back into its original position, sandwiching the vent glass tightly against the rear pillar.
- Torque Specification: We tighten the bolts on the division bar to factory specifications. Over-tightening can shatter the new glass; under-tightening leads to wind noise and water leaks.
- Weatherstrip Seating: We ensure the exterior rubber seals are completely flush against the bodywork to prevent wind whistle at highway speeds.
Phase 6: Reassembly and Functionality Test
Before the door panel goes back on, we verify the mechanics.
- Window Regulator Test: We operate the main window up and down several times to ensure the glass travels smoothly in the track next to the newly installed vent glass. If there is any friction, we adjust the angle of the division bar.
- Vapor Barrier Reseal: The foam moisture barrier is pressed back into place. A perfect seal here is vital to prevent moisture from entering the cabin and causing mold on your carpets.
- Panel Installation: The door card is re-hung, clips are snapped into place, and all hidden screws are re-installed. We verify that the interior door handle works smoothly and the lock pin moves freely.
- Final Polish: We clean the new glass inside and out with professional-grade glass cleaner, leaving it streak-free.
Why "Good Enough" Isn't Good Enough for German Engineering
The Audi A6 (1998-2004) is a vehicle built on precision. A generic auto glass shop might force the glass in or fail to vacuum the door cavity properly, leading to rattles, scratches on your main window, or wind noise that ruins the serenity of the Audi cabin. At AlexWindshield, we treat your vehicle with the respect a luxury German sedan deserves.
Furthermore, shattered tempered glass is a safety hazard. Our meticulous cleanup process ensures that you won't find shards of glass under the floor mats or in the seat crevices weeks later. We vacuum the seats, the floor, and the door pockets comprehensively.
Lifetime Warranty and Peace of Mind
When you choose AlexWindshield for your Audi A6 vent glass replacement, you are getting more than a repair; you are getting a guarantee. We offer a Lifetime Warranty on our workmanship. If you experience water leaks, wind noise, or loose molding related to our installation for as long as you own the vehicle, we will fix it free of charge.
Ready to restore your Audi A6 to its former glory?
Don't let a broken vent glass compromise the security or the aesthetic of your classic C5. Trust the Master Technicians at AlexWindshield.
Contact AlexWindshield today to schedule your mobile service in Vaughan, Richmond Hill, Markham, or anywhere across the GTA. We are the authority on specialized auto glass replacement.


