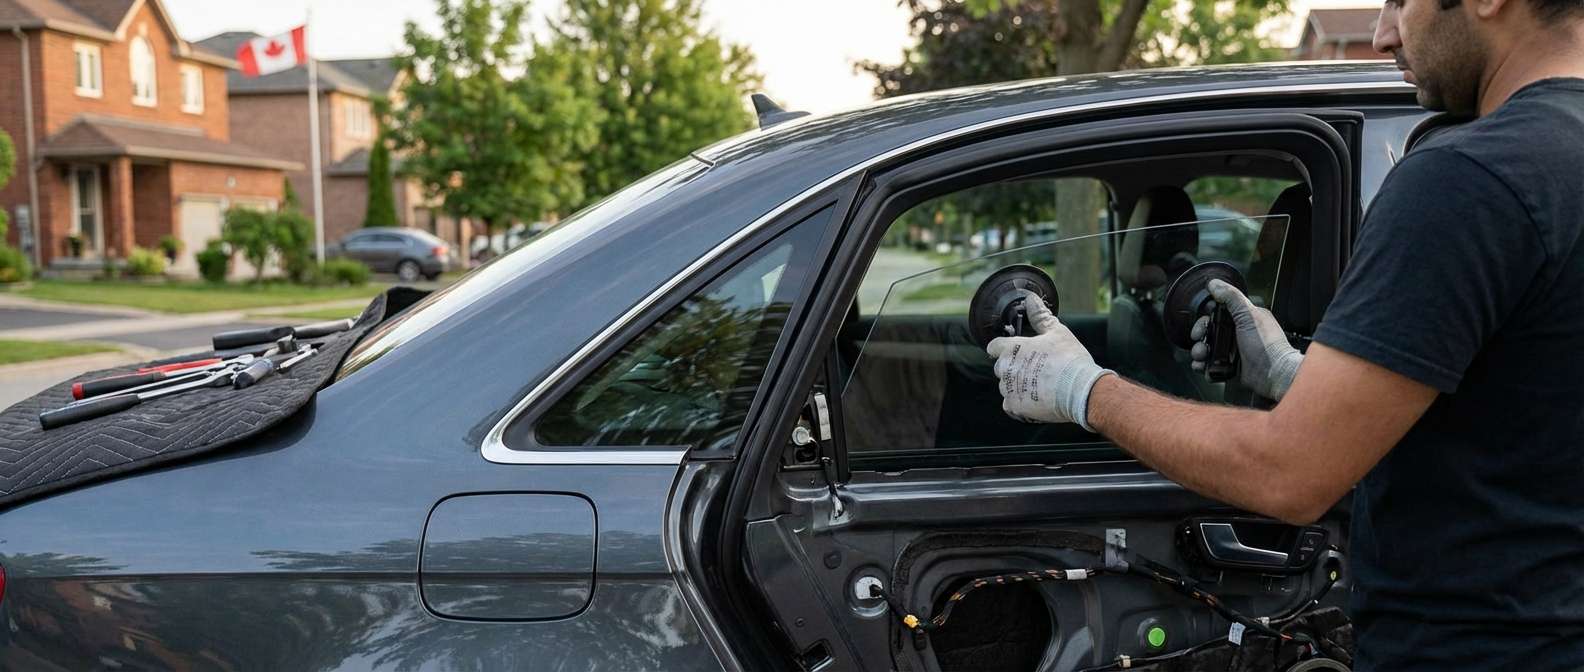
The "Thief's Choice" Glass: Specialized Vent Glass Replacement for Audi A4 (B8)
There is a specific frustration that comes with finding your Audi A4 (2009-2016) with a shattered rear vent glass. Often mistaken by thieves as the "cheapest" window to break to gain access to the interior, this small, triangular piece of glass is actually a complex, integral component of your vehicle's rear door assembly. Unlike a standard drop-glass window, the vent glass on the B8 chassis is tightly integrated with the window guide channels and the divider bar. It is not a simple "pop-out, pop-in" repair; it requires surgical precision to replace without damaging the surrounding trim, the window regulator, or the electronic door locks.
At AlexWindshield, we do not treat this as a quick fix. We treat it as a restoration of your vehicle's security and aesthetic integrity. As Master Technicians, we understand the specific engineering of the Audi A4 B8 platform. From the intricate door panel clips to the specific torque required for the window frame bolts, we handle your vehicle with the care it demands. Whether you are in Vaughan, Richmond Hill, or Markham, our mobile specialists bring the repair shop to you, ensuring your Audi is sealed, secure, and road-ready.
Understanding the Audi A4 B8 (2009-2016) Rear Door Architecture
The Audi A4 B8 generation represents a significant leap in build quality and complexity compared to its predecessors. The rear door involves a sophisticated interplay of sound-dampening materials, electronic harnesses, and a rigid window frame structure. The vent glass (also known as the quarter glass) is located stationary in the rear corner of the door frame.
Replacing this glass is not merely about adhesion; it involves the mechanical disassembly of the door's internal structure. Many inexperienced technicians attempt to force the new glass in without properly loosening the divider bar (the pillar separating the main window from the vent glass). This often results in damaged weatherstripping, wind noise (whistling at high speeds), or even water leaks that can damage the Audi's sensitive floor-mounted electronics. At AlexWindshield, we follow the factory-specified procedure to ensure a fit that is indistinguishable from the original assembly.
Detailed Step-by-Step Replacement Protocol
As a Master Technician at AlexWindshield, I follow a strict, A-to-Z protocol for every Audi A4 vent glass replacement. This process ensures safety, cleanliness, and structural rigidity. Here is exactly how we handle your vehicle:
Phase 1: Site Preparation and Safety Measures
- Interior Protection: Before touching the glass, we cover the rear seats, front seats, and center console with heavy-duty protective covers. The leather and Alcantara interiors common in the 2009-2016 Audi A4 require protection from glass dust and technician traffic.
- Exterior Masking: We apply high-grade painter's tape to the exterior door paint and the B-pillar and C-pillar trim. This prevents accidental scratches during the removal of the broken glass and the manipulation of tools.
- PPE Compliance: Technicians wear cut-resistant gloves and protective eyewear, as tempered glass shards can be razor-sharp and unpredictable.
Phase 2: Door Panel Removal and Disassembly
Unlike a windshield replacement, vent glass repair requires access to the inside of the door shell. This is the most critical phase for the Audi A4 B8.
- Trim Removal: We carefully pry off the decorative trim strip (wood, aluminum, or piano black) on the door panel using non-marring plastic wedge tools to reveal the hidden mounting bolts.
- Hardware Extraction: We remove the Torx screws securing the door card to the metal door skin. Audi hides these screws well—usually under the armrest, behind the trim, and at the bottom edge of the panel.
- Panel Separation: Using a specialized fork tool, we pop the retention clips around the perimeter of the door panel. We are careful not to break the brittle plastic clips often found on older B8 models (2009-2012).
- Cable and Harness Disconnection: We disconnect the Bowden cable (for the inner door handle), the window switch connector, and the speaker wiring harness before fully removing the door card and setting it aside in a safe location.
- Vapor Barrier Management: We carefully peel back the foam vapor barrier to access the inner door cavity, ensuring the adhesive remains tacky for re-sealing later.
Phase 3: Glass Debris Removal and Vacuuming
When tempered vent glass breaks, it explodes into thousands of cubes. These cubes fall deep into the door shell, inside the window run channels, and all over the carpet.
- Interior Vacuuming: We use an industrial-grade high-suction vacuum to remove every shard of glass from the seats, floor mats, and crevices.
- Door Shell Cleaning: This is a step amateurs miss. We vacuum inside the metal door door cavity. If left behind, glass shards will rattle incessantly every time you close the door or drive over a bump. We also ensure shards are cleared from the water drain holes at the bottom of the door to prevent rust.
- Run Channel Clearing: We run a tool through the rubber window tracks to ensure no glass is stuck, which would otherwise scratch your main window when it rolls down.
Phase 4: Structural Disassembly and Old Glass Removal
To fit the new vent glass into an Audi A4 B8, the space must be widened temporarily.
- Loosening the Divider Bar: We locate the bolts securing the vertical divider bar (the metal channel separating the moving window from the vent). We loosen these bolts to allow the bar to shift slightly.
- Removing the Main Window Guide: In some B8 configurations, we may need to manipulate the main window rubber run channel to free the vent glass seating area.
- Extraction: We remove the remaining rubber encapsulation and glass fragments from the vent window frame. The surface is then scraped clean of any old adhesive or debris.
Phase 5: Primer Application and Bonding
For vent glasses that are encapsulated or require bonding (depending on the specific sub-model trim of the A4), chemical preparation is key.
- Surface Activation: We clean the metal pinch weld and the new glass perimeter with a bonding activator to remove oils and silicones.
- Primer Application: We apply a high-quality black primer to any exposed metal on the vehicle body to prevent rust and ensure urethane adhesion. This also protects the urethane from UV degradation.
- Adhesive Application: We apply a bead of high-modulus, non-conductive Sika or Dow automotive urethane. Using non-conductive adhesive is vital for Audis to prevent interference with radio antennas often integrated into rear glass systems.
Phase 6: Installation and Reassembly
- Insertion: The new vent glass is carefully angled and slid into the frame. We manipulate the loosened divider bar to sandwich the glass tightly into the weatherstripping, ensuring a flush aerodynamic fit.
- Securing Hardware: We re-torque the divider bar bolts to factory specifications. This locks the vent glass in place and ensures the main window track is perfectly straight.
- Functionality Test: Before putting the door panel back on, we reconnect the window switch and test the main drop glass. It must move up and down smoothly without binding or scraping against the divider bar.
- Final Reassembly: The vapor barrier is resealed, the door panel is clipped back on, cables are reattached, and all Torx screws are tightened. The decorative trim is snapped back into place.
Why Local Expertise Matters in the GTA
Driving in the Greater Toronto Area presents unique challenges for auto glass. The freeze-thaw cycles in Vaughan and Richmond Hill can wreak havoc on improperly installed glass. If moisture gets behind a poorly sealed vent glass, it freezes, expands, and can cause rust or push the glass out of alignment.
At AlexWindshield, we use adhesives specifically rated for Canadian climates. Our fast-cure urethane allows you to drive away safely shortly after installation, even in colder temperatures. Whether you are parked at a GO Station in Markham or your office in downtown Vaughan, our mobile units are equipped with climate-controlled storage for our adhesives, ensuring they are applied at the optimal temperature regardless of the weather outside.
The AlexWindshield Guarantee: OEM Quality and Lifetime Warranty
For a premium vehicle like the Audi A4 (B8), aftermarket glass with wavy distortions or poor dimensional accuracy is unacceptable. We prioritize the use of OEM-equivalent glass (such as Pilkington, PGW, or Saint-Gobain) that matches the tint, thickness, and curvature of your original factory glass. This ensures that the wind noise levels remain low and the aesthetic of the car is maintained.
Furthermore, we stand behind our craftsmanship. Every vent glass replacement performed by AlexWindshield comes with our Lifetime Warranty against leaks, air noise, and workmanship defects. If you hear a whistle or see a drop of water, we fix it—no questions asked.
Service Areas and Mobile Convenience
We understand that a broken window is an emergency. You cannot leave your Audi A4 open to the elements or theft. That is why we offer Same-Day Mobile Service across the GTA, with a dedicated focus on:
- Vaughan: Including Woodbridge, Kleinburg, and Maple.
- Richmond Hill: From Oak Ridges to Hwy 7.
- Markham: Including Unionville, Cornell, and Thornhill.
- Greater Toronto Area: Comprehensive coverage for all surrounding neighborhoods.
Don't let a broken vent glass compromise the security or look of your Audi. Trust the Master Technicians who understand the intricacies of German engineering.
Contact AlexWindshield today to schedule your mobile Audi A4 vent glass replacement. Drive with confidence, knowing your vehicle is secure.


