Restoring the Look: Quarter Glass Replacement for Audi A4 2009-2016 (B8)
The Audi A4 (B8 generation), produced between 2009 and 2016, represents a pinnacle of German engineering and aesthetic balance. With its signature "Tornado Line" running along the side profile and the aggressive stance of its wheel arches, the B8 is a vehicle that demands respect on the road. However, that seamless profile is instantly shattered—literally and figuratively—when the rear quarter glass is broken. Unlike a windshield chip that might go unnoticed, a smashed quarter glass is often the result of an unfortunate break-in or vandalism, leaving your luxury sedan exposed to the elements and theft. At AlexWindshield, we understand that for an Audi owner, this isn't just a repair; it is a restoration of the vehicle's integrity and security.
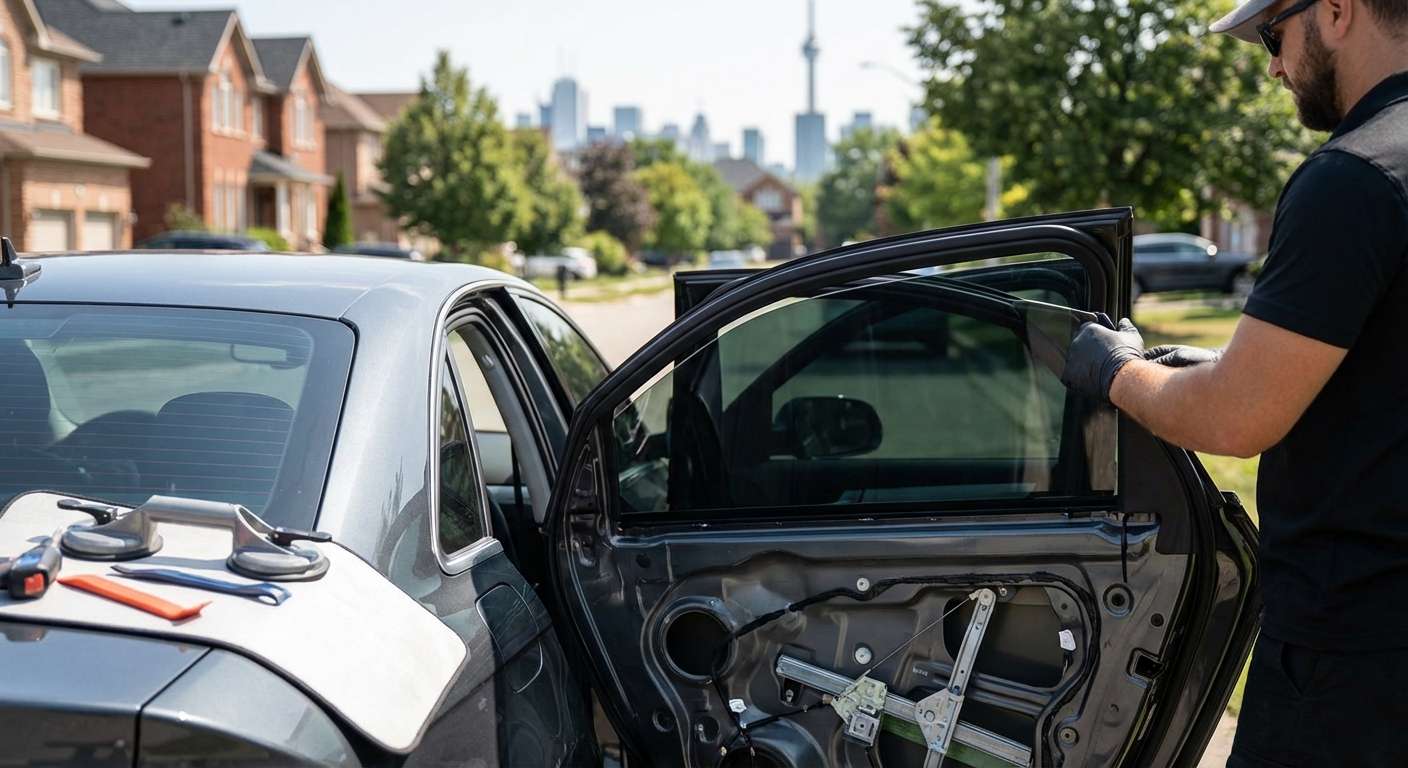
Replacing the quarter glass on an Audi A4 B8 is a deceptive task. To the untrained eye, it looks like a small, simple piece of glass. In reality, it is a complex assembly that requires precise handling of the vehicle's pinch weld, careful disassembly of the rear door components, and expert application of high-modulus adhesives. As the leading auto glass specialists in the GTA, AlexWindshield treats your Audi with the surgical precision it deserves.
Mobile Auto Glass Service Across the Greater Toronto Area
A broken window renders your vehicle insecure and unsafe to drive. You should not have to tape up your window with plastic and drive through highway traffic to get it fixed. AlexWindshield brings the repair shop to you. Our fully equipped mobile units operate throughout the Greater Toronto Area (GTA), providing same-day service to get you back on the road securely.
We have a strong local presence and dedicated routes in key municipalities, ensuring rapid response times for:
- Vaughan: From the busy streets near Vaughan Mills to the residential quiet of Kleinburg.
- Richmond Hill: Servicing all neighborhoods along Yonge Street and beyond.
- Markham: Covering the tech hub and historic Unionville with expert glass technicians.
- Toronto & The GTA: Our network extends across the entire metro area.
The Technical Complexity of the Audi A4 (B8) Quarter Glass
On the 2009-2016 Audi A4 Sedan, the rear quarter glass is the small, triangular window located in the rear door frame, separated from the main roll-down window by a vertical division bar (often called a guide rail). This glass is encapsulated and bonded directly to the door frame using automotive-grade urethane. It is not held in by a rubber gasket like older vehicles.
Because this glass is tempered, it is designed to shatter into thousands of small, cube-like pebbles upon impact to prevent severe lacerations. While safe for passengers, this feature creates a massive cleanup challenge. The shards inevitably fall inside the door shell, which can jam the window regulator, scratch the main door glass, or cause incessant rattling if not removed properly. Our process at AlexWindshield is designed to address every single one of these issues.
Step-by-Step Replacement: The AlexWindshield Protocol
As a Master Technician, I follow a rigorous, manufacturer-specified protocol for every Audi we service. Below is the detailed, A-to-Z process we utilize for replacing the quarter glass on your Audi A4 B8.
Step 1: Site Preparation and Vehicle Protection
Before we touch the glass, we protect the car. We apply protective tape around the exterior window frame to prevent any accidental scratches to the paint or the black cosmetic trim (B-pillar and C-pillar trims) during the removal process. Inside the vehicle, we place heavy-duty covers over the rear seats and leather upholstery. The Audi A4 interior uses high-quality materials that can be easily damaged by glass shards or urethane drips, so we mask off the door panel area thoroughly.
Step 2: Interior Disassembly and Door Panel Removal
This is a critical step that budget auto glass shops often skip. To properly replace the quarter glass and clean the debris, the door panel (door card) must be removed.
- We carefully pop the decorative trim strips to access the hidden Torx screws securing the panel.
- Using non-marring pry tools, we release the perimeter clips holding the door card to the metal door frame.
- We disconnect the Bowden cable (door latch release) and the electrical harnesses for the window switch and speakers.
- The door panel is stored safely on a padded stand to prevent scuffs.
Removing the panel is mandatory because it exposes the access holes to the bottom of the door shell where broken glass accumulates.
Step 3: Comprehensive Debris Removal and Vacuuming
Once the door interior is exposed, we perform a deep clean. Tempered glass shards find their way everywhere.
- We use an industrial-grade vacuum with a flexible crevice tool to reach deep into the bottom of the door shell.
- We meticulously clean the window regulator tracks and the motor assembly. If glass is left here, it will eventually grind against your main window or burn out the window motor.
- We vacuum the vehicle's interior carpets, rear seats, and even the air vents if glass has flown forward.
At AlexWindshield, we believe the job isn't done until there is zero evidence that the glass was ever broken.
Step 4: Removing the Division Bar and Old Glass
To fit the new quarter glass, we often need to loosen or manipulate the vertical division bar that separates the quarter glass from the roll-down window. We remove the upper screws securing the bar to the door frame. Next, we address the broken glass adhesive:
Using the "Full Cut" method, we trim the existing urethane bead down to approximately 1-2mm on the pinch weld. This requires a razor-sharp cold knife or a specialized reciprocating removal tool. We must ensure the metal surface of the door frame is not scratched. If the paint is scratched, it leads to rust, which eventually causes leaks and structural failure.
Step 5: Pinch Weld Preparation and Priming
The surface where the glass bonds (the pinch weld) must be chemically pure. We scrub the area with a specialized contaminant remover to eliminate road grease, dirt, and old silicone. If there are any minor nicks to the paint from the removal process, we apply a high-quality anti-corrosion primer. This black primer serves two purposes: it prevents rust and acts as a bonding agent between the metal body and the new urethane adhesive.
Step 6: Preparing the New Quarter Glass
We inspect the replacement glass for optical clarity and flaws. The new glass for an Audi A4 typically comes with an encapsulation (molding). We clean the bonding surface of the new glass with an activator to open up the pores of the frit band (the black ceramic band around the edge), ensuring the glue bites into the glass effectively.
Step 7: Applying High-Modulus Urethane
This is where chemistry meets mechanics. We utilize Sika or Dow Automotive Systems urethane adhesive. This is not simple glue; it is a structural component of your vehicle. Using a high-ratio battery-powered caulking gun, we lay a consistent, triangular bead of urethane directly onto the glass or the vehicle body (depending on the specific encapsulation style of the aftermarket or OEM part). The triangular shape is crucial as it prevents air pockets and ensures a uniform seal when compressed.
Step 8: Precision Installation
With the adhesive applied, the new quarter glass is carefully maneuvered into the door frame. This requires steady hands to avoid smearing the black urethane on the beige or grey headliner of your Audi. We press the glass firmly into place, ensuring it sits flush with the exterior body panels to match the aerodynamic "Tornado Line" of the B8. We tighten the division bar screws to lock the assembly in position.
Step 9: Reassembly and Function Test
Before putting the door panel back on, we test the main roll-down window. We ensure it moves up and down smoothly without grinding noises (which would indicate leftover glass shards). Once confirmed, we:
- Reconnect all electrical harnesses (speakers, locks, lights).
- Reattach the Bowden cable for the door handle.
- Snap the door panel back onto the clips and secure all Torx screws.
- Replace decorative trim pieces.
We finish by cleaning the new glass inside and out with ammonia-free cleaner to leave it sparkling.
Safety and Drive-Away Time
Because the quarter glass is a bonded part, the adhesive requires time to cure (harden) to achieve full strength. At AlexWindshield, we use fast-curing urethanes that typically allow for a safe drive-away time (SDAT) of just 60 minutes after installation. We will advise you specifically based on the humidity and temperature in Vaughan, Markham, or Richmond Hill on the day of service. We also advise keeping a window slightly cracked for 24 hours to prevent air pressure from pushing the new glass out when you close the doors.
Why Choose AlexWindshield for Your Audi?
Your Audi A4 B8 is a luxury vehicle that requires specialized care. Generic auto glass shops often focus on speed over quality, skipping the vacuuming stage or using inferior primers that lead to rust years down the line. As the Master Technician at AlexWindshield, I guarantee:
- Expert Craftsmanship: We know the intricacies of German vehicles, from removing door cards without breaking clips to calibrating sensors.
- OEM Quality Glass: We use glass that meets or exceeds Original Equipment Manufacturer standards for fit, tint, and clarity.
- Lifetime Warranty: We stand behind our work. Our installation comes with a lifetime warranty against air leaks and water leaks for as long as you own the vehicle.
- Local Convenience: We are your neighbors in the GTA, serving Vaughan, Richmond Hill, and Markham with pride.
Don't let a broken quarter glass compromise the safety or the sleek aesthetics of your Audi A4. Trust the experts who treat your car like their own.
Contact AlexWindshield today to schedule your mobile quarter glass replacement. Drive with clarity, drive with confidence.


