B0111 Rain Sensor Signal Too Low: What It Actually Means
If you drive a modern car in Canada, you expect your automatic wipers to kick in when the weather turns nasty. When they stop working and your scanner pulls a B0111 code, you have a straightforward electrical or optical issue on your hands. I deal with this specific code—which stands for "Rain Sensor Signal Too Low"—on a weekly basis. It simply means your car's Body Control Module (BCM) isn't getting a strong enough voltage signal from the rain sensor mounted behind your rearview mirror.
Symptoms You'll Notice Behind the Wheel
When the BCM loses that signal, your wiper system gets confused. Here is what usually happens when you pull out of the driveway:
- Dead Auto Mode: Your wipers completely refuse to turn on during a downpour when set to the automatic position.
- Phantom Wiping: The wipers swipe randomly on a perfectly dry day, dragging dirt across the glass.
- Default Operation: The system ignores the sensor entirely and defaults to a standard, timed intermittent wipe.
Why Is Your Rain Sensor Failing?
In my experience, these sensors rarely just burn out on their own. There is almost always a physical reason the signal drops below the required threshold.
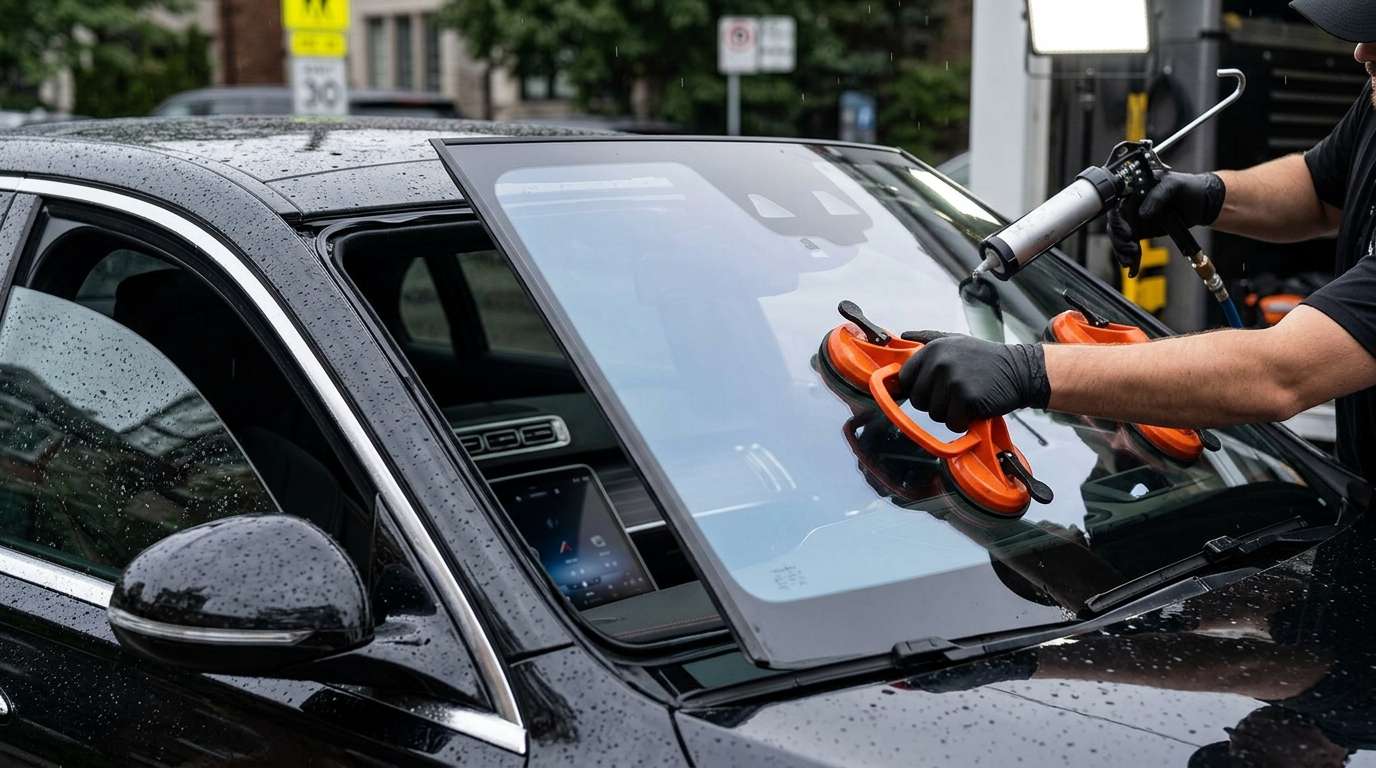
Bad Windshield Replacements
This is the number one cause I see in the shop. If a technician slaps a new windshield in but reuses the old sensor gel pad—or worse, leaves it out entirely—the optical lens cannot read the moisture on the glass. The sensor needs a perfect, bubble-free bond to work.
Sensor Gel Pad Degradation
Even on a factory windshield, the clear silicone pad between the glass and the sensor can dry out, shrink, or develop air bubbles over the years. Once air gets between the glass and the lens, the optical signal drops immediately, triggering the B0111 code.
Wiring and Connector Faults
A loose connector at the sensor, corrosion from interior condensation, or a pinched wire up in the headliner will easily cause a low voltage reading at the BCM.
Step-by-Step Repair Solutions
Don't just throw a new sensor at the car. Follow this process to track down the actual fault and fix it right the first time.
Step 1: Inspect and Clean the Glass
Start with the absolute basics. Clean the outside of the windshield thoroughly right over the sensor eye. Heavy road grime, tree sap, or a deep rock chip directly over the lens will block the optics and throw a low signal code.
Step 2: Check the Gel Pad Bond
Look at the sensor from the outside of the vehicle. You should see a solid, dark, uniform circle or square. If you spot milky spots or air bubbles, you need to fix the bond. Remove the sensor from the inside, scrape off the old silicone, clean the glass with alcohol, and install a brand-new sensor gel pad.
Step 3: Test the Wiring Harness
Pop the plastic cover off the rearview mirror and unplug the sensor. Check the metal pins for green corrosion. Grab your multimeter and verify you have good power and ground at the connector with the ignition on. If the wiring is damaged, repair the harness.
Step 4: Replace and Calibrate the Sensor
If the wiring tests good and the gel pad bond is flawless, the sensor unit itself has likely failed internally. Swap in a new rain sensor, plug in your scan tool, clear the B0111 code, and run the manufacturer's recalibration procedure.
Don't Let a Bad Install Ruin Your Tech
A massive chunk of these sensor errors comes from sloppy glass work. If you need a windshield replacement in the GTA, trust the experts at AlexWindshield. We handle mobile auto glass services the right way, ensuring your rain sensors and ADAS cameras are perfectly bonded, plugged in, and calibrated before we hand back the keys. Plus, we back our work with a Lifetime Warranty so you never have to worry about phantom wipers or annoying error codes again.


