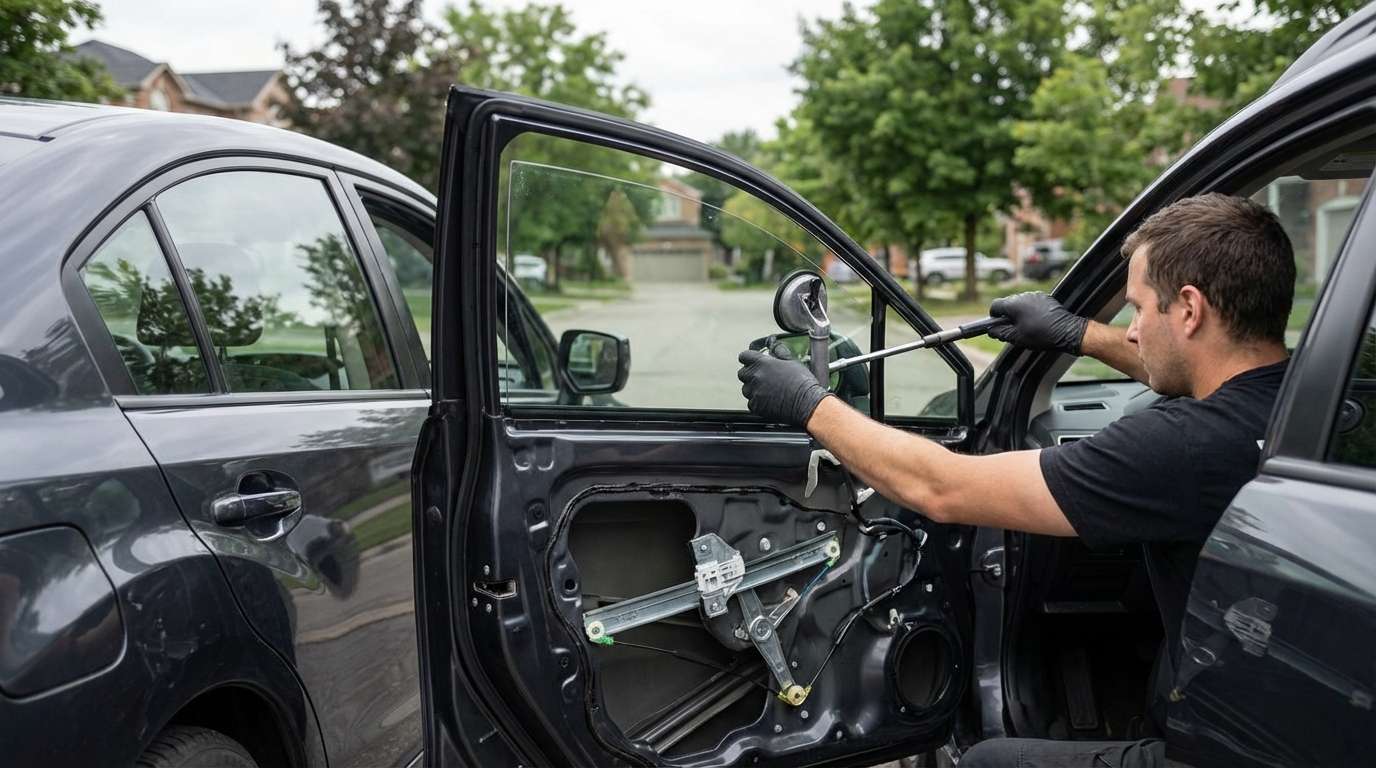
Unleashing Uncompromised Safety: Expert Door Glass Replacement for the 2012-2016 Subaru Impreza
The 2012-2016 Subaru Impreza marks a pivotal era in the evolution of this legendary compact car. As the formidable fourth generation, it introduced improved fuel efficiency, an enhanced continuously variable transmission (CVT), and the brand's renowned Symmetrical All-Wheel Drive system, making it a rugged companion for daily commutes and weekend adventures alike. Notably, this generation fully adopted framed door glass—a deliberate engineering choice to significantly reduce cabin noise, vibration, and harshness (NVH) compared to the frameless windows of older models. However, when an unexpected collision, a break-in, or flying road debris shatters your side window, your Impreza's meticulously engineered cabin seal is instantly destroyed. You are left exposed to the elements, your vehicle's security is compromised, and the driving experience is ruined by deafening wind noise.
When you require a Door Glass Replacement for Subaru Impreza 2012-2016 by Alexwindshield, you are not just getting a piece of glass swapped out; you are investing in a meticulous, factory-standard restoration. As a Master Technician at AlexWindshield, I have spent years mastering the intricate internal anatomy of the fourth-generation Impreza's doors. Unlike a simple cosmetic fix, restoring the side window demands surgical precision to ensure the new glass integrates flawlessly with the vehicle's electrical window regulators, weather stripping, and impact sensors.
Extensive Mobile Auto Glass Coverage Across the Greater Toronto Area (GTA)
Driving with a shattered side window is not only uncomfortable but also incredibly dangerous and often illegal. The blinding glare of the sun, the intrusion of rain or snow, and the absolute lack of theft deterrence mean your vehicle should ideally remain stationary until repaired. Recognizing this critical need, AlexWindshield brings the repair shop directly to your driveway, office parking lot, or garage.
Our premier mobile auto glass services span the entirety of the Greater Toronto Area (GTA). We specifically deploy our fully equipped, climate-controlled mobile technician vans to major suburban hubs to ensure rapid response times. Our primary service corridors include:
- Vaughan: Whether you are near Vaughan Mills, navigating the busy streets of Woodbridge, or parked at a commercial complex in Concord, our mobile technicians arrive promptly with the exact OEM-equivalent glass required for your 2012-2016 Impreza.
- Richmond Hill: For residents and professionals along the Yonge Street corridor or tucked into the quiet neighborhoods of Oak Ridges, we provide seamless on-site replacements that do not disrupt your busy schedule.
- Markham: From the bustling tech hubs to the heritage district of Main Street Unionville, our experts deliver precision installations right at your location, ensuring your Subaru is secured and road-ready in record time.
The Master Technician's Blueprint: A to Z Step-by-Step Door Glass Replacement Process
Replacing the door glass on a 2012-2016 Subaru Impreza requires far more than just bolting a new pane into place. Because automotive door glass is tempered, it is designed to shatter into thousands of tiny, blunt fragments upon impact. These fragments infiltrate every conceivable crevice of your car's interior and the hollow cavity of the car door. Below is the exhaustive, step-by-step methodology we employ at AlexWindshield to guarantee a flawless restoration.
Step 1: Vehicle Preparation and Interior Protection
Before any tools are lifted, we secure the operational environment. We start by laying down heavy-duty protective drop cloths over your Impreza's seats, center console, and floor mats. We also apply automotive-grade masking tape around the exterior door frame to prevent our tools or the sharp edges of broken glass from scratching your Subaru's clear-coat finish. Protecting your vehicle's pristine condition is our foundational priority.
Step 2: Removal of Door Panels and Interior Hardware
To access the window regulator mechanism, the interior door panel must be carefully dismantled. Using specialized, non-marring nylon trim removal tools, we pry away the cosmetic covers hiding the retaining screws—typically located behind the interior door handle and inside the armrest pull cup. Once the screws are extracted, we systematically unclip the perimeter of the door card, taking extreme care not to snap the delicate plastic retention clips. We then disconnect the electrical harnesses for the power window switches, door locks, and side mirrors, carefully setting the door panel aside in a safe location.
Step 3: Crucial Vapor Barrier Peeling and Thorough Vacuuming
Behind the door panel lies the moisture vapor barrier, secured by a highly adhesive butyl rubber sealant. We meticulously slice and peel back this barrier so it can be perfectly resealed later. This exposes the inner cavity of the door shell. This step is critical: we utilize high-powered, industrial HEPA vacuums to extract all broken glass shards from the vehicle's interior. We vacuum the seats, the carpets, inside the seat tracks, and—most importantly—deep inside the hollow metal door cavity. Leaving even a few fragments behind will result in maddening rattles when you drive and can severely damage the delicate gears of your window regulator.
Step 4: Removal of the Old Glass and Hardware
With the cavity clean, we manipulate the power window regulator to align the glass mounting brackets with the access holes in the door frame. We unbolt the shattered remnants of the original window. Often, the bottom edge of the old glass is still clamped into the regulator tracks. We painstakingly remove these remnants, clear out the rubber window run channels (weatherstripping), and ensure the entire mechanical path is free of microscopic glass dust and debris.
Step 5: Surface Cleaning and Primer Application
To guarantee the longevity and stability of the new installation, preparation of the bonding and mounting surfaces is paramount. We thoroughly clean the new piece of tempered door glass with an industrial, streak-free solvent, paying special attention to the bottom edge where it will mate with the regulator brackets. Although door glass is primarily held by mechanical clips, modern auto glass repair protocols for specific brackets require chemical bonding to prevent the glass from shifting or separating from the track during extreme weather. We apply a specialized, fast-acting primer application to these mounting points. This primer etches into the surface, creating an optimal bonding environment and preventing future corrosion on any exposed metal components.
Step 6: Precision Installation Using High-Quality Adhesive
Once the primer has flashed (dried), we carefully maneuver the new OEM-quality door glass through the top window slit, angling it perfectly to slide into the front and rear rubber run channels. We lower the glass into the regulator mounting brackets. To ensure an immovable, rattle-free fit, we dispense a precise bead of high-quality adhesive into the mounting saddles before tightening the retention bolts. This high-grade polyurethane adhesive cures rapidly, creating a permanent, vibration-absorbent bond between the glass and the window lifting mechanism. This ensures that no matter how hard the door is slammed, the glass remains perfectly seated.
Step 7: Regulator Testing and Hardware Reassembly
Before sealing the door, we reconnect the power window switch and conduct rigorous testing. We cycle the window up and down multiple times to ensure smooth, unimpeded operation. We check for binding, strain on the motor, and perfect alignment with the upper weather seals. Once satisfied with the mechanical function, we carefully reseal the vapor barrier using fresh butyl tape if necessary, ensuring no rainwater can leak into the cabin. Finally, we remount the interior door panel, secure all hidden screws, and snap the cosmetic trim pieces flawlessly back into place.
Step 8: Final Cleaning and Quality Inspection
The final step is an exhaustive quality check. We clean both the interior and exterior of the newly installed door glass using specialized foaming glass cleaner and lint-free microfiber towels, ensuring crystal-clear visibility. We perform one last pass with the vacuum across your interior to guarantee your vehicle is returned to you cleaner than when we arrived.
Trust AlexWindshield for Your Subaru Impreza Auto Glass Needs
Your 2012-2016 Subaru Impreza was engineered to provide unparalleled safety and reliability on the unpredictable roads of the GTA. Do not compromise that engineering with substandard glass repairs. AlexWindshield stands as the undisputed, trusted expert for mobile auto glass services throughout the region. Our Master Technicians bring decades of combined experience, an uncompromising dedication to technical precision, and a deep respect for your vehicle.
We source only the highest-rated auto glass materials, utilizing industry-leading primers and adhesives to ensure your repair withstands the harshest Canadian winters and the hottest summer days. Because we stand firmly behind the quality of our craftsmanship and materials, every single door glass replacement we perform is backed by our comprehensive Lifetime Warranty against leaks, wind noise, and workmanship defects.
Whether you are stranded in your driveway in Vaughan, working late in Markham, or running errands in Richmond Hill, let the professionals at AlexWindshield restore your vehicle's integrity. Contact us today to experience the ultimate in convenience, safety, and automotive excellence.


