Premium Windshield Replacement for the 2007-2017 Lincoln Navigator: Uncompromising Luxury Meets Technical Precision
The 2007-2017 Lincoln Navigator represents a pivotal era in American full-size luxury SUVs, transitioning from traditional V8 brawn to the sophisticated, twin-turbocharged EcoBoost era in its later years. Designed to offer a whisper-quiet, sanctuary-like cabin, this generation of the Navigator relies heavily on its massive, acoustically engineered windshield to deflect wind noise and absorb road vibrations. When a rogue rock on the highway shatters your line of sight, you are not just losing a piece of glass; you are compromising the vehicle's structural integrity, its advanced climate control sensors, and its intricate driver assistance network. As a Master Technician at AlexWindshield, I can assure you that replacing the windshield on a luxury behemoth like the Navigator requires far more than a standard drop-in fix—it demands rigorous, manufacturer-approved precision.
Dedicated Mobile Auto Glass Service Across the Greater Toronto Area (GTA)
Driving a flagship luxury SUV with a cracked windshield is not only a safety hazard but an unnecessary stress. At AlexWindshield, we eliminate the inconvenience by bringing our state-of-the-art auto glass shop directly to your location. We proudly serve the entire Greater Toronto Area (GTA), with specialized, rapid-response mobile fleets operating extensively throughout Vaughan, Richmond Hill, and Markham. Whether your Navigator is parked at a corporate office in Markham, a driveway in Vaughan, or a shopping center in Richmond Hill, our master technicians arrive fully equipped to execute a flawless, factory-grade windshield replacement on site.
The Master Technician's Blueprint: A to Z Windshield Replacement Process
Replacing the windshield on a 2007-2017 Lincoln Navigator involves navigating heavy, expansive glass, intricate wiper cowl assemblies, and sensitive electronics. We follow a strict, uncompromising protocol to ensure your vehicle is restored to its pristine factory condition.
Step 1: Comprehensive Pre-Installation Inspection and Interior Protection
Before any tools are drawn, we conduct a thorough pre-inspection of your Lincoln Navigator. We test the functionality of your wipers, the automatic rain-sensing system, and the auto-dimming rearview mirror to establish a baseline of operation. Because luxury preservation is our priority, we meticulously protect your vehicle. Heavy-duty fender covers are placed over the exterior paint, while specialized protective blankets are draped over the Navigator's premium leather dashboard, steering wheel, and front seats. We ensure that not a single drop of debris or chemical touches your luxury interior.
Step 2: Careful Removal of Exterior Cowling and Interior Electronics
The next step requires surgical precision to strip away the components surrounding the damaged glass. We carefully detach the heavy-duty windshield wiper arms and remove the protective plastic cowl cover at the base of the windshield. Inside the cabin, we expertly unclip the rearview mirror assembly and carefully disconnect the wiring harnesses for the Rain Light Sensor (RLS), the condensation sensor, and, most importantly, the Advanced Driver Assistance Systems (ADAS) camera module mounted against the glass.
Step 3: Precision Cut-Out of the Damaged Windshield
Removing the massive windshield of a Lincoln Navigator without damaging the vehicle's aluminum and steel frame requires advanced extraction tools. Instead of using aggressive, outdated cold knives that can easily scratch the vehicle's paint and lead to future rust, we utilize an advanced fiber-line or high-tensile wire cutting system. We thread this line through the old polyurethane adhesive layer from the inside out, smoothly slicing through the bond around the entire perimeter of the glass. Using specialized heavy-duty suction cups, two master technicians safely lift the heavy, compromised glass away from the vehicle.
Step 4: Pinchweld Preparation and Surface Cleaning
The foundation of a safe windshield installation lies in the preparation of the vehicle's frame, known as the pinchweld. We carefully trim down the old, remaining polyurethane adhesive to a perfectly uniform base layer of about 1 to 2 millimeters. This "close-cut" method ensures that the new adhesive will bond chemically with the original factory urethane. Once trimmed, we use an industrial-grade vacuum to remove any micro-debris, dust, and dirt from the pinchweld and surrounding cowl area. The channel is then thoroughly scrubbed with specialized lint-free wipes and an alcohol-based, residue-free auto glass cleaner.
Step 5: Advanced Primer Application
To guarantee a watertight seal and prevent future corrosion, priming is a non-negotiable step. If there are any micro-scratches on the pinchweld exposing bare metal—a common occurrence in older models like the 2007-2010 Navigators—we apply an anti-rust, high-performance metal primer. We also meticulously apply a glass prep primer to the black ceramic frit band on the edge of the new, premium acoustic windshield. This chemical activator is essential; it opens the pores of the glass's ceramic band, creating a molecular locking mechanism when it meets the adhesive.
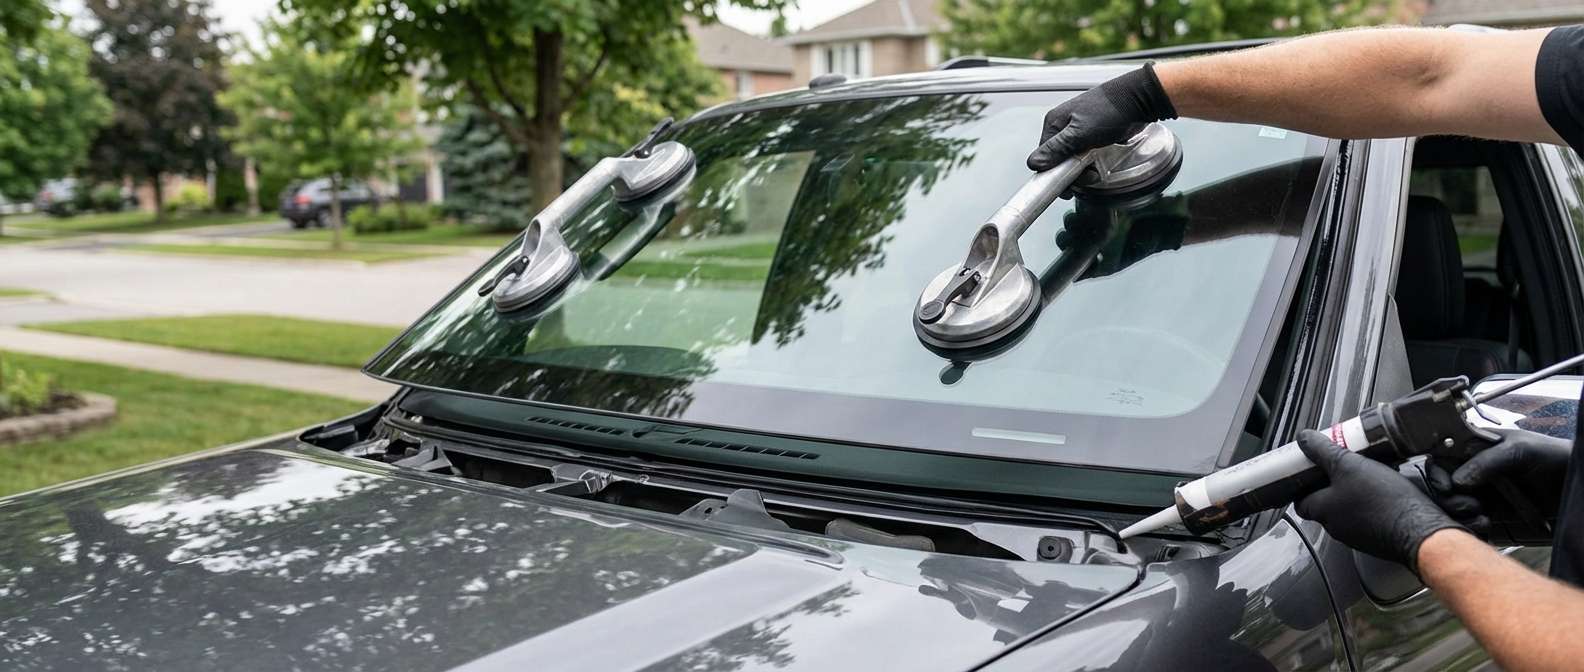
Step 6: Extruding the Premium Urethane Adhesive
For a heavy-duty luxury SUV that boasts immense towing power and frame torque, standard adhesives simply will not suffice. We exclusively use premium, fast-curing, OEM-grade polyurethane adhesive. Using an electric caulking gun, we extrude a perfectly uniform V-bead of urethane directly onto the prepared pinchweld. The V-shape is critical in auto glass engineering; as the new windshield is pressed into place, the peak of the "V" collapses smoothly, eliminating any trapped air pockets and creating an impenetrable, uniform seal against water and wind noise.
Step 7: Precision Installation of the New Glass and Reassembly
With the urethane applied, time is of the essence. Using specialized glass-setting vacuum cups, our technicians carefully align the new windshield with the Lincoln Navigator's roofline and A-pillars. We gently set the glass onto the wet adhesive, applying precise, even pressure to ensure proper depth and a flush fit with the vehicle's body lines. Once the glass is locked into position, we reverse the disassembly process: snapping the interior ADAS camera and rain sensors back into their brackets, re-hanging the rearview mirror, replacing the exterior cowling, and re-torquing the wiper arms to factory specifications.
The Mandatory ADAS Camera Calibration Process
The 2007-2017 generation of the Lincoln Navigator, particularly the facelifts from 2015 onwards, introduced highly sophisticated safety technologies. The forward-facing camera mounted on the windshield is the absolute nerve center for your vehicle's Advanced Driver Assistance Systems (ADAS). This camera governs critical safety features such as Lane Departure Warning, Lane Keeping Assist, and Forward Collision Warning.
When a windshield is replaced, the camera is physically disconnected and moved. Even a microscopic deviation of a single millimeter or a fraction of a degree in the camera's new mounting angle can result in the system miscalculating distances by several feet at highway speeds. This can cause your Navigator to aggressively auto-brake for non-existent threats or fail to warn you when drifting out of your lane.
At AlexWindshield, we do not just replace the glass and leave you to figure out the electronics. ADAS Camera Calibration is a mandatory part of our windshield replacement process. Following the physical installation, we utilize cutting-edge, computer-diagnostic calibration equipment. Depending on your specific Navigator's sub-model and year, we perform either a dynamic calibration (requiring a strictly controlled test drive to allow the camera to self-align with road markers) or a static calibration (using precisely measured laser targets set up in front of the vehicle). We ensure the onboard computer validates the new camera angles, restoring your Lincoln's safety systems to absolute factory perfection.
Post-Installation Care Guidelines for Your Lincoln Navigator
To ensure the longevity and safety of your newly installed windshield, we provide strict post-installation guidelines:
- Observe the Safe Drive-Away Time (SDAT): We use rapid-cure urethane, meaning your vehicle will meet federal crash safety standards in as little as 30 to 60 minutes. However, we will advise you of the exact minute your Navigator is safe to drive.
- Leave the Windows Cracked: Keep a window slightly open for the first 24 hours. Closing vehicle doors creates a sudden spike in cabin air pressure, which can push against the newly installed windshield and compromise the curing seal.
- Retain the Retention Tape: If we apply specialized retention tape to the top edge of the windshield, leave it in place for at least 24 hours to hold the glass perfectly aligned while the urethane fully cross-links.
- Avoid High-Pressure Car Washes: Do not take your Lincoln Navigator through a commercial, high-pressure auto wash for at least 48 hours to ensure the chemical seal is entirely weatherproofed.
Why Choose AlexWindshield for Your Auto Glass Needs?
Your Lincoln Navigator is an investment in unparalleled comfort, safety, and luxury. Do not compromise its structural integrity with cut-rate glass services. AlexWindshield is widely recognized as the premier, trusted expert for mobile auto glass services across the GTA, including Vaughan, Richmond Hill, and Markham.
We pride ourselves on technical mastery, exclusively utilizing OEM-equivalent acoustic glass and premium adhesives that meet or exceed federal motor vehicle safety standards. Furthermore, we stand behind our craftsmanship with an ironclad Lifetime Warranty covering air leaks, water leaks, and manufacturer defects for as long as you own your Lincoln Navigator. Experience the ultimate in convenience, precision, and safety. Trust AlexWindshield to restore your view and protect your journey.


