Shattered Elegance: Restoring the Grandeur of Your 2007-2015 Jaguar XK and XKR
The 2007-2015 Jaguar XK and its supercharged sibling, the XKR, represent a pinnacle of modern British automotive design. Penned by legendary designer Ian Callum, the X150 generation features sweeping lines, an aggressive stance, and an aerodynamic profile that demands attention. The rear back glass of the coupe is not merely a transparent panel; it is an expansive, heavily contoured structural component that completes the vehicle's teardrop silhouette while housing critical defroster and antenna technologies. When this beautifully sculpted piece of glass shatters, it feels like a severe blow to the elegance and security of your grand tourer. Because rear glass is traditionally made of tempered safety glass, an impact doesn't just cause a crack—it causes a catastrophic web of thousands of razor-sharp shards that flood your luxurious leather interior and cargo area.
At AlexWindshield, we understand the panic and frustration that accompanies a shattered back window on a high-end luxury vehicle. You cannot trust a generic, rush-job glass replacement on a machine of this caliber. You need a Master Technician who understands the tight tolerances, intricate electronic connections, and sensitive interior trims of a Jaguar. We provide specialized, precision-driven Jaguar XK back glass replacement tailored specifically for the 2007-2015 models.
Premier Mobile Auto Glass Replacement Across the Greater Toronto Area (GTA)
Driving a Jaguar with a shattered rear window is not only uncomfortable but highly dangerous and often illegal due to obstructed visibility and the risk of flying debris. To ensure your ultimate safety and convenience, AlexWindshield operates a state-of-the-art mobile auto glass replacement fleet. We bring our master-level expertise directly to your driveway, workplace, or climate-controlled garage.
Our premium mobile service spans the entirety of the Greater Toronto Area (GTA). Whether you need an emergency dispatch to your home in Vaughan, an on-site installation at your corporate office in Markham, or a meticulous replacement at your estate in Richmond Hill, our technicians arrive fully equipped. We carry the specialized tools, premium urethanes, and OEM-equivalent or genuine dealer glass required to restore your Jaguar XK or XKR to its factory pristine condition without you ever having to call a tow truck.
The Master Technician's A-Z Jaguar XK / XKR Back Glass Replacement Process
Replacing the sweeping rear glass on a 2007-2015 Jaguar XK Coupe requires far more than just laying down adhesive and dropping in a new pane. It is a highly technical, multi-stage procedure that demands absolute precision, chemical expertise, and an obsessive attention to detail. Below is our comprehensive, step-by-step master methodology:
Step 1: Thorough Vehicle Inspection and Interior Protection
Before any tools are lifted, our Master Technician conducts a comprehensive walk-around of your Jaguar. We inspect the paintwork around the rear hatch and roofline to ensure no secondary damage occurred during the glass breakage. Next, we prioritize the protection of your luxury interior. Heavy-duty protective drop cloths and specialized interior covers are draped over the premium leather seats, the center console, and the rear cargo area. We also apply automotive-grade protective tape to the exterior painted surfaces surrounding the rear hatch pinch weld to prevent any accidental scratches during the extraction process.
Step 2: Meticulous Glass Shard Eradication and Panel Removal
Unlike a windshield, which is laminated and stays together when broken, the back glass of your Jaguar XK is tempered. Upon impact, it detonates into countless tiny, granular cubes.
- Trim Disassembly: Because shards inevitably fall into the inner workings of the rear hatch, we carefully remove the interior tailgate trim panels, parcel shelf, and rear pillar covers. We use specialized non-marring trim removal tools to ensure the delicate clips and Jaguar interior fabrics are perfectly preserved.
- Deep Vacuuming: We deploy heavy-duty, high-suction industrial vacuums equipped with micro-crevice tools to extract every single glass shard from the cargo area, the rear seat folds, and deep within the cavity of the rear hatch doors. Leaving even one piece of glass behind can cause maddening rattles and potential safety hazards later on.
Step 3: Disconnecting Electronic Components
The 2007-2015 Jaguar XK back glass houses highly complex, integrated electronics. Our technician carefully unclips the wiring harnesses for the rear window defroster grid. On many X150 models, the radio and key fob antenna lines are also embedded within the glass matrix. We safely isolate these connectors, ensuring the delicate pins and wiring looms are protected from dust and adhesive during the replacement process.
Step 4: Precision Extraction of the Damaged Glass and Old Urethane
With the interior safe and the electronics disconnected, we begin the removal of the remaining glass perimeter and the factory adhesive.
- Cutting the Seal: We utilize advanced wire-cutting systems and precision cold knives to slice through the dense factory polyurethane bonding the glass to the vehicle's frame. This specialized wire system pulls smoothly through the adhesive without ever making contact with the Jaguar's aluminum bodywork.
- Trimming the Pinch Weld: Once the shattered perimeter is lifted away, we are left with a thick ridge of old urethane. Using exceptionally sharp paring tools, we trim this old adhesive down to a thin, even layer of 1 to 2 millimeters. This remaining base serves as the optimal bonding foundation for the new adhesive.
Step 5: Surface Decontamination and Chemical Priming
The structural integrity of your new back glass relies entirely on the chemical bond between the frame, the primer, and the urethane.
- Cleaning: The entire pinch weld is scrubbed with a specialized, alcohol-based glass and surface cleaner to remove dust, natural oils, and microscopic glass dust.
- Rust and Scratch Treatment: If any bare metal was exposed (either from previous poor installations or factory defects), we treat it immediately.
- Pinch Weld Primer: We apply a high-tech, rapid-curing black primer to any exposed metal and the trimmed urethane track. This primer acts as a chemical bridge, preventing rust formation and ensuring the new urethane achieves a molecular-level bond with the vehicle's frame.
Step 6: Preparing the Premium Replacement Glass
We source only the highest quality, OEM-equivalent or exact dealer-specification back glass for the Jaguar XK/XKR. The new glass is placed onto a padded windshield stand. We meticulously clean the interior bonding surface of the new glass, applying a specialized glass-prep solvent. Following this, a specialized glass primer is applied to the black ceramic frit (the black band around the edge of the glass). We also thoroughly test the new defroster grid and antenna connections with a multimeter to ensure perfect factory functionality before installation.
Step 7: Applying Advanced High-Modulus Urethane
For a high-performance vehicle capable of speeds well over 150 mph, standard adhesives are unacceptable. We extrude a thick, perfectly uniform triangular bead of premium, high-modulus, non-conductive urethane directly onto the pinch weld. This advanced adhesive is specifically designed to handle the extreme torsional rigidity and chassis flex of the Jaguar XKR, while drying incredibly fast to meet strict federal safety standards.
Step 8: The Precision Installation (The "Set")
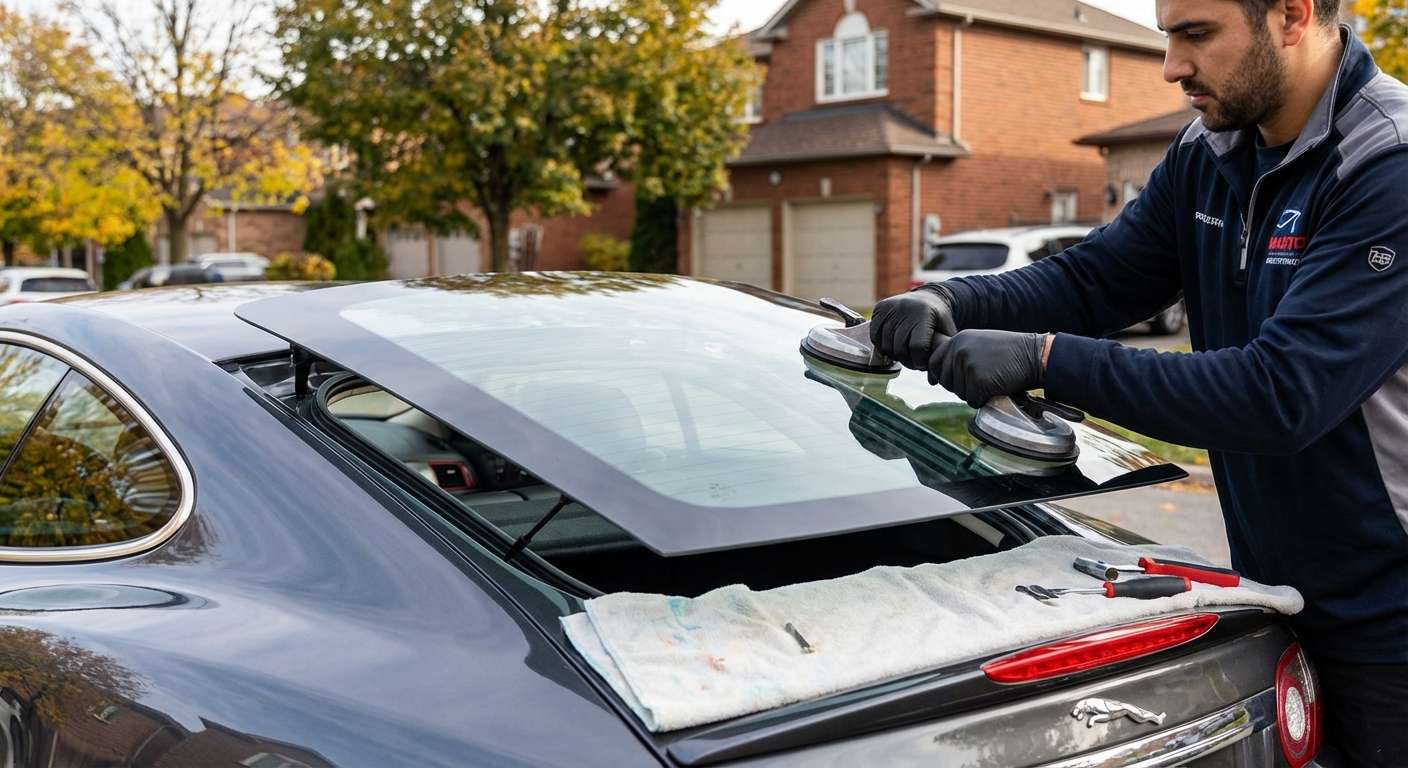
Using heavy-duty suction cup lifters, our master technicians carefully hoist the expansive new rear glass. With absolute precision, the glass is aligned perfectly with the Jaguar's roofline and rear quarter panels. It is gently lowered into the fresh urethane bed. We apply light, even pressure to ensure a complete, watertight seal around the entire perimeter, double-checking the gaps and flushness to guarantee it matches the original factory aerodynamics and aesthetics.
Step 9: Electronic Reconnection and Interior Reassembly
Before the urethane fully cures, we reconnect the defroster terminals and antenna wiring harnesses, ensuring a snug and secure fit. We then carefully re-install all interior hatch panels, pillar trims, and the cargo cover. A final, meticulous vacuuming of the entire interior is performed to ensure your Jaguar is returned to you in a pristine, showroom-level state of cleanliness.
Step 10: Post-Installation Cleanup and Safe Drive-Away Time
The final step involves cleaning the new glass inside and out with streak-free, ammonia-free automotive glass cleaner. We then brief the customer on the Safe Drive-Away Time (SDAT). Thanks to the advanced, fast-curing urethanes we use at AlexWindshield, your Jaguar will typically be safe to drive within 60 to 90 minutes after the glass is set, ensuring your downtime is kept to an absolute minimum.
Why Choose AlexWindshield for Your Jaguar Auto Glass Needs?
Your Jaguar XK or XKR is an investment in luxury and high performance. Trusting its structural integrity to a discount glass shop can result in devastating wind noise, chronic water leaks, electrical failures in the defroster, or even rust degradation in the aluminum chassis.
By choosing AlexWindshield, you are choosing unparalleled master craftsmanship. We are the premier auto glass experts in the GTA, proudly serving the communities of Vaughan, Richmond Hill, and Markham with rapid, reliable mobile service. We stand behind every single installation we perform. That is why every back glass replacement completed by our technicians comes backed by our comprehensive Lifetime Warranty. This warranty guarantees that your new glass will remain free from air leaks, water leaks, and manufacturer defects for as long as you own your stunning Jaguar.
Don't let a shattered rear window ruin the aesthetic and safety of your British grand tourer. Contact AlexWindshield today for industry-leading precision, unparalleled customer service, and the highest quality mobile auto glass replacement available in the Greater Toronto Area.


