The Elegance of the X350: Expert Quarter Glass Replacement for Your Jaguar XJ (2004-2009)
The 2004-2009 Jaguar XJ, known to automotive purists by its X350 chassis code, marked a revolutionary leap in British engineering. As the first Jaguar to feature an aerospace-inspired, all-aluminum monocoque body, it delivered unparalleled lightweight agility wrapped in a timeless, sweeping silhouette. Every curve and component of this luxury sedan was designed with meticulous intent, including the distinct stationary quarter glass. When this crucial piece of structurally bonded glass is shattered by debris, vandalism, or a collision, it compromises not only the vehicle’s striking aesthetic but also its meticulously engineered cabin acoustics, weatherproofing, and security. Replacing it is not a job for a novice; it requires a deep understanding of Jaguar’s unique assembly techniques.
Because the quarter glass on the 2004-2009 Jaguar XJ is bonded directly to an aluminum body using high-strength polyurethane, improper removal can gouge the soft metal, leading to severe oxidation and future water leaks. Furthermore, quarter glass is manufactured from tempered glass, meaning an impact will cause it to explode into thousands of sharp, granular shards that embed themselves deep into the luxurious interior. You need an expert who understands the anatomy of a premium vehicle to restore your Jaguar to its original factory condition.
Premium Local SEO: Dedicated Service Across the Greater Toronto Area (GTA)
A shattered quarter window completely exposes the interior of your luxury sedan to the elements and theft. Driving with an open cabin is not only uncomfortable but highly dangerous. That is why AlexWindshield brings our state-of-the-art repair facility directly to you. We are proud to offer unparalleled mobile auto glass services spanning the entire Greater Toronto Area (GTA).
Whether you need emergency service while parked at a corporate plaza in Markham, require a meticulous installation in the driveway of your home in Vaughan, or need our master technicians to visit your workplace in Richmond Hill, we arrive fully equipped. Our mobile units are outfitted with premium tools, OEM-equivalent glass, and climate-controlled adhesives to ensure a flawless Jaguar XJ quarter glass replacement no matter where you are located in the GTA.
Step-by-Step: The Master Technician's Approach to Jaguar XJ Quarter Glass Replacement
At AlexWindshield, we do not cut corners. The replacement of a bonded quarter glass on an aluminum-bodied luxury vehicle is a highly technical procedure. Below is our comprehensive, A-to-Z methodology for restoring your 2004-2009 Jaguar XJ.
Step 1: Meticulous Vehicle Preparation and Interior Protection
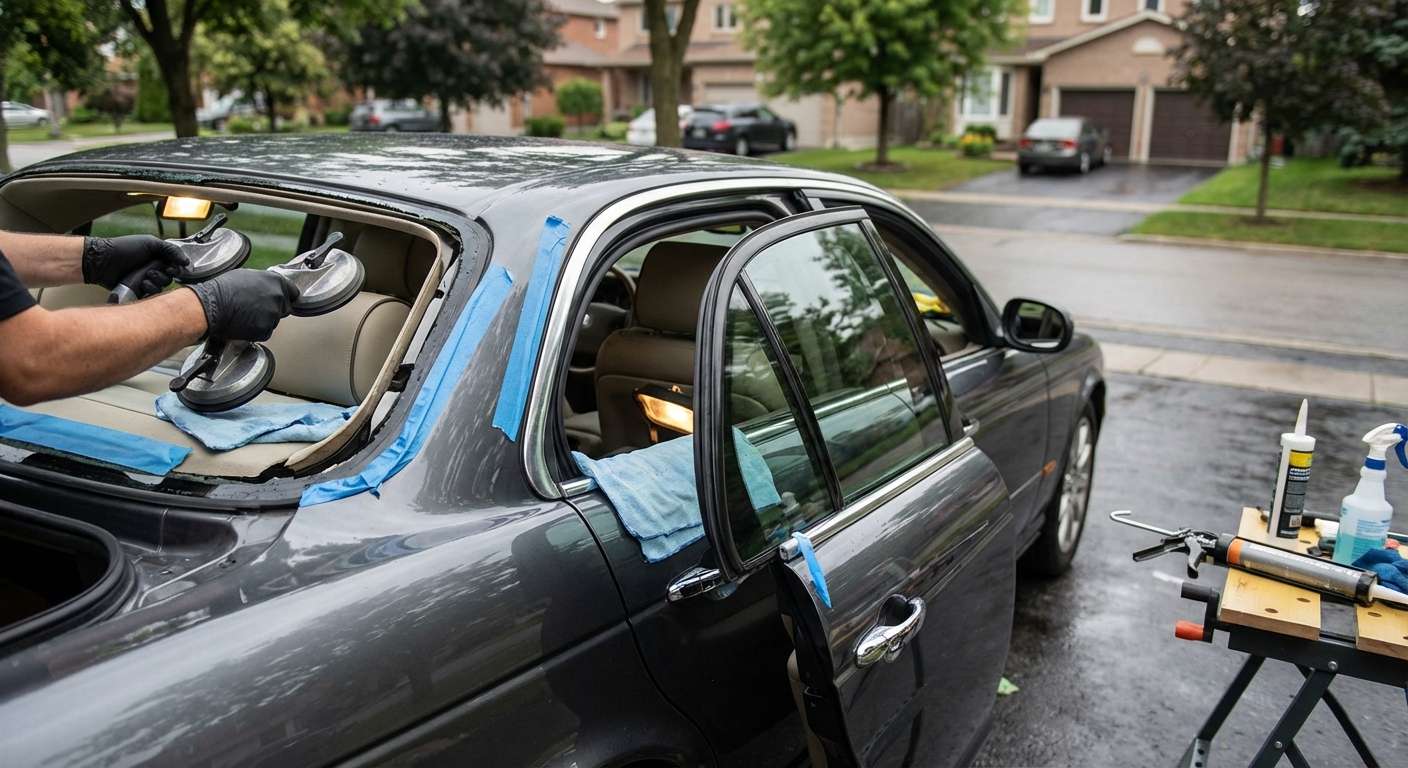
The cabin of the Jaguar XJ is adorned with delicate Connolly leather, burled walnut veneers, and plush wool carpeting. Before any tools are utilized, we prioritize the protection of your investment. We drape heavy-duty, scratch-resistant protective blankets over the rear seating area, the trunk exterior, and the rear quarter panels. We also apply specialized automotive masking tape around the exterior perimeter of the quarter glass opening to protect the vehicle's pristine clear coat from accidental tool contact during the extraction phase.
Step 2: Deep Interior Dismantling and Comprehensive Glass Shard Vacuuming
Unlike a laminated windshield that cracks but stays intact, your Jaguar's quarter glass is tempered. Upon breaking, it shatters into thousands of tiny pieces that infiltrate every crevice of the cabin. To execute a proper repair, we must meticulously clean the area.
- Trim Removal: We carefully use non-marring nylon pry tools to detach the interior C-pillar trim panels and adjacent rear door or parcel shelf trims. This grants us unrestricted access to the interior side of the glass encapsulation and structural body bolts.
- Industrial Vacuuming: We utilize high-suction industrial vacuums equipped with micro-crevice nozzles to extract every single shard of broken glass. We vacuum the leather seats, inside the seatbelt retractor housings, along the carpet edges, and deep within the interior body cavities. Failing to remove these shards can cause persistent rattling noises and damage the interior upholstery.
Step 3: Precision Removal of the Damaged Quarter Glass and Urethane Bead
With the interior stripped and protected, we focus on removing the remnants of the broken quarter glass and its encapsulated molding. Because the 2004-2009 XJ features an aluminum pinch weld, traditional steel cold knives can easily slice into the soft metal, causing irreversible damage. Instead, we utilize an advanced fiber-line or wire-cutting system. By threading a high-tensile cutting wire through the existing polyurethane bead from the inside out, we carefully saw through the old adhesive. This technique cuts the glass free with surgical precision, leaving the delicate aluminum body entirely unharmed.
Step 4: Pinch Weld Preparation and Contaminant Cleaning
Once the broken quarter glass is completely removed, the structural integrity of the new installation relies entirely on the condition of the vehicle's pinch weld. We perform a highly detailed preparation process:
- Trimming the Bead: Using specialized, razor-sharp paring chisels, we trim the old factory polyurethane bead down to a uniform 1-2 millimeter base. This thin layer of original urethane provides the optimal bonding surface for the new adhesive.
- Chemical Cleaning: We thoroughly clean the exposed pinch weld and surrounding body panels using an alcohol-based, lint-free surface prep solvent. This eliminates microscopic dust, grease, glass dust, and natural oils that could compromise the chemical bond of the new seal.
Step 5: Primer Application and Corrosion Prevention
Even with the most careful removal techniques, microscopic scratches can sometimes occur, exposing bare aluminum. While aluminum doesn't rust like steel, it is highly susceptible to galvanic corrosion and oxidation, which can push the new adhesive away from the body over time. To guarantee a permanent bond, we apply a premium, fast-drying black glass primer. We coat both the newly trimmed urethane track on the vehicle’s body and the ceramic frit band on the edge of the new replacement quarter glass. This primer acts as an aggressive chemical bonding agent and provides crucial UV protection to prevent the sun from deteriorating the urethane over the lifespan of the vehicle.
Step 6: Dispensing the High-Quality Urethane Adhesive
The secret to a factory-tight seal lies in the quality of the adhesive and the geometry of its application. At AlexWindshield, we exclusively use advanced, rapid-curing automotive-grade polyurethane. Using an electric caulking gun for perfect consistency, we apply a continuous "V-notch" bead of urethane directly onto the vehicle’s pinch weld. The V-shape is an industry-standard best practice; it ensures that when the glass is pressed into place, the adhesive collapses evenly, eliminating any risk of air pockets, wind whistles, or water leaks.
Step 7: Precision Installation of the New Quarter Glass
Handling the new, pristine quarter glass requires a master's touch. Using heavy-duty suction cups, we carefully align the specialized encapsulated molding of the new quarter glass with the sweeping body lines of the Jaguar XJ. We gently press the glass into the fresh urethane bead, ensuring uniform depth and perfect alignment with the rear door and C-pillar. Retention tape is temporarily applied to hold the glass in exact alignment while the chemical curing process begins.
Step 8: Final Reassembly and Quality Assurance Inspection
While the high-quality adhesive cures, we begin the meticulous reassembly of your Jaguar's interior. The C-pillar trim panels, weather stripping, and any removed rear upholstery are snapped back into place flawlessly, ensuring no clips are broken and the factory fitment is retained. We perform a final, secondary vacuuming of the cabin to guarantee absolute perfection. Finally, we clean the newly installed quarter glass with a streak-free, ammonia-free foaming cleaner, leaving it crystal clear and ready for the road.
Post-Installation: What to Expect with Your Restored Jaguar XJ
Because we utilize state-of-the-art, rapid-cure polyurethane, your vehicle's Safe Drive-Away Time (SDAT) is minimized. However, to ensure the absolute longevity and safety of your new quarter glass, we recommend the following post-installation care:
- Leave the Retention Tape: Keep the blue specialized support tape on the exterior of the glass for at least 24 hours to prevent the glass from shifting while driving over uneven GTA roads.
- Avoid Car Washes: Do not take your Jaguar through high-pressure commercial car washes for a minimum of 48 hours to allow the urethane to fully outgas and harden.
- Keep Windows Cracked: If parking in the hot sun, leave the opposite windows cracked by half an inch. Closing vehicle doors creates a sudden spike in cabin air pressure, which can potentially push a freshly installed quarter window outward before it has fully cured.
Trust AlexWindshield for Your Jaguar Auto Glass Needs
Your 2004-2009 Jaguar XJ is a sophisticated piece of British engineering that deserves nothing less than master-level craftsmanship. Generic chain repair shops often lack the specialized knowledge required to navigate aluminum monocoque frames, encapsulated luxury moldings, and complex interior trim dismantling without causing collateral damage.
As the premier destination for mobile auto glass services in the Greater Toronto Area (GTA), AlexWindshield combines old-world craftsmanship with modern adhesive technology. Whether you reside in Vaughan, Richmond Hill, Markham, or anywhere else in the GTA, our dedicated mobile fleet brings our expertise directly to your doorstep. Every single installation we perform is backed by our comprehensive Lifetime Warranty against leaks, wind noise, and workmanship defects, giving you ultimate peace of mind.
Don't let a shattered quarter glass compromise the safety, security, and elegance of your luxury sedan. Contact AlexWindshield today to schedule your expert Jaguar XJ quarter glass replacement and experience the gold standard in mobile auto glass repair.


