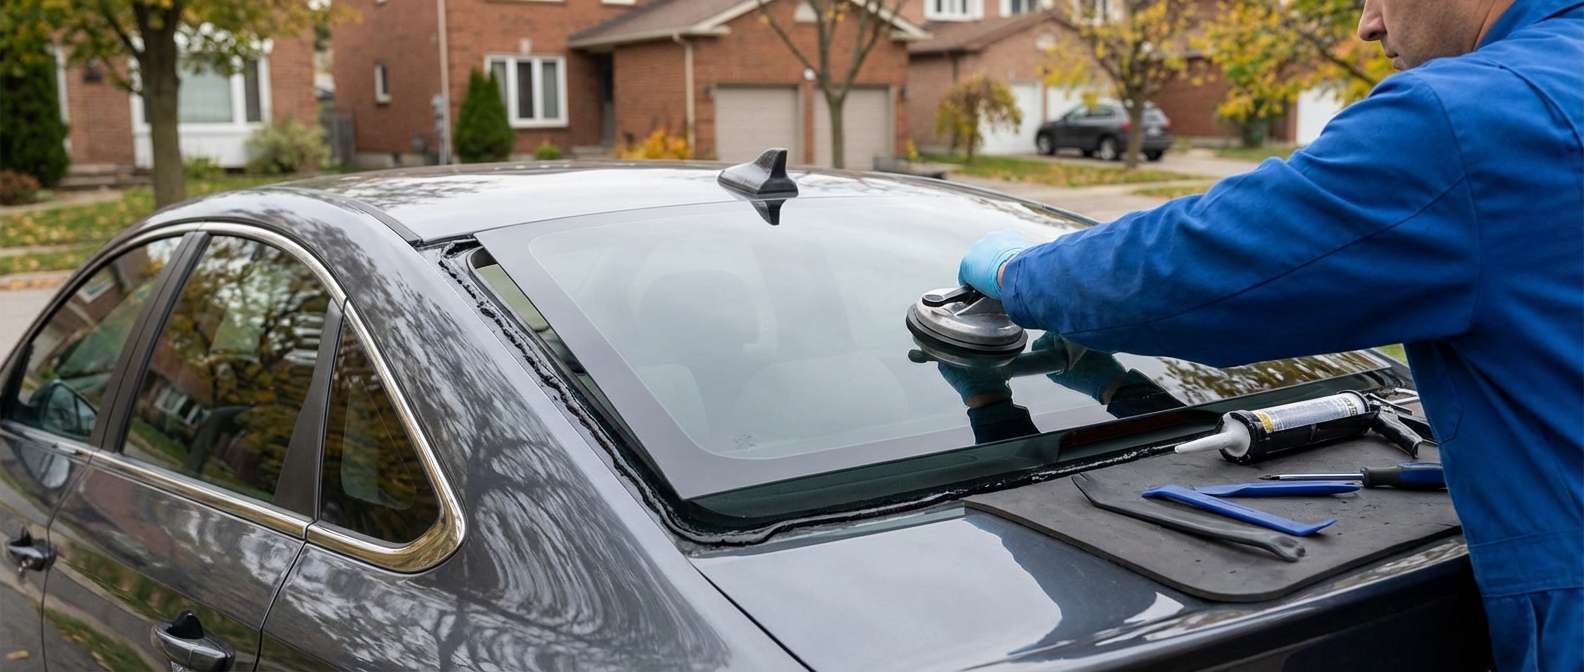
Expert Back Glass Replacement for the 2015-2019 Hyundai Sonata
The seventh-generation Hyundai Sonata (2015-2019), celebrated for its refined "Fluidic Sculpture 2.0" design, boasts a sleek, sweeping roofline that perfectly merges aesthetics with aerodynamic efficiency. However, when the rear windshield is compromised, that beautiful profile instantly becomes a major safety and security hazard. Unlike a laminated front windshield that cracks but stays intact, the back glass of your Sonata is constructed from tempered glass. When shattered, it instantaneously bursts into thousands of tiny, pebble-like shards that flood your rear seats, speaker deck, and trunk cavity. As a Master Technician at AlexWindshield, I have replaced countless rear windows on this specific model, and I can assure you that restoring your vehicle requires much more than just slapping on a new piece of glass. It demands meticulous cleanup, structural precision, and expert handling.
A compromised rear window leaves your vehicle vulnerable to the harsh Canadian weather, exposes your interior to theft, and disables vital features like your rear defroster and integrated antenna systems. At AlexWindshield, we specialize in delivering flawless, factory-grade Hyundai Sonata back glass replacement right to your driveway. Our specialized mobile units operate seamlessly across the Greater Toronto Area (GTA), with dedicated service routes actively covering Vaughan, Richmond Hill, and Markham. We bring the auto glass shop directly to you, ensuring that your Sonata is restored to its original factory specifications without you having to drive a compromised vehicle.
Why the 2015-2019 Hyundai Sonata Requires Specialized Back Glass Care
The rear glass of the 2015-2019 Hyundai Sonata is a highly integrated component of the vehicle's electrical and structural network. It houses the thermal defroster grid essential for navigating our freezing GTA winters, and in many trims, it contains embedded radio and GPS antenna lines. Furthermore, the sweeping angle of the Sonata’s C-pillars requires exact glass curvature to prevent wind noise, water leaks, and structural weakness. Using sub-par glass or cutting corners during the installation process will inevitably lead to connectivity failures and cabin pressure issues. This is why our technicians strictly adhere to a comprehensive, A-to-Z replacement protocol utilizing only premium, OEM-quality glass and industry-leading adhesives.
Our Master Technician's Step-by-Step Back Glass Replacement Process
At AlexWindshield, we do not believe in rushed, temporary fixes. As a senior technician, I strictly enforce a rigorous, methodical approach to every 2015-2019 Hyundai Sonata rear window replacement. Here is the exact, detailed process we execute to guarantee a flawless result and secure your Lifetime Warranty.
1. Comprehensive Vehicle Preparation and Interior Protection
The moment we arrive at your location in the GTA, our first priority is protecting your vehicle’s pristine interior. We begin by laying down heavy-duty protective drop cloths over the front seats, center console, and steering wheel. For a back glass replacement, we place specialized moving blankets over the rear passenger seats and the exterior trunk lid to prevent any accidental scratches during the extraction and installation phases. We tape off the surrounding exterior paint and C-pillar trims using low-tack automotive masking tape. This crucial preparatory step ensures that your Hyundai Sonata remains in immaculate condition throughout the entire procedure.
2. Extensive Interior Disassembly and Glass Shard Vacuuming
Because the Sonata's back glass is tempered, a blowout results in thousands of dangerous glass shards scattered throughout the cabin. We absolutely never install new glass over old debris. First, we carefully remove the interior C-pillar trim panels, the rear parcel shelf (speaker deck), and the inner trunk lid liner. Once these panels are safely set aside, we utilize high-powered, industrial-grade shop vacuums equipped with specialized crevice tools to extract every single shard of broken glass. We vacuum the rear seats, the floorboards, deep inside the trunk cavity, and inside the structural channels of the rear deck. This exhaustive shard removal ensures that you won't hear annoying rattling noises or face safety hazards from hidden glass pieces long after we leave.
3. Removal of the Old Urethane and Glass Remnants
With the interior fully clean and the panels removed, we focus on the exterior frame. We carefully disconnect the electrical wiring harnesses that power the rear defroster and the integrated antenna grid. Using specialized cold knives and powered extractor tools, we meticulously cut through the original, hardened urethane adhesive that bonds the glass to the vehicle's frame. Any remaining glass shards still clinging to the frame are carefully extracted. We take extreme caution not to scratch the vehicle's metal pinch weld during this step, as preserving the factory paint is critical for long-term rust prevention.
4. Surface Cleaning and Pinch Weld Preparation
Once the old glass and debris are completely removed, the structural integrity of the installation relies on perfect surface preparation. We trim the existing bed of old urethane down to a thin, uniform layer of about 1 to 2 millimeters. This acts as an ideal base for the new adhesive to bond to. Next, we rigorously clean the entire perimeter of the pinch weld using an alcohol-based, lint-free automotive glass cleaner to remove any dirt, grease, or microscopic debris. If any bare metal was exposed during the removal process, we immediately treat it with a specialized anti-corrosion automotive primer. This black primer seals the metal, absolutely preventing future rust formation that could otherwise compromise the seal and the safety of your vehicle.
5. Application of Primer and High-Quality Urethane Adhesive
Preparing the new Hyundai Sonata back glass is just as critical as preparing the vehicle. We clean the inner bonding edge of the fresh, premium replacement glass and apply a specialized glass primer to promote maximum adhesion. After the primer has properly flashed (dried), we load our electric caulking guns with a premium, high-modulus, fast-curing urethane adhesive. We expertly pump a continuous, perfectly shaped "V-bead" of urethane around the entire perimeter of the vehicle's pinch weld. This thick, uniform bead is the sole barrier keeping out the wind and rain, and it is vital for maintaining the structural rigidity of the vehicle's roofline in the event of a rollover collision.
6. Precision Installation of the New Hyundai Sonata Back Glass
Installing the heavy, curved back glass of a 2015-2019 Sonata is a delicate operation that requires expert precision. Using heavy-duty pneumatic suction cups, two of our technicians carefully lift the new glass and align it perfectly over the fresh urethane bead. We use factory alignment pins and specific reference points on the Sonata’s frame to gently lower the glass into place. Once seated, we apply even, firm pressure around the perimeter to compress the V-bead, ensuring a flawless, watertight, and airtight seal. We then secure the glass with specialized retention tape to hold it perfectly in place while the chemical curing process begins.
7. Final Connections, Reassembly, and Quality Assurance
With the glass firmly set, we move on to reassembly. We meticulously reconnect the electrical terminals for the rear defroster and integrated antenna, testing them to ensure optimal conductivity and performance. We then carefully reinstall the rear parcel shelf, the interior C-pillar trims, and the trunk lid liner, making sure every factory clip snaps securely back into its rightful place. Finally, we perform a secondary vacuuming of the interior, clean the new back glass with premium streak-free foam, and conduct a comprehensive quality assurance check to guarantee that the installation meets our strict Master Technician standards.
Premier Mobile Auto Glass Replacement Across the GTA
Driving a Hyundai Sonata with a shattered rear window is not only uncomfortable—it is incredibly dangerous and often illegal. Rather than towing your vehicle or risking a drive to a traditional repair shop, AlexWindshield brings the ultimate auto glass solution directly to you. Our state-of-the-art mobile service vans are fully equipped to handle this complex procedure in your driveway, your office parking lot, or your garage.
We are proud to provide rapid, reliable, and professional mobile auto glass services across the entire Greater Toronto Area (GTA). We have dedicated expert technicians ready to be dispatched specifically to:
- Vaughan: Whether you are near Vaughan Mills or Woodbridge, our mobile units arrive fully stocked with the exact 2015-2019 Sonata back glass you need.
- Richmond Hill: From the business parks to residential neighborhoods, we ensure swift, precise glass replacement without disrupting your busy schedule.
- Markham: Providing top-tier shard cleanup and flawless back glass installations for all Hyundai Sonata models across Markham and the surrounding communities.
Why Choose AlexWindshield for Your Hyundai Sonata?
Your vehicle is a significant investment, and its structural integrity should never be compromised by amateur repairs. When you trust AlexWindshield with your 2015-2019 Hyundai Sonata, you are partnering with the industry's best. Here is what sets our service apart:
- Master Technicians: Every replacement is overseen and executed by senior technicians with years of dedicated auto glass experience.
- Premium Materials: We use only OEM-equivalent or superior glass, matched with advanced, fast-curing urethane adhesives for a safe drive-away time.
- Comprehensive Cleanup: We guarantee thorough vacuuming of all dangerous tempered glass shards from your vehicle's interior and trunk.
- Lifetime Warranty: We stand confidently behind our craftsmanship. Every back glass replacement comes with our comprehensive Lifetime Warranty covering leaks, wind noise, and workmanship defects.
- Ultimate Convenience: Our GTA mobile service saves you time, money, and the stress of navigating traffic with a broken window.
Contact AlexWindshield Today for Expert Mobile Service
Do not let a shattered back window ruin your day or compromise your safety. If you need a back glass replacement for your 2015-2019 Hyundai Sonata, trust the premier experts in the GTA. At AlexWindshield, we are committed to delivering exceptional quality, rigorous safety standards, and unmatched customer service directly to your door. Reach out to us today to schedule your mobile appointment in Vaughan, Richmond Hill, Markham, or anywhere across the Greater Toronto Area, and let our Master Technicians restore your vehicle with precision, care, and our rock-solid Lifetime Warranty.


