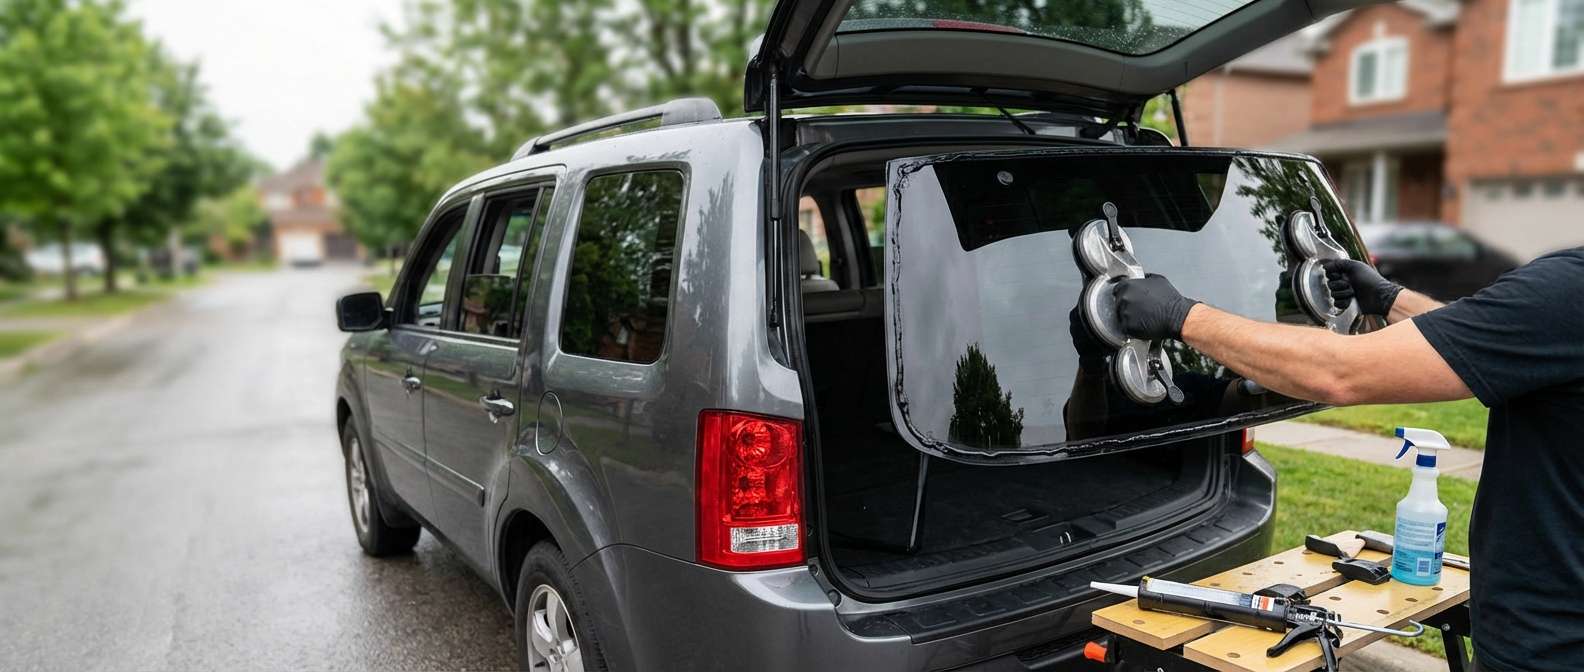
The 2009-2015 Honda Pilot: Restoring the Rear View of a Family Workhorse
The second-generation Honda Pilot (2009-2015) is revered for its rugged, boxy silhouette and exceptional family-hauling capabilities. Unlike the sloped, aerodynamic rear ends of modern crossovers, the 2009-2015 Pilot features a nearly vertical, expansive back glass that maximizes third-row headroom and cargo capacity. However, this vertical orientation also makes the rear window highly susceptible to direct impacts from shifting cargo, rogue road debris, and rear-end collisions. Furthermore, drastic temperature fluctuations can cause the tempered glass to fail under thermal stress, resulting in a sudden, explosive shatter. When this happens, you need a highly specialized, technical approach to restore the structural integrity and safety of your vehicle.
Local Auto Glass Expertise You Can Trust Across the GTA
Navigating the bustling highways and dense urban grids of the Greater Toronto Area (GTA) requires a vehicle that is in peak condition. A shattered back glass is not just a cosmetic issue; it exposes your SUV's interior to harsh weather, exhaust fumes, and potential theft. Whether you are parked at a shopping center in Vaughan, commuting through the busy streets of Richmond Hill, or running errands in Markham, driving with compromised rear visibility is dangerous and illegal. At AlexWindshield, we bring elite, dealership-level glass replacement directly to your driveway. As a Master Technician, I have replaced countless rear windows on the second-generation Honda Pilot, and I know the precise quirks, wiring harnesses, and structural requirements of this specific model.
The Technical Anatomy of the 2009-2015 Honda Pilot Back Glass
Replacing the rear window on a 2009-2015 Honda Pilot is significantly more complex than a standard windshield installation. The back glass serves as an integrated hub for several critical vehicle components. It houses the rear defroster grid, which is essential for clearing ice and condensation during brutal Canadian winters. It also serves as the mounting point for the rear windshield wiper motor assembly, the high-mount third brake light, and the intricate wiring harnesses that power these systems. Because rear windows are manufactured from tempered glass, they do not crack like a laminated windshield; they disintegrate into thousands of tiny, blunt-edged cubes. This necessitates a highly rigorous interior teardown and cleanup process before any new glass can be installed.
Step-by-Step Back Glass Replacement Process for the Honda Pilot
Step 1: Initial Assessment and Comprehensive Interior Protection
The first and most critical step in any professional auto glass replacement is securing the vehicle. Before a single tool is lifted, we conduct a thorough pre-inspection of the Honda Pilot's liftgate, hinges, and surrounding body panels to check for collateral damage caused by the impact that shattered the glass. Once assessed, we meticulously tape off the exterior paint around the rear hatch to prevent accidental scratching. Inside the vehicle, we lay down heavy-duty, puncture-resistant drop cloths covering the cargo area, the folded third-row seats, and the rear bumper. Protecting the Honda Pilot's interior from rogue adhesive drips and sharp glass fragments is a non-negotiable standard of our service.
Step 2: Liftgate Panel Removal and Exhaustive Debris Vacuuming
Because tempered glass shatters explosively, glass cubes inevitably fall deep into the mechanical cavities of the rear hatch. To address this, we perform a complete removal of the interior door panels and liftgate trim pieces. Using specialized, non-marring nylon pry tools, we carefully detach the plastic retaining clips without snapping them—a common issue in older vehicles like the 2009-2015 Pilot. Once the internal framework of the tailgate is exposed, we begin the exhaustive process of vacuuming all broken glass shards from the vehicle's interior. We use high-powered industrial shop vacuums with flexible crevice attachments to extract glass from the tailgate latch mechanism, the wiper motor housing, and the deep recesses of the cargo floor. Failing to remove every piece of glass can result in an infuriating permanent rattle or, worse, a jammed liftgate latch.
Step 3: Disconnecting Electrical Components and Hardware
With the liftgate stripped and cleaned, we move on to the mechanical teardown. The second-generation Honda Pilot's back glass supports various hardware that must be carefully unbolted. We detach the external wiper arm and extract the internal wiper motor assembly. Next, we carefully unclip the 12-volt wiring harness connections for the thermal defroster grid. Older wiring connectors can become brittle, so we apply electrical contact cleaner and gentle leverage to remove them safely. If the vehicle is equipped with a glass-mounted radio antenna or an integrated spoiler, these components are also unscrewed and safely stored for reinstallation.
Step 4: Precision Removal of the Old Glass and Urethane Bead
Even though the center of the glass has shattered, the outer perimeter remains fiercely bonded to the vehicle's pinch weld by the factory polyurethane adhesive. To remove this, we employ a cold knife or an advanced wire-cutting system. We carefully slice through the incredibly tough old urethane seal around the entire perimeter of the liftgate. Once the remaining glass frame is removed, we perform a specialized "close-cut." This involves using a razor-sharp scraper to trim the old adhesive down to a uniform thickness of 1-2 millimeters. This thin base layer of existing urethane provides the optimal foundation for the new chemical bond, ensuring a watertight seal.
Step 5: Surface Cleaning and Primer Application
Preparation of the pinch weld is where the longevity of the replacement is decided. We perform a rigorous surface cleaning of the metal frame using specialized, alcohol-based glass and surface prep solvents. This eliminates grease, road salt, and microscopic debris that could contaminate the adhesive bond. During the cutting process, if any minor scratches expose the bare metal of the Honda Pilot's tailgate, we immediately address them. We apply a high-grade automotive primer application directly to these bare spots. This advanced black primer performs two essential functions: it acts as a total moisture barrier to completely rust-proof the metal frame, and it creates a highly reactive chemical surface that maximizes the adhesion of the new urethane.
Step 6: High-Quality Adhesive Application and Glass Installation
Once the primer has flashed and cured, we prepare the brand-new, OEM-quality back glass. The new glass undergoes its own chemical cleaning and receives a specialized glass primer around its ceramic frit band (the black painted border). Next, using an electric caulking gun, we apply a thick, triangular "V-bead" of high-quality, advanced-cure polyurethane adhesive directly onto the pinch weld. The V-bead ensures that when the glass is compressed, the adhesive spreads perfectly without any air gaps. With the help of high-capacity suction cups, the heavy back glass is carefully hoisted and aligned with the factory mounting points. It is gently pressed into the wet adhesive, ensuring perfect flushness with the Honda Pilot's body lines.
Step 7: Reassembly, Reconnection, and Curing Verification
With the new back glass firmly set, the reassembly process begins. We work backward, reinstalling the hardware with precision:
- Wiper Assembly: The wiper motor is re-bolted, and the external wiper arm is aligned to its exact factory resting position.
- Electrical Reconnection: The defroster tabs and antenna wires are firmly plugged in, ensuring full electrical conductivity.
- Trim Reinstallation: The interior liftgate door panels are snapped back into place, ensuring every clip engages securely without rattling.
- Final Cleanup: The new glass is polished to a streak-free shine, and a final sweep of the interior is conducted to guarantee the absolute removal of all debris.
Safe Drive-Away Time and Post-Installation Care
Modern polyurethane adhesives require a specific chemical curing period, known as the Safe Drive-Away Time (SDAT). For the heavy back glass of a 2009-2015 Honda Pilot, we utilize rapid-curing urethane that typically secures the vehicle for safe driving within 30 to 60 minutes, depending on the ambient temperature and humidity in the GTA. We advise all our clients to leave a window slightly cracked for the first 24 hours; this prevents air pressure spikes from slamming car doors from compromising the fresh urethane seal. Furthermore, avoid high-pressure automated car washes for at least 48 hours to ensure the adhesive achieves its absolute maximum tensile strength.
Choose AlexWindshield for Unmatched Auto Glass Excellence
A shattered back window is incredibly stressful, but resolving it shouldn't be. When you choose AlexWindshield, you are securing the expertise of Master Technicians who understand the exacting mechanical tolerances of your 2009-2015 Honda Pilot. We don't just replace auto glass; we restore the safety, security, and integrity of your vehicle. Proudly offering premium, reliable mobile auto glass services across the GTA—including prompt, professional dispatch to Vaughan, Richmond Hill, and Markham—we bring the repair shop directly to your home or office. We stand behind every single drop of primer and bead of adhesive we lay down. That is why every replacement performed by AlexWindshield is backed by our comprehensive Lifetime Warranty against leaks, wind noise, and workmanship defects. Don't compromise on your family's safety; contact AlexWindshield today and experience the absolute highest standard in auto glass replacement.


