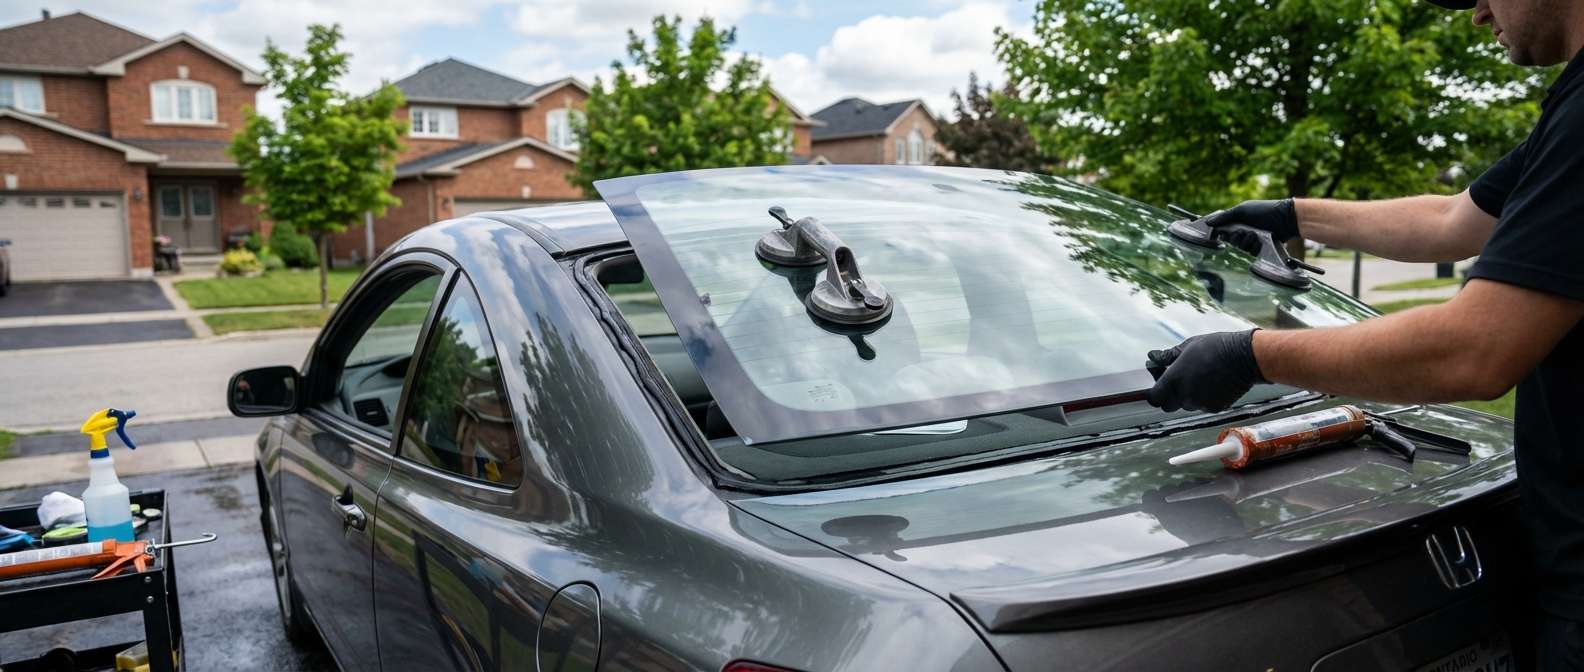
The Eighth-Generation Revolution: Restoring the Sweeping Profile of Your 2006-2011 Honda Civic
The eighth-generation Honda Civic, spanning the 2006 to 2011 model years, completely redefined the aesthetic of the modern compact car. With its aggressively sloped front windshield and an equally expansive, sweeping rear window, it earned the affectionate nickname of the "spaceship" generation among automotive enthusiasts. While this heavily raked rear profile offers incredible aerodynamics and unmatched driver visibility, it also presents a massive surface area that is highly vulnerable to environmental hazards, road debris, and vandalism. When the rear window of this specific Civic model breaks, it doesn't merely crack like a laminated windshield—it detonates into thousands of tiny, razor-sharp tempered glass cubes. Navigating this chaotic mess requires more than just a quick fix; it demands the precision, technical mastery, and meticulous care of a senior auto glass specialist.
At AlexWindshield, we do not believe in taking shortcuts. As Master Technicians, we understand the exact structural geometry of the 2006-2011 Honda Civic. We know exactly how the rear parcel shelf interacts with the glass, how the heating elements are wired into the vehicle's electrical matrix, and how crucial the rear glass is to the overall structural rigidity of the cabin. When you require a Honda Civic back glass replacement, our process ensures your vehicle is restored to its original factory safety standards with absolutely no compromises.
Premier Mobile Auto Glass Services Across the Greater Toronto Area (GTA)
Driving a vehicle with a shattered back glass is not just a major safety hazard; it exposes your interior to the harsh Canadian weather, exhaust fumes, and potential theft. That is why AlexWindshield brings our state-of-the-art auto glass shop directly to your doorstep. We provide comprehensive, fully equipped mobile replacement services across the Greater Toronto Area (GTA).
Whether your Civic has been compromised while parked in your driveway in Vaughan, shattered by a stray rock during your commute through Richmond Hill, or damaged while you are at work in the corporate sectors of Markham, our specialized mobile units are dispatched immediately. We carry all the specialized tools, climate-controlled adhesives, and OEM-equivalent glass required to perform a flawless, factory-grade installation right where you are, minimizing your downtime and maximizing your convenience.
Understanding the Anatomy of the 2006-2011 Honda Civic Rear Glass
Unlike the front windshield, which utilizes laminated safety glass, the rear window of the 2006-2011 Honda Civic is constructed from tempered safety glass. This material undergoes a rigorous heating and rapid cooling process during manufacturing, creating immense internal tension. Upon severe impact, this tension causes the glass to shatter entirely into small, granular chunks rather than dangerous, jagged shards. Furthermore, this specific back glass features an integrated thermal grid—the rear defroster—which is bonded directly onto the inner surface of the glass, connecting to the vehicle’s electrical system via hidden terminal tabs behind the C-pillar trims.
The Master Technician's Step-by-Step Back Glass Replacement Process
At AlexWindshield, we treat every installation as a highly technical engineering task. Our A to Z back glass replacement process is strictly formulated to ensure absolute safety, zero interior damage, and a lifetime structural bond.
Step 1: Pre-Installation Inspection and Rigorous Interior Protection
Before a single tool touches your vehicle, we perform a comprehensive walk-around inspection. The sweeping rear pillar of the 2006-2011 Civic requires us to be highly mindful of the exterior paint and the interior upholstery. We apply heavy-duty protective drapes over your trunk lid, rear bumper, and rear quarter panels to prevent any accidental scratching. Inside the cabin, we cover the rear passenger seats, the floorboards, and the center console with thick protective blankets. We carefully detach and lower the interior C-pillar trim panels to expose the wiring harness for the defroster without damaging the delicate plastic retaining clips.
Step 2: Comprehensive Glass Cleanup and Interior Debris Vacuuming
Because this is a back glass replacement, dealing with shattered tempered glass is the most labor-intensive and critical step. The blast radius of a shattered Civic rear window typically covers the rear parcel shelf, falls into the child seat tether anchors, slips behind the rear seatbacks, and drops heavily into the trunk cavity. Using industrial-grade HEPA shop vacuums, we perform a deep extraction.
- Trunk Cavity Extraction: We open the trunk and meticulously vacuum the weather channels, the trunk floor, and the spare tire wheel well where rogue glass shards inevitably migrate.
- Parcel Shelf and Speaker Deck: We use soft-bristled brush attachments to dislodge glass from the rear speaker grilles and the high-mount third brake light assembly.
- Seat Crevice Detailing: We utilize specialized crevice tools to pull every microscopic cube of glass out from between the rear seat cushions, ensuring total safety for your future passengers.
Step 3: Disconnecting Hardware and Electrical Components
With the hazardous glass shards safely removed, we focus on the hardware. We carefully disconnect the wiring harness clips from the broken defroster tabs. If the high-mount brake light or any localized antenna modules are attached near the top edge of the glass, we detach them safely. We also remove any remaining exterior molding or rubber encapsulation that surrounds the outer perimeter of the Civic's rear window channel.
Step 4: Precision Removal of the Old Urethane Seal
Even though the glass has shattered, a thick ring of the original factory polyurethane adhesive remains bonded to the vehicle's pinchweld (the metal frame where the glass sits). Using specialized, razor-sharp cold knives and power extractor tools, we carefully pare down this old urethane bead. We do not remove it entirely; instead, we trim it down to a uniform 1 to 2 millimeters. This thin remaining layer serves as the perfect base for the new adhesive to bond to, a chemical process known as cross-linking.
Step 5: Surface Preparation, Cleaning, and Primer Application
A flawless installation relies entirely on the chemical integrity of the bonding surface. We wash the newly trimmed pinchweld with a specialized, alcohol-based glass and surface cleaner to remove all dust, oils, and environmental contaminants. Next comes the critical priming phase.
- Pinchweld Priming: If any minor scratches occurred on the bare metal of the pinchweld during the removal process, we immediately treat them with a high-performance anti-corrosion black primer. This prevents future rust formation, which is the leading cause of late-stage structural leaks.
- Glass Frit Priming: We thoroughly clean the interior edge of the new, premium replacement back glass. We then apply an adhesion-promoting glass primer to the black ceramic band (the frit) on the perimeter of the new glass, activating the surface for maximum molecular bonding.
Step 6: High-Quality Urethane Adhesive Application
Using a heavy-duty, battery-operated caulking gun, we apply a fresh, continuous bead of premium, fast-curing polyurethane adhesive. The urethane is applied using a highly specific "V-bead" profile. This triangular shape ensures that when the glass is pressed into the frame, the adhesive compresses perfectly, leaving zero air gaps, preventing wind noise, and guaranteeing a watertight seal. Our adhesives are engineered to cure rapidly, even in fluctuating Canadian temperatures.
Step 7: Precision Installation of the New Civic Back Glass
Installing the expansive rear glass of a 2006-2011 Honda Civic requires surgical precision. Using specialized heavy-duty suction cups, our technicians carefully lift the newly primed glass. We align the glass perfectly with the vehicle's roofline and trunk deck gap, ensuring the reveals (the gaps between the glass and the car body) are factory-perfect. Once aligned, we gently press the glass into the urethane bed, allowing the V-bead to collapse and create an impenetrable structural bond.
Step 8: Reconnecting Electronics and Final Quality Checks
With the glass firmly set, we immediately reconnect the rear defroster wiring to the new thermal tabs. We conduct an electrical continuity test to ensure the defroster grid is fully operational. The interior C-pillar trims are carefully snapped back into place, ensuring no wires are pinched. Finally, we clean the new rear glass inside and out with a streak-free, automotive-grade cleaner, and perform one last sweep of the interior to guarantee absolute cleanliness.
Post-Installation Care for Your Honda Civic
While our premium fast-cure urethane allows for a safe drive-away time of usually less than an hour, we advise our clients to follow a few simple rules to ensure the integrity of the new seal:
- Leave the tape on: If retention tape was used to hold the glass flush with the roofline, leave it in place for at least 24 hours.
- Avoid high-pressure car washes: Do not take your Civic through an automatic, high-pressure car wash for at least 48 hours. Standard rain will not affect the curing process, but high-pressure jets can push past the curing urethane.
- Mind the cabin pressure: When driving for the first 24 hours, leave one of your side windows rolled down about an inch. Closing the doors with all windows up creates a massive spike in cabin air pressure, which can potentially push against the newly installed back glass and compromise the fresh urethane seal.
The AlexWindshield Guarantee: Trusted Mobile Experts with a Lifetime Warranty
Replacing the back glass on a 2006-2011 Honda Civic requires a deep understanding of automotive geometry, meticulous cleanup protocols, and the use of the highest grade adhesives on the market. Do not trust your safety and your vehicle's interior to cut-rate shops. AlexWindshield is recognized as the premier destination for mobile auto glass services throughout the Greater Toronto Area.
Whether you are situated in Markham, Vaughan, or Richmond Hill, our Master Technicians deliver dealership-level quality directly to your location. We stand fiercely behind our craftsmanship, which is why every single installation we perform comes backed by our comprehensive Lifetime Warranty against leaks, wind noise, and manufacturer defects. When disaster strikes your vehicle, choose the unparalleled expertise of AlexWindshield—where precision meets convenience, and your safety is permanently sealed.


