Mastering the Windshield Replacement for Your 2007-2013 GMC Sierra 1500
The GMC Sierra 1500 2007-2013 (part of the renowned GMT900 platform) revolutionized the pickup truck landscape. By introducing a steeper windshield rake and significantly enhanced aerodynamics, GMC engineers successfully reduced wind noise and improved highway fuel efficiency. However, as a senior technician, I can tell you that this exact aerodynamic slope makes the front glass of your truck a prime target for high-velocity highway debris. Whether you are hauling equipment to a tough job site or commuting across the province, this generation of the Sierra takes a beating, and its windshield absorbs the brunt of it. When that glass inevitably cracks, a simple patch-up will not suffice. The structural integrity of your truck's cabin depends heavily on a flawlessly executed windshield replacement.
At AlexWindshield, we do not believe in cutting corners. Replacing the windshield on a heavy-duty workhorse like the 2007-2013 Sierra requires deep technical knowledge, precise tools, and an uncompromising commitment to safety. From advanced urethane bonding to intricate sensor calibration, our replacement process is engineered to restore your truck to its original factory standards.
Premium Auto Glass Services Across the Greater Toronto Area (GTA)
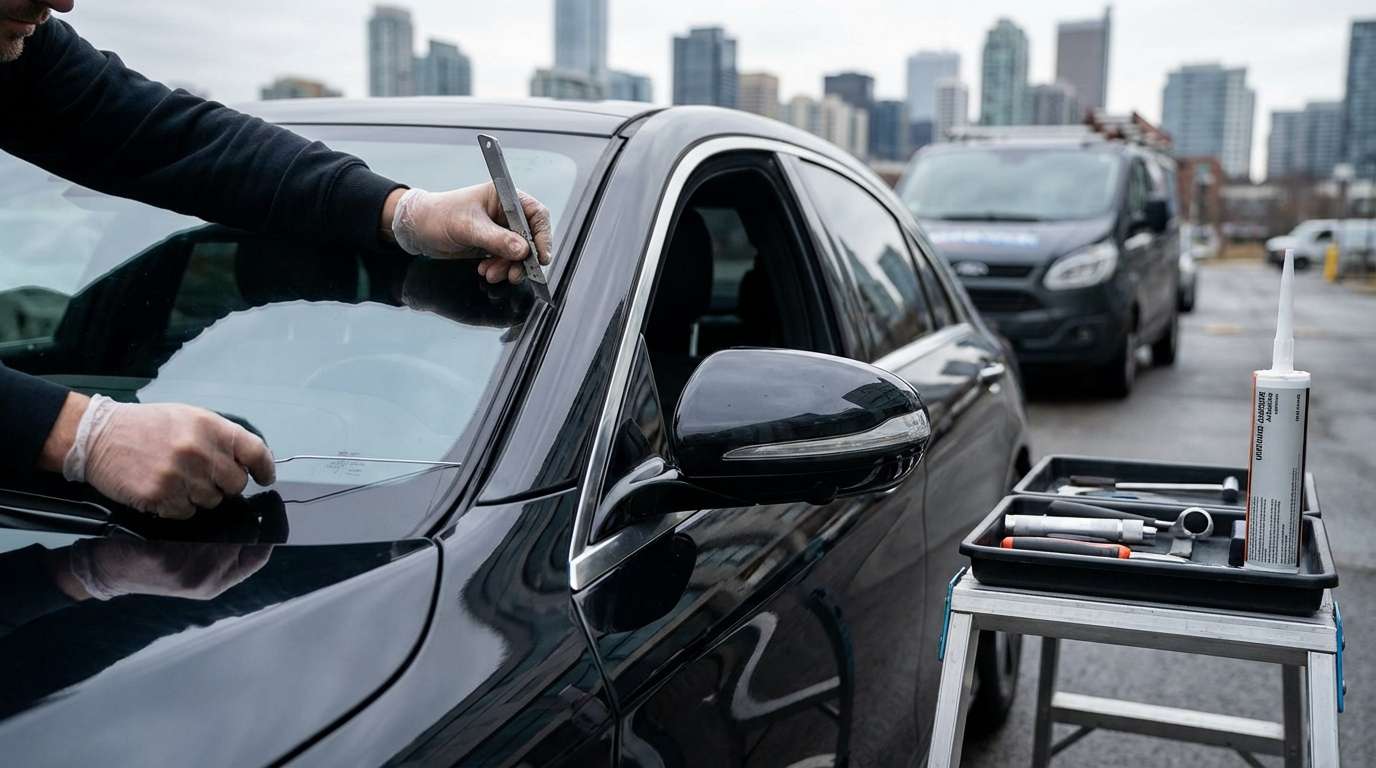
Driving with a compromised windshield is a significant safety hazard, especially given the unpredictable weather and heavy traffic of Southern Ontario. We are proud to offer unparalleled mobile auto glass services across the Greater Toronto Area (GTA). Our fully equipped mobile service vans bring the expertise of a master technician directly to your driveway, office, or job site.
We specifically cater to truck owners throughout the region, offering rapid response times and premium service in key municipalities. Whether you are navigating the heavy commercial zones of Vaughan, commuting from a residential neighborhood in Richmond Hill, or working on a sprawling construction site in Markham, our technicians arrive on-site with the exact glass and materials needed for your GMC Sierra 1500 2007-2013. We understand that your truck is your livelihood, and our mobile service ensures minimal downtime so you can get back on the road safely.
The AlexWindshield Technical Standard: Step-by-Step Windshield Replacement
Replacing the windshield on a GMT900 Sierra is a complex technical procedure. Below is the comprehensive, A-to-Z process our master technicians follow to ensure a secure, leak-proof, and factory-grade installation.
Step 1: Vehicle Preparation and Interior Protection
Before any tools touch your truck, we prioritize the protection of your vehicle. We begin by applying high-grade automotive masking tape to the A-pillars and the leading edge of the roof to protect the Sierra's paint from accidental tool strikes. Inside the cabin, we lay down heavy-duty protective drop cloths over the dashboard, steering wheel, and front leather or cloth seats. This ensures that no debris, old adhesive, or dust contaminates your interior during the glass extraction process.
Step 2: Removal of the Cowl, Wipers, and Exterior Trim
To access the bottom edge of the windshield, we must remove the exterior components. Using specialized wiper pullers, we safely detach the heavy-duty wiper arms without stripping the splines. Next, we carefully unclip and remove the plastic cowl panel that sits at the base of the windshield. On the 2007-2013 GMC Sierra 1500, we also inspect and disconnect any heated wiper park elements or washer fluid lines attached to the cowl area. The side moldings and top weather-stripping are then carefully removed to expose the perimeter of the auto glass.
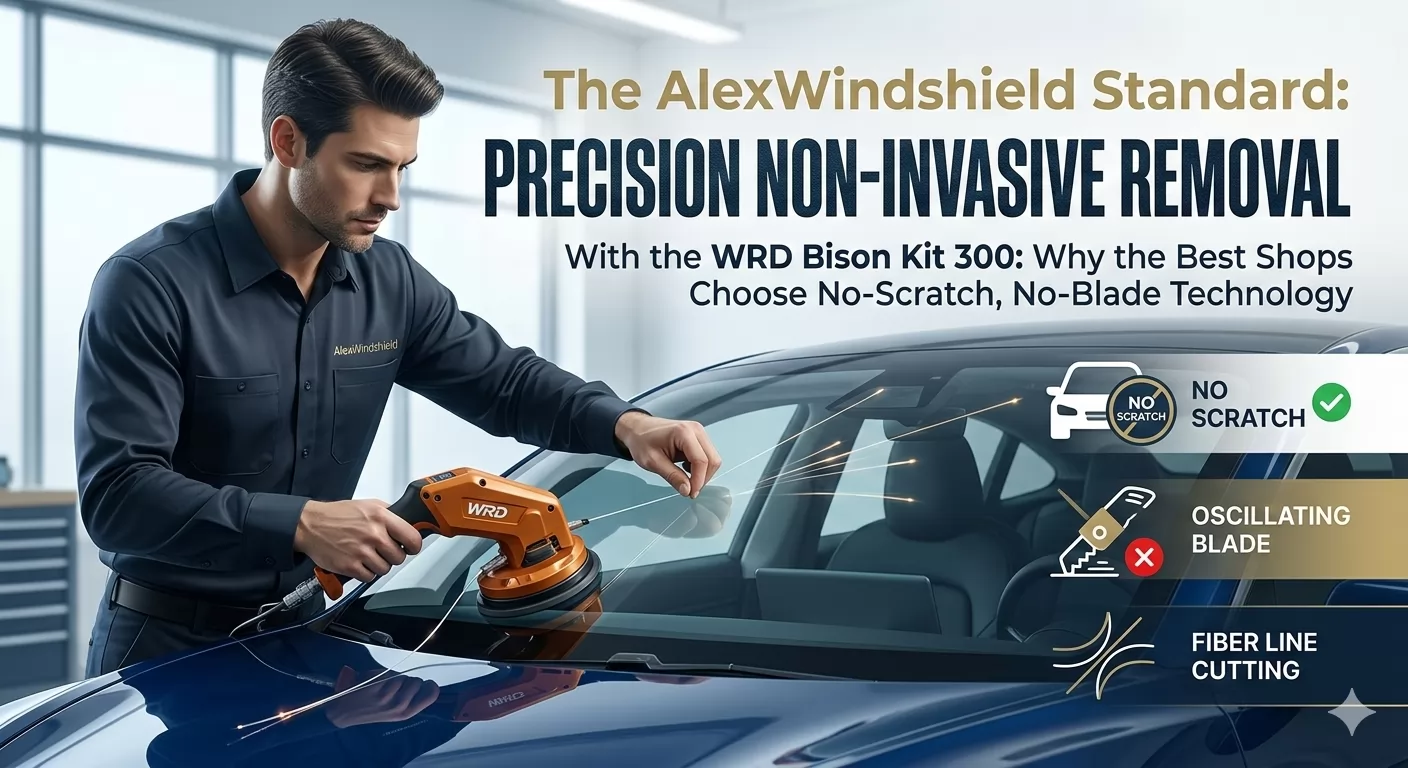
Step 3: Precision Extraction of the Old Glass
Removing the old windshield requires slicing through the factory polyurethane adhesive. Instead of using outdated, aggressive methods that can scratch the pinchweld, our technicians utilize an advanced fiber-line cutting system. By feeding a high-tensile wire through the urethane bead and using a controlled pulley system, we slice through the adhesive from the inside out. This method ensures that the old, damaged windshield is removed cleanly without any risk of damaging the truck's underlying steel frame.
Step 4: Pinchweld Preparation and Surface Cleaning
Once the old glass is removed, the most critical phase of the replacement begins: preparing the pinchweld (the steel frame where the glass sits). First, we use specialized scraping chisels to trim the old polyurethane bead down to a precise thickness of 1-2 millimeters. This thin layer of existing urethane provides the ultimate bonding base for the new adhesive. We then utilize powerful industrial vacuums to remove any trapped dirt, leaves, or micro-shards of glass from the dashboard and defrost vents. Finally, the entire perimeter is scrubbed using an alcohol-based prep solvent to guarantee a mathematically clean bonding surface.
Step 5: Primer Application and High-Quality Adhesive
Older trucks like the 2007-2013 Sierra are highly susceptible to rust if the pinchweld is exposed. If we detect any bare metal scratches from previous, lower-quality installations, we immediately treat the area with a specialized, rust-inhibiting black glass primer. We also apply this primer to the ceramic frit band of the new windshield. Once the primer flashes (dries), we apply a continuous, V-notch bead of premium, high-modulus, non-conductive urethane adhesive around the entire pinchweld. This high-quality adhesive is OEM-certified and provides the vital structural strength required to support the roof in the event of a rollover.
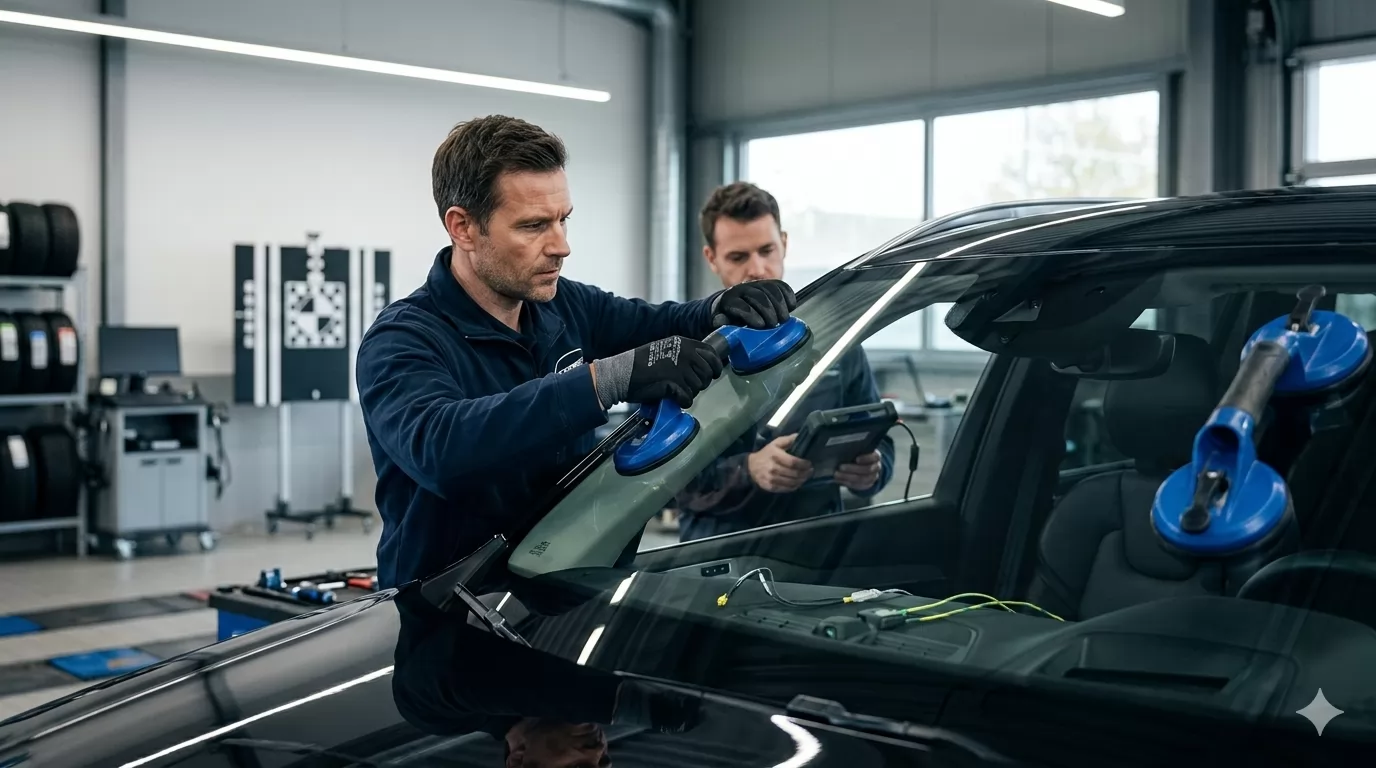
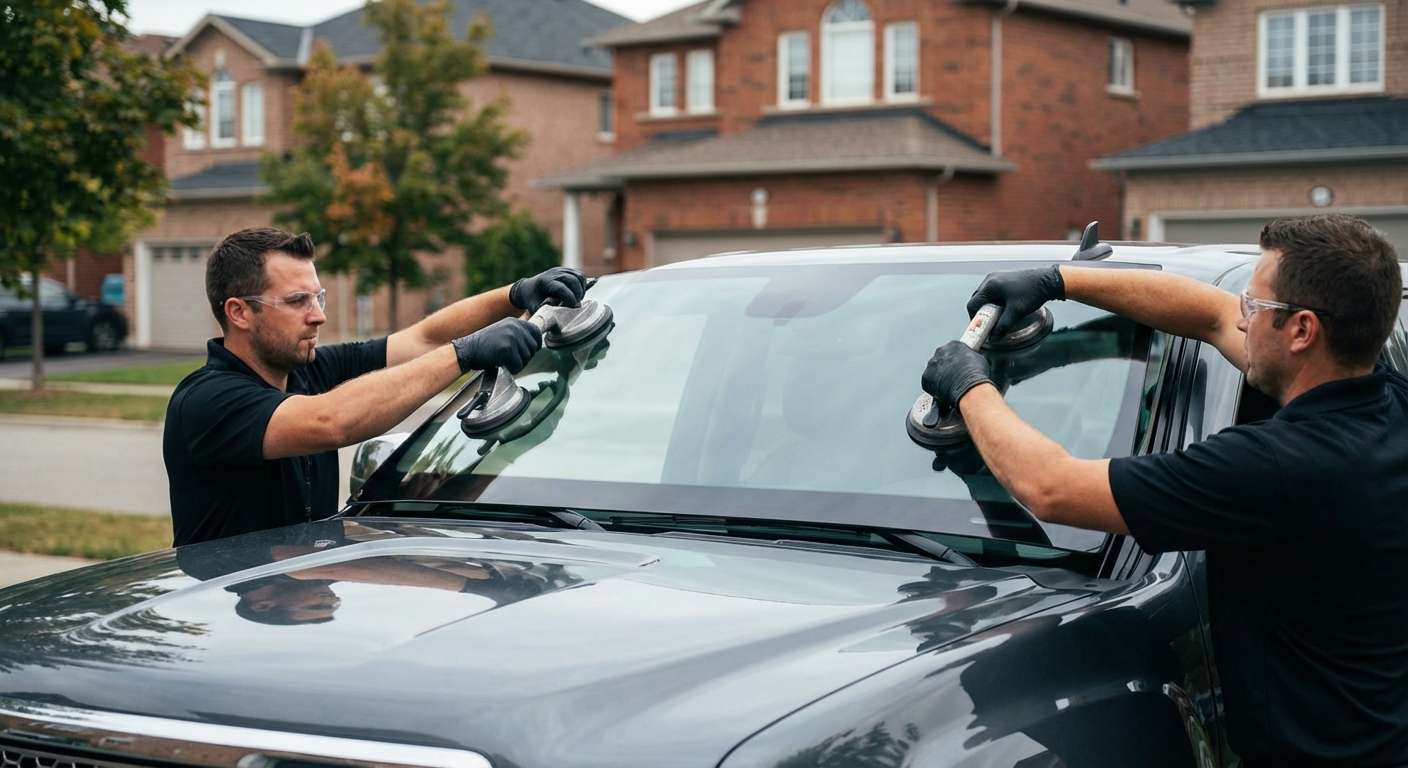
Step 6: Precision Installation of the New Glass
With the urethane applied, time is of the essence. Using professional-grade, heavy-duty suction cups, two master technicians carefully align the new windshield with the truck's frame. We gently set the glass into the wet urethane bed, applying even, controlled pressure to ensure the adhesive spreads uniformly without any gaps or air pockets. This guarantees a watertight seal. We then secure the glass with retention tape and reinstall the cowl, wiper arms, and exterior moldings.
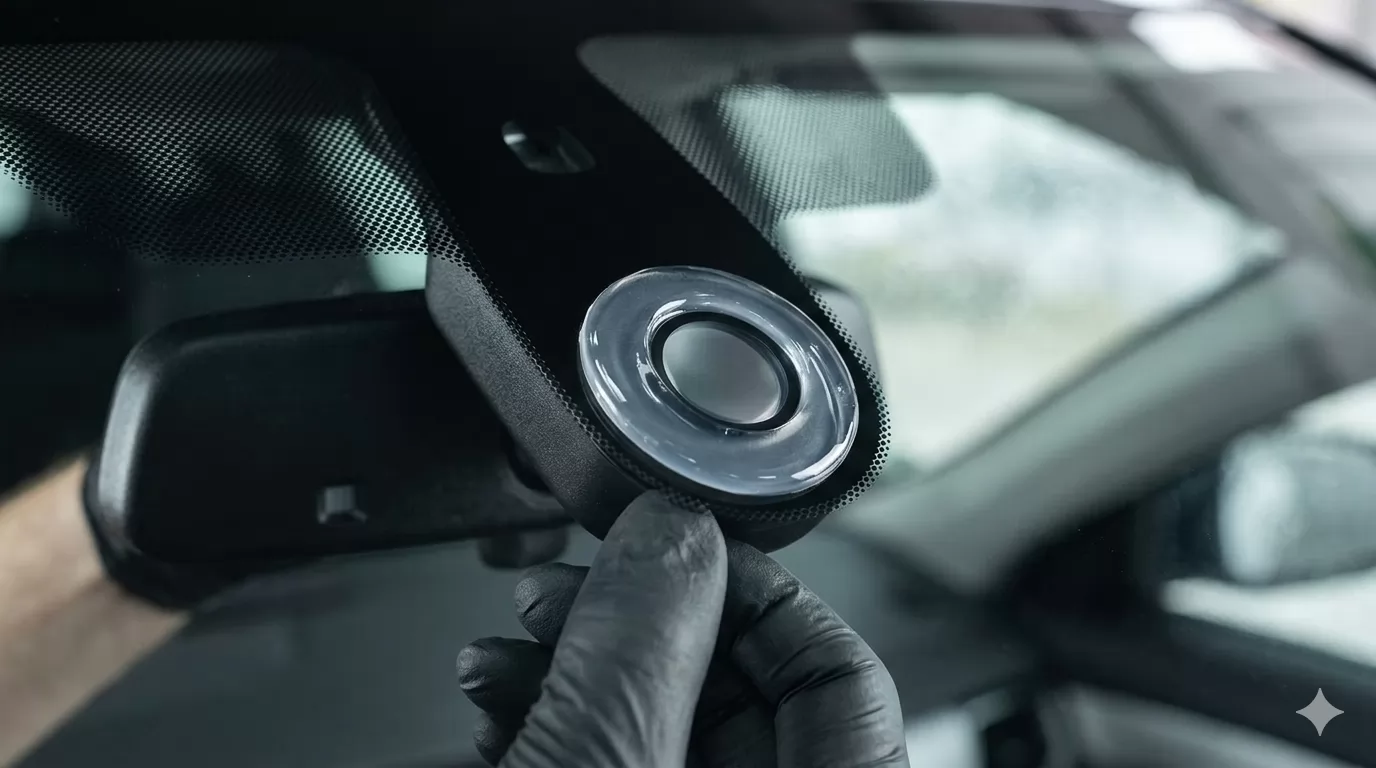
Step 7: Mandatory ADAS Camera Calibration
While the GMC Sierra 1500 2007-2013 represents an earlier generation of automotive technology, top-tier trims (such as the Denali and SLT) featured transitional safety technologies, including sophisticated rain sensors, auto-dimming rearview mirror sensors, and early iteration forward-facing cameras. Because the windshield acts as the physical lens for these systems, a replacement alters their precise viewing angle. Therefore, our mandatory ADAS (Advanced Driver Assistance Systems) camera calibration process is fully initiated.
Using state-of-the-art diagnostic computers and highly precise optical targeting boards, we plug directly into your Sierra's OBD-II port. We run a comprehensive static and dynamic calibration protocol, adjusting the software to recognize the new glass. This step is absolutely non-negotiable in our shop. Failing to calibrate ADAS sensors can result in malfunctioning safety alerts, improper wiper activation, and compromised driver safety. We ensure your truck's brain is in perfect sync with its new eyes.
Choosing the Right Glass: Safety and Structural Integrity
Your windshield is not just a shield against the wind; it is a critical structural component that accounts for up to 30% of your truck's cabin strength. For your GMC Sierra 1500, we source only the highest quality OEE (Original Equipment Equivalent) and OEM auto glass from industry-leading manufacturers. Our glass features the exact same acoustic dampening layers, solar control properties, and exact contouring as the glass installed on the factory floor in Michigan.
- Acoustic Interlayer: Reduces highway wind noise and heavy-duty engine rumble inside the cabin.
- Solar Protection: UV-reflective coatings protect your truck's dashboard from cracking and keep the interior cool.
- Optical Clarity: Zero distortion in the driver's line of sight, preventing eye strain during long hauls.
Post-Installation Care for Your GMC Sierra
After we complete the installation and calibration, the premium urethane requires time to cure. We strictly enforce a Minimum Drive-Away Time (MDAT) based on the specific adhesive used and the ambient humidity in the GTA. To ensure the longevity of your new windshield, we advise the following for the first 48 hours:
- Keep the retention tape in place: Leave the specialized blue tape on the upper edge of the glass for at least 24 hours to prevent the glass from shifting while the urethane fully cross-links.
- Avoid high-pressure car washes: Do not take your truck through an automatic car wash for at least 48 hours. The high-pressure water jets can compromise the fresh urethane seal.
- Leave a window slightly rolled down: When closing your heavy truck doors, the sudden spike in cabin air pressure can push the new glass outward. Leaving a window cracked relieves this pressure.
Trust AlexWindshield for Your Mobile Auto Glass Needs
When you drive a rugged, dependable truck like the GMC Sierra 1500 2007-2013, you need an auto glass partner that matches its toughness and reliability. Do not let an amateur compromise the safety and structural integrity of your vehicle with cheap materials and rushed techniques.
As the trusted experts for mobile auto glass services across the Greater Toronto Area (GTA), we bring master-level craftsmanship directly to you—whether you are parked at home in Vaughan, running errands in Richmond Hill, or managing a site in Markham. Every windshield replacement we perform is backed by our comprehensive Lifetime Warranty, which guarantees against air leaks, water leaks, and manufacturer defects for as long as you own your truck.
Do not compromise on your safety or your truck's performance. Contact AlexWindshield today to schedule your expert windshield replacement, complete with mandatory ADAS calibration and premium urethane bonding. Let us give your GMC Sierra the crystal-clear, durable, and structurally sound glass it deserves.