Restoring Your Family's Fortress: Chrysler Voyager 2020-2024 Quarter Glass Replacement
The 2020-2024 Chrysler Voyager resurrected a legendary nameplate, delivering a budget-friendly, highly capable alternative to its Pacifica sibling. Designed as the ultimate family workhorse, the Voyager features a spacious cabin and excellent visibility. However, when the rear quarter glass is shattered—whether due to an unfortunate break-in, a stray rock on the highway, or a side-impact collision—that sanctuary is immediately compromised. The quarter glass on the Voyager is not just a window; it is a vital structural component that contributes to the vehicle's aerodynamic profile, cabin climate control, and overall acoustic dampening. Leaving this glass broken exposes your third-row passengers to the elements, increases road noise exponentially, and creates a glaring security vulnerability.
As a Master Technician at AlexWindshield, I have witnessed firsthand the stress a shattered window brings to a family. That is exactly why our specialized, rapid-response auto glass replacement services are engineered to bring your vehicle back to factory standards without disrupting your daily routine. We proudly provide top-tier auto glass solutions across the Greater Toronto Area (GTA), with dedicated mobile service routes specifically serving Vaughan, Richmond Hill, and Markham. When you trust us with your Chrysler Voyager, you are getting unparalleled technical expertise backed by years of hands-on experience.
The Technical Blueprint: A Master Technician's A-Z Quarter Glass Replacement Process
Replacing the encapsulated quarter glass on a modern minivan like the 2020-2024 Chrysler Voyager requires much more than just sticking a new piece of glass onto the frame. It is a meticulous, multi-step engineering process. Below is my detailed, step-by-step breakdown of how we execute a flawless quarter glass replacement.
Step 1: Pre-Installation Inspection and Rigorous Interior Protection
Before any tools are lifted, we conduct a comprehensive inspection of the damaged area. We assess the exterior paint for scratches and evaluate the vehicle's interior. Protecting your vehicle is our foremost priority. We apply heavy-duty automotive masking tape around the exterior window frame to safeguard the Voyager's clear coat. Inside, we drape protective drop cloths over the third-row seating, cargo area, and flooring. Because families rely on these vehicles, ensuring that not a single speck of dirt or debris ruins the interior upholstery during our preparation phase is absolutely mandatory.
Step 2: Removal of Interior Panels and Comprehensive Vacuuming
Quarter glass and rear side windows on the Chrysler Voyager are deeply integrated into the vehicle's interior trim. To properly access the inner mounting points and the urethane bead, we must carefully execute the removal of door panels and interior rear-quarter plastic trims. Using specialized nylon pry tools, we detach these panels without breaking the delicate retaining clips. Once the interior framework is exposed, we tackle the most crucial safety step for a family vehicle: vacuuming all broken glass shards from the vehicle's interior. Using high-powered industrial shop vacuums equipped with micro-crevice attachments, we extract every microscopic fragment of tempered glass from the seat tracks, cargo bins, floor mats, and deep within the vehicle's body cavity. We do not stop until the interior is surgically clean and safe for children and pets.
Step 3: Precision Removal of the Old Quarter Glass
With the interior stripped back and cleaned, we move to the extraction of the damaged glass frame. The Chrysler Voyager's quarter glass is permanently bonded to the chassis using industrial-grade polyurethane. We utilize advanced auto glass cut-out tools—such as a braided wire extrusion system or a specialized cold knife—to slice through the factory urethane bond. This step requires a steady hand and immense precision to ensure we cut the adhesive smoothly without nicking the metal pinch weld beneath it. Any damage to the metal could lead to future rust, which is why this step separates true Master Technicians from amateurs.
Step 4: Pinch Weld Preparation and Surface Cleaning
Once the broken quarter glass and its encapsulation are completely removed, the exposed frame (the pinch weld) must be prepared. We cannot simply bond new glass to old, dirty adhesive. We use specialized scraping chisels to trim the existing factory urethane down to a thin, uniform base layer of about 1 to 2 millimeters. This acts as the perfect bonding foundation. Following the trimming, we execute rigorous surface cleaning. We treat the entire perimeter with an alcohol-based, lint-free cleaner to remove dust, natural oils, and any residual moisture. A pristine surface is non-negotiable for the chemical bonding process that follows.
Step 5: Primer Application for Rust Prevention and Adhesion
Even with the utmost care, the factory paint on the pinch weld can occasionally sustain micro-scratches during the old glass removal. To combat this and ensure absolute structural integrity, we perform a vital primer application. We apply a premium, fast-drying black glass primer to any bare metal spots to permanently seal them against rust and corrosion. Furthermore, we apply this specialized primer to the bonding edge of the brand-new Chrysler Voyager quarter glass. This primer acts as a chemical bridge, ensuring that the adhesive bites into both the vehicle frame and the glass encapsulation with maximum grip.
Step 6: Applying High-Quality Adhesive
With the surfaces prepped and primed, we are ready for the bonding agent. We load a high-viscosity, fast-curing automotive polyurethane into an electric caulking gun to ensure a perfectly smooth, continuous application. We lay down a thick, triangular bead of this high-quality adhesive directly onto the pinch weld. The triangular shape is an industry-standard best practice; as the new glass is pressed into place, the peak of the adhesive collapses outward, creating an impenetrable, waterproof seal that guarantees zero wind noise and zero water leaks.
Step 7: Setting the New Quarter Glass
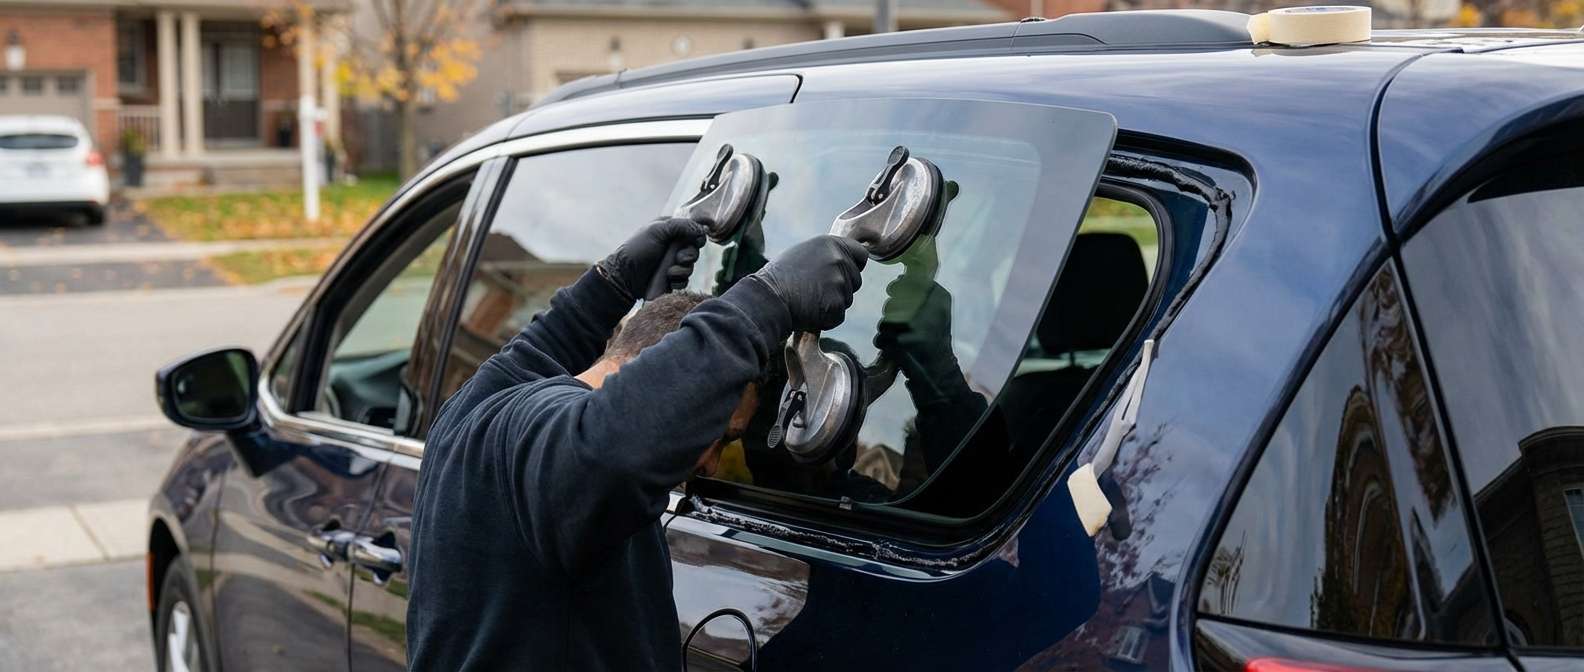
Handling the new quarter glass requires precision alignment. The 2020-2024 Chrysler Voyager features distinct aerodynamic body lines, and the quarter glass must sit perfectly flush with the exterior sheet metal. Using suction cups and a steady hand, the glass is carefully positioned and pressed firmly into the fresh urethane bed. We apply specialized retention tape to hold the glass firmly in its perfect alignment while the initial chemical curing process takes place.
Step 8: Reassembly and Final Quality Assurance
While the urethane begins to cure, we reverse the disassembly process. We meticulously reinstall the interior rear-quarter trim and door panels, ensuring every clip snaps back into its factory position. After the vehicle is put back together, we perform a secondary vacuuming to guarantee absolute perfection. Finally, we clean the newly installed quarter glass with a streak-free, ammonia-free foaming glass cleaner and perform a final inspection of the exterior seals to ensure everything meets our rigorous Master Technician standards.
Understanding Your Chrysler Voyager's Glass Needs in the GTA
Driving in the Greater Toronto Area (GTA) exposes your Chrysler Voyager to extreme temperature fluctuations—from blistering summer heat waves in Vaughan to freezing, ice-laden winters in Richmond Hill and Markham. These massive temperature shifts cause the metal framework of your vehicle to expand and contract. If your quarter glass is installed using inferior, low-grade adhesive or if the surface was improperly prepped, this thermal expansion can cause the bond to fail, resulting in dangerous water leaks that can fry your vehicle's sensitive rear electronics.
By strictly utilizing OEM-equivalent glass and premium-grade urethane, we ensure that your new quarter glass flexes perfectly with the chassis of your Voyager. Furthermore, our robust installation process helps maintain the structural rigidity of the minivan, ensuring that in the unlikely event of a rollover collision, the vehicle's cabin remains strong and intact.
Why AlexWindshield is the Premier Choice for Chrysler Auto Glass
- Unmatched Technical Expertise: We do not cut corners. From the meticulous primer application to the exact calibration of our adhesive beads, every step is performed by heavily trained technicians who understand the specific architecture of the 2020-2024 Chrysler Voyager.
- Comprehensive Safety Protocols: We treat your family's safety as our own, which is why our thorough removal of door panels and intensive interior vacuuming guarantees that no dangerous glass shards are left behind to injure passengers.
- Premium Materials: We exclusively use OEM-quality glass and industry-leading, crash-tested high-quality adhesive to guarantee a permanent, weatherproof bond.
- Ultimate Convenience: You do not need to sit in a waiting room. Our fully equipped mobile service vans bring the auto glass shop directly to your driveway, workplace, or parking lot.
Your Trusted Partner for Mobile Auto Glass Services in the GTA
A broken quarter glass is a major inconvenience, but getting it fixed shouldn't be. At AlexWindshield, we are proud to be the most trusted name for mobile auto glass services across the Greater Toronto Area (GTA). Whether you are parked at a shopping plaza in Markham, working in an office park in Richmond Hill, or resting at your home in Vaughan, our mobile units are fully equipped to perform Master-level auto glass replacements on-site. We stand firmly behind the quality of our craftsmanship, which is why every quarter glass replacement we perform is backed by our comprehensive Lifetime Warranty against leaks, whistling, and manufacturer defects. Don't compromise on your family's safety or your vehicle's integrity—trust the experts at AlexWindshield to restore your Chrysler Voyager to perfection.


