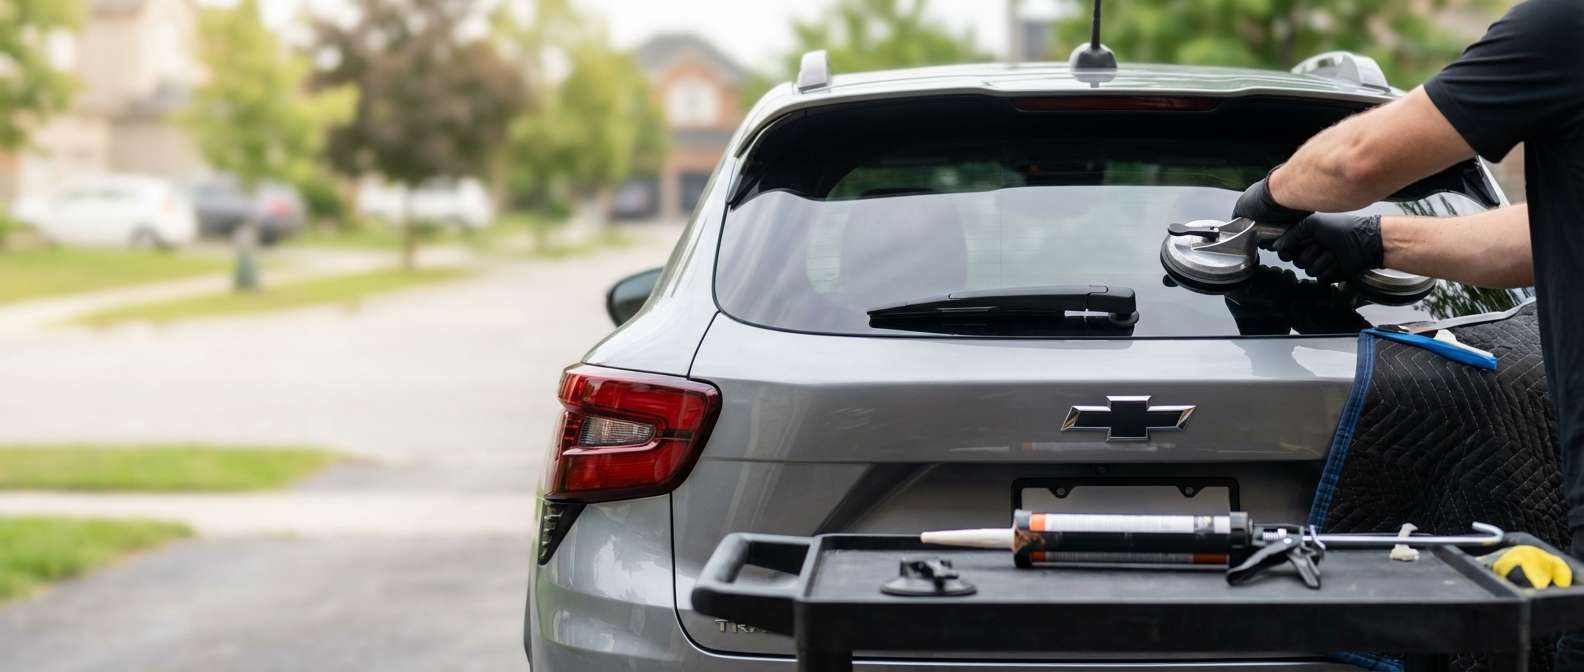
The 2024-2027 Chevrolet Trax: Restoring the Integrity of a Bold Redesign
The completely reimagined 2024-2027 Chevrolet Trax marks a massive departure from its predecessor, boasting a longer wheelbase, muscular proportions, and an aggressively raked rear liftgate that defines its sporty new aesthetic. This sweeping rear architecture isn't just about good looks; the rear glass plays a critical role in the vehicle's structural integrity, aerodynamics, and climate control. However, when an impact, severe weather, or vandalism shatters your rear window, it instantly compromises your vehicle's security and your driving visibility. Because tempered back glass is designed to shatter into thousands of small, blunt pieces upon impact to prevent severe lacerations, a broken rear window leaves your Trax's cabin completely exposed to the elements.
Replacing the back glass on these modern, tech-heavy crossover SUVs requires far more than just slapping on a new piece of glass. It demands the meticulous hands of a Master Technician. At AlexWindshield, we specialize in delivering flawless, factory-standard Chevrolet Trax back glass replacement services, ensuring that your vehicle is returned to its pristine, showroom condition.
Premium Local Auto Glass Services Across the Greater Toronto Area
Driving with a shattered rear window is not only uncomfortable but deeply unsafe, exposing you to exhaust fumes, road debris, and potential theft. We understand that you need immediate, reliable assistance. That is why AlexWindshield brings our state-of-the-art mobile auto glass replacement services directly to your driveway, home, or workplace across the Greater Toronto Area (GTA).
Our fully equipped mobile service vans frequently operate in key GTA communities, providing unparalleled convenience for our clients. We proudly offer dedicated, rapid-response services in:
- Vaughan: Whether you are near Vaughan Mills or working in the corporate sectors of Woodbridge, our technicians arrive promptly to secure your Chevy Trax.
- Richmond Hill: Navigating the busy stretches of Yonge Street requires perfect visibility. We provide on-site back glass replacement for Richmond Hill residents, ensuring zero disruption to your daily schedule.
- Markham: From Unionville to the tech hubs of Markham, we deliver precise, tech-forward auto glass installations right to your location.
The Anatomy of the 2024-2027 Chevrolet Trax Back Glass
Before diving into the replacement process, it is essential to understand the complex components integrated into the rear glass of the modern Chevrolet Trax. The 2024-2027 models feature a highly integrated rear liftgate system. The back glass is not merely a window; it houses the rear defroster grid essential for Canadian winters, specialized mounting points for the rear windshield wiper motor assembly, and integrated radio antenna elements. A precise replacement ensures that all these electronic components function seamlessly without draining the vehicle's battery or short-circuiting the electrical system.
Step-by-Step Back Glass Replacement Process: The Master Technician Approach
As a senior Master Technician at AlexWindshield, I follow a strict, uncompromising A to Z protocol for every back glass replacement. Unlike a front windshield, a shattered rear window creates an immense mess of tempered glass shards that infiltrate every crevice of your vehicle. Here is our rigorous, step-by-step technical process tailored specifically for the 2024-2027 Chevrolet Trax.
Step 1: Pre-Inspection and Thorough Interior Protection
The moment we arrive on-site, the first step is safeguarding the interior of your Trax. We begin by laying down heavy-duty protective drop cloths over the rear cargo area, folding down the rear seats, and covering the interior upholstery. We also apply protective automotive tape around the exterior painted edges of the liftgate to ensure our specialized cutting tools do not scratch the clear coat or paint during the extraction process.
Step 2: Interior Trim Removal and Component Disconnection
Because the back glass has completely shattered, fragments of glass inevitably fall into the hollow cavity of the rear liftgate door. To do the job correctly, we must safely remove the interior plastic trim panels of the rear liftgate. Using specialized, non-marring nylon pry tools, we carefully unclip the rear interior door panels to expose the inner mechanics of the trunk lid. Once the panels are removed, we meticulously disconnect the wiring harnesses for the rear defroster tabs, the rear wiper motor, and the high-mount third brake light.
Step 3: Comprehensive Vacuuming of Broken Glass Shards
This is arguably the most critical step distinguishing a Master Technician from an amateur. Tempered glass breaks into thousands of tiny pebbles. We use high-powered, industrial shop vacuums to extract every single piece of glass from the cargo area, the rear seat folds, and the child seat anchors. Furthermore, we manually actuate the bare liftgate up and down, listening for rattling, and vacuum deep inside the internal cavity of the door panels. Vacuuming all broken glass shards from the vehicle's interior ensures you will not hear annoying rattles every time you close your trunk, nor will you risk injury to passengers or pets.
Step 4: Safely Removing the Damaged Back Glass
Even though the center of the glass is shattered, the outer perimeter (the frit band) remains glued to the vehicle's frame by the original factory urethane. Using an advanced cold knife or a specialized fiber-wire cutting system, we slice through the tough, rubbery urethane adhesive completely around the perimeter of the liftgate. This releases the remaining glass frame and clears the opening for the new installation.
Step 5: Pinch Weld Preparation and Surface Cleaning
Once the old glass frame is removed, we are left with a thick ridge of old urethane on the vehicle's frame, known as the pinch weld. We use specialized shaving blades to trim this old urethane down to a thin, even layer of about 1 to 2 millimeters. This provides the optimal base for the new adhesive to bond chemically. We then clean the entire pinch weld and the surrounding liftgate area with an ammonia-free, foaming auto glass cleaner to remove dirt, grease, and any microscopic glass dust.
Step 6: Primer Application for Maximum Adhesion
If our cutting tools exposed any bare metal on the pinch weld during the removal process, we immediately treat it with a high-quality bare metal primer to prevent future rust—a crucial step for longevity in the harsh climate of the GTA. Next, we prepare the brand-new OEM-equivalent back glass. We clean the inside perimeter and apply a specialized glass primer to the black frit band. This primer acts as a chemical bridge, ensuring the urethane adhesive creates a permanent, watertight, and airtight bond with the glass.
Step 7: Applying High-Quality Urethane Adhesive
With the surfaces prepped and primed, we load a tube of premium, fast-curing high-quality automotive urethane adhesive into our electric caulking gun. A Master Technician knows that the shape of the urethane bead is vital. We apply a precise "V-bead" of urethane perfectly aligned over the old trimmed adhesive track. The V-shape ensures that when the glass is pressed into place, the adhesive collapses evenly, eliminating the risk of air pockets, wind noise, or water leaks.
Step 8: Precision Installation of the New Glass
Using heavy-duty suction cup grips, the new Chevrolet Trax back glass is carefully lifted and maneuvered into the exact position. Because the Trax's liftgate has a very specific curvature, alignment must be perfect on the first try. We gently press the glass into the fresh urethane bed, ensuring it seats to the correct depth flush with the vehicle's body lines. We then use specialized retention tape to hold the glass firmly in place while the chemical curing process begins.
Step 9: Reassembly and Post-Installation Quality Check
While the urethane flashes and begins to cure, we reverse the disassembly process. We reconnect the rear wiper motor, reattach the delicate defroster wiring tabs, and snap the interior door panels back into their factory positions, ensuring no clips are broken. Finally, we perform a thorough post-installation inspection. We clean the new glass inside and out, test the defroster circuit with a multimeter, and verify that the rear wiper operates flawlessly. We also advise the client on the Safe Drive-Away Time (SDAT), ensuring the vehicle is not driven until the high-quality adhesive has reached its optimal structural strength.
Mobile Auto Glass Service Excellence You Can Trust
A broken back glass disrupts your life, but the repair process doesn't have to. At AlexWindshield, we have optimized our mobile service to bring the auto glass shop directly to you. Whether you are parked in a residential driveway in Vaughan, at a commercial plaza in Richmond Hill, or at your office in Markham, our technicians carry the specialized tools, generators, and premium materials required to execute a flawless, factory-grade installation anywhere in the Greater Toronto Area.
Choose AlexWindshield: Lifetime Warranty & Expert Care
Your 2024-2027 Chevrolet Trax deserves nothing less than premium parts and masterful execution. Cutting corners on auto glass replacement can lead to electrical failures in your defroster, severe water leaks that ruin your interior, or compromised safety in the event of a collision. When you choose us, you are choosing peace of mind.
Make the right choice for your vehicle. Rely on AlexWindshield, the most trusted expert for mobile auto glass services in the GTA. Every single back glass replacement we perform is backed by our comprehensive Lifetime Warranty against leaks, whistling, and manufacturer defects. Contact AlexWindshield today to restore your Chevrolet Trax to perfection with unparalleled safety, quality, and convenience.


