Restoring the Silence: Premium Windshield Replacement for Buick Verano (2012-2017)
The Buick Verano, particularly the models manufactured between 2012 and 2017, was engineered with a singular focus that set it apart from its compact luxury competitors: QuietTuning® technology. General Motors utilized acoustic laminated glass, triple door seals, and specific chassis tuning to block road noise and vibration. When your windshield sustains damage, it isn't just a cosmetic issue or a structural safety concern—it is a breach in the carefully calibrated acoustic envelope of your vehicle. A standard replacement with inferior glass will destroy the silent cabin experience you paid for.
At AlexWindshield, we do not simply swap glass; we restore the architectural integrity of your vehicle. As the premier auto glass experts in the Greater Toronto Area (GTA), we specialize in the specific requirements of the Buick Verano. From the acoustic interlayer specifications to the precise calibration of the Lane Departure Warning System (LDWS) found in the Convenience, Leather, and Premium groups, our Master Technicians deliver factory-grade results right to your driveway.
The Critical Importance of Acoustic Glass and ADAS in the Buick Verano
Before we begin the replacement process, it is vital for Verano owners to understand what makes their windshield unique. The 2012-2017 models are often equipped with acoustic interlayers—a specialized vinyl layer sandwiched between two sheets of glass designed to dampen sound frequencies from wind and tires.
Furthermore, many of these models feature Advanced Driver Assistance Systems (ADAS). If your Verano is equipped with features like Forward Collision Alert or Lane Departure Warning, there is a camera mounted directly to the windshield, behind the rearview mirror. This camera "looks" through the glass to monitor road markings and traffic. Replacing the windshield disrupts the camera's alignment.
At AlexWindshield, we handle the entire spectrum of glass specifications for your Verano:
- Acoustic Interlayer Verification: Ensuring the new glass meets GM’s QuietTuning standards.
- Rain Sensor Integration: Proper re-gelling and attachment of rain-sensing wipers.
- Solar Coated Glass: verifying heat-rejection properties if your model requires it.
- ADAS Camera Brackets: Ensuring the mounting hardware is OEM-equivalent for stability.
Service Coverage: Vaughan, Richmond Hill, Markham, and the GTA
We understand that driving with a cracked windshield is hazardous, and taking time off work to visit a shop is inconvenient. That is why AlexWindshield brings the repair shop to you. Our fully equipped mobile units operate extensively throughout the Greater Toronto Area.
Whether you are parked at a residence in Richmond Hill, working at an office complex in Markham, or shopping in Vaughan, our mobile service incurs no extra travel fees. We carry all necessary equipment, including power generators, urethane warming systems, and calibration tools, to perform a dealership-level installation on-site.
Step-by-Step Replacement Process: The Master Technician Standard
Replacing a windshield on a 2012-2017 Buick Verano requires a disciplined, multi-stage approach to ensure safety, leak-proof performance, and acoustic sealing. Below is the detailed A-to-Z process our technicians follow.
Phase 1: Pre-Inspection and Vehicle Protection
Before a tool touches your car, we perform a comprehensive safety check. We verify the functionality of your wipers, rain sensors, and the current status of your ADAS camera systems. We document any pre-existing issues to ensure total transparency.
Interior and Exterior Protection: We treat your vehicle with the utmost respect. We apply protective tape to the exterior body panels and fender covers to prevent scratches. Inside, we cover the dashboard, steering wheel, and front seats with heavy-duty protective sheets. This prevents debris, old urethane, or glass shards from soiling your high-quality Verano interior.
Phase 2: Disassembly and Component Removal
To access the glass properly, we must remove several components:
- Wiper Arm Removal: Utilizing a specialized puller tool to remove the wiper arms without damaging the splines or the alignment nuts.
- Cowl Panel Removal: The plastic cowling (the grille at the base of the windshield) is carefully unclipped and removed to expose the bottom edge of the glass.
- Mirror and Sensor Detachment: Inside the vehicle, we carefully disconnect the rearview mirror, the humidity sensor, and the ADAS camera module housing, ensuring no stress is placed on the wiring harnesses.
- Trim Removal: We remove the side moldings (A-pillar trims) if applicable, using non-marring plastic pry tools to save the retaining clips.
Phase 3: Safe Glass Removal
This is the most delicate part of the operation. Many budget shops use "cold knives" that can scratch the pinchweld (the metal frame), leading to hidden rust months later. At AlexWindshield, we prefer the Wire Cutting Method.
We thread a high-tensile cutting wire through the adhesive bead and use a pulley system to slice through the old urethane. This method exerts zero pressure on the vehicle body and guarantees that the paint on the pinchweld remains intact. Once the seal is broken, two technicians carefully lift the old glass away from the vehicle.
Phase 4: Pinchweld Preparation and Rust Prevention
The bonding surface must be chemically pure for the new adhesive to hold during a crash.
- The "Full Cut": We trim the existing urethane bead down to approximately 1-2mm. This provides the perfect base for the new adhesive to bond to.
- Decontamination: We scrub the pinchweld and the new glass ceramic band with a specialized activator to remove all grease, silicone, and road grime.
- Priming: If any minor scratches occurred on the metal frame during removal, or if previous replacements left exposed metal, we apply a high-grade Black Primer. This acts as a rust inhibitor and an ultraviolet shield for the adhesive.
Phase 5: High-Performance Adhesive Application
We do not use generic glue. We utilize Sika® or DOW® High-Modulus, Non-Conductive Urethane. This is critical for the Buick Verano because:
- Non-Conductive: It ensures no interference with the radio antenna or GPS systems often embedded in or near the glass.
- High-Modulus: It adds structural rigidity to the vehicle body, mimicking the factory stiffness required for optimal handling and rollover safety.
Using a battery-operated caulking gun for a consistent flow rate, we apply the adhesive in a "V-Bead" profile. The V-shape ensures that when the glass is pressed down, the glue spreads evenly without trapping air bubbles, guaranteeing a watertight seal.
Phase 6: Precision Installation
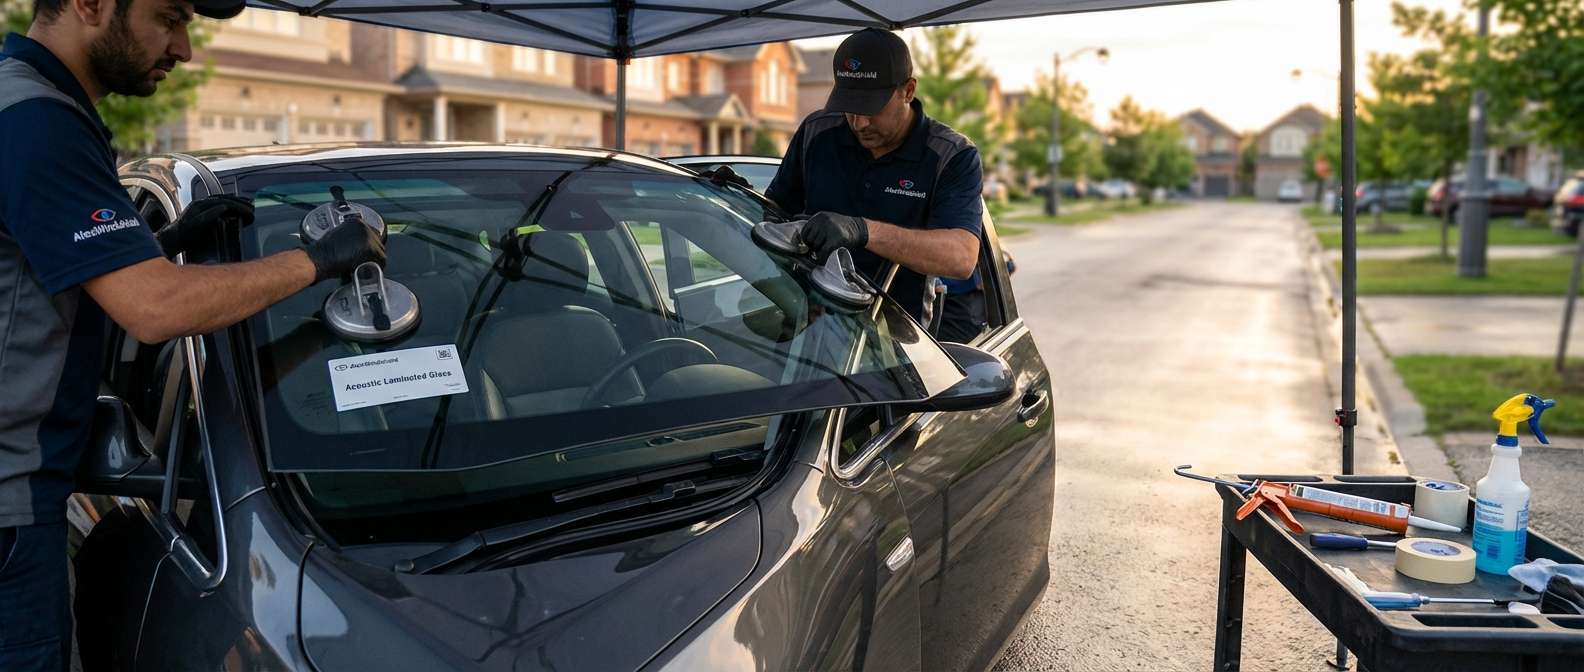
Using heavy-duty suction cups (vacuum lifters), our technicians align the new windshield with the vehicle frame. We carefully lower it onto the fresh urethane bead. We check the alignment against the roofline and the A-pillars to ensure the gaps are symmetrical. Once positioned, we gently press the glass to set the bond.
Phase 7: Reassembly and Clean-Up
We reinstall the cowl grid, ensuring the rubber weatherstripping sits flush against the new glass. The wiper arms are reattached and torqued to spec, verifying they are aligned correctly in the "park" position. The rearview mirror and sensor clusters are remounted.
Finally, we clean the new windshield inside and out with professional glass cleaner and vacuum the dashboard and footwells to remove any microscopic debris.
Mandatory ADAS Camera Calibration
For Buick Verano models (2012-2017) equipped with the Driver Confidence Package, physical installation is only half the job. The forward-facing camera, which governs the Lane Departure Warning and Forward Collision Alert, relies on the windshield's optical clarity and position.
Even a variance of 1 millimeter in the glass position can result in the camera looking several meters off-target down the road. This can cause the safety systems to fail or trigger false alarms.
AlexWindshield provides comprehensive ADAS Calibration:
- Dynamic Calibration: For many GM vehicles of this era, a handheld calibration tool is plugged into the OBDII port. Our technician then drives the vehicle at specific speeds on clearly marked roads in Vaughan, Markham, or Richmond Hill to allow the camera to "re-learn" the road geometry.
- Static Calibration: If required by the specific trim level, we set up precise targeting boards at exact distances and heights in front of the vehicle to calibrate the camera before the car moves.
We provide a calibration certificate upon completion, verifying that your safety systems are active and accurate.
Why Choose AlexWindshield for Your Buick Verano?
Your Buick Verano is a sophisticated machine designed for comfort and quiet luxury. It deserves more than a budget "quick-fix." At AlexWindshield, we combine technical mastery with exceptional customer convenience.
- Mobile Convenience: We come to you anywhere in the GTA, including Vaughan, Richmond Hill, and Markham.
- Lifetime Warranty: We stand behind our workmanship. Our installation comes with a lifetime warranty against wind noise, water leaks, and manufacturer defects for as long as you own the vehicle.
- Insurance Approved: We work directly with all major insurance providers in Canada, handling the paperwork to make your claim hassle-free.
- Safety First: From using OEM-quality acoustic glass to performing mandatory ADAS calibrations, we prioritize the safety of you and your passengers above all else.
Don't compromise the silence or safety of your ride. Trust the Master Technicians who understand the engineering behind your vehicle.
Contact AlexWindshield today at [Insert Phone Number] or request a free quote online to schedule your Buick Verano windshield replacement. Drive with clarity, drive with confidence.


