Restoring the Silence: Premium Door Glass Replacement for the 2004-2007 Buick Rainier
The 2004-2007 Buick Rainier holds a unique place in automotive history as the first truck-based SUV from the marque since the early 1990s, blending the rugged utility of the GMT360 platform with Buick’s signature "QuietTuning" technology. Owners of this vehicle appreciate the laminated glass, acoustic insulation, and refined ride that set it apart from its Chevrolet and GMC cousins. However, when a side window is shattered due to road debris, vandalism, or an unfortunate accident, that carefully engineered sanctuary is instantly compromised. Replacing the door glass on a Rainier is not merely about patching a hole; it is about restoring the structural integrity and the acoustic seal that defines the driving experience. At AlexWindshield, we specialize in the meticulous restoration of these specific models, ensuring your SUV remains as quiet and secure as the day it left the assembly line.
Understanding the 2004-2007 Buick Rainier Side Glass Architecture
Before diving into the replacement process, it is vital to understand what makes the glass on your Buick Rainier specific. Unlike standard economy vehicles of the mid-2000s, the Rainier was equipped with high-quality tempered safety glass designed to shatter into granular chunks rather than sharp shards to protect occupants. Whether you require a front driver-side window or a rear passenger door glass, the curvature and tint level (often privacy tint for rear windows) must match factory specifications perfectly.
Furthermore, the internal mechanisms of the Rainier's doors—specifically the window regulators and motors—are known points of wear on this vehicle platform. When glass breaks, the impact often damages these plastic clips and cables. Our service at AlexWindshield goes beyond simple glass swapping; we perform a comprehensive diagnostic of the door's internals to ensure long-term functionality.
A Master Technician’s Guide: The Step-by-Step Replacement Process
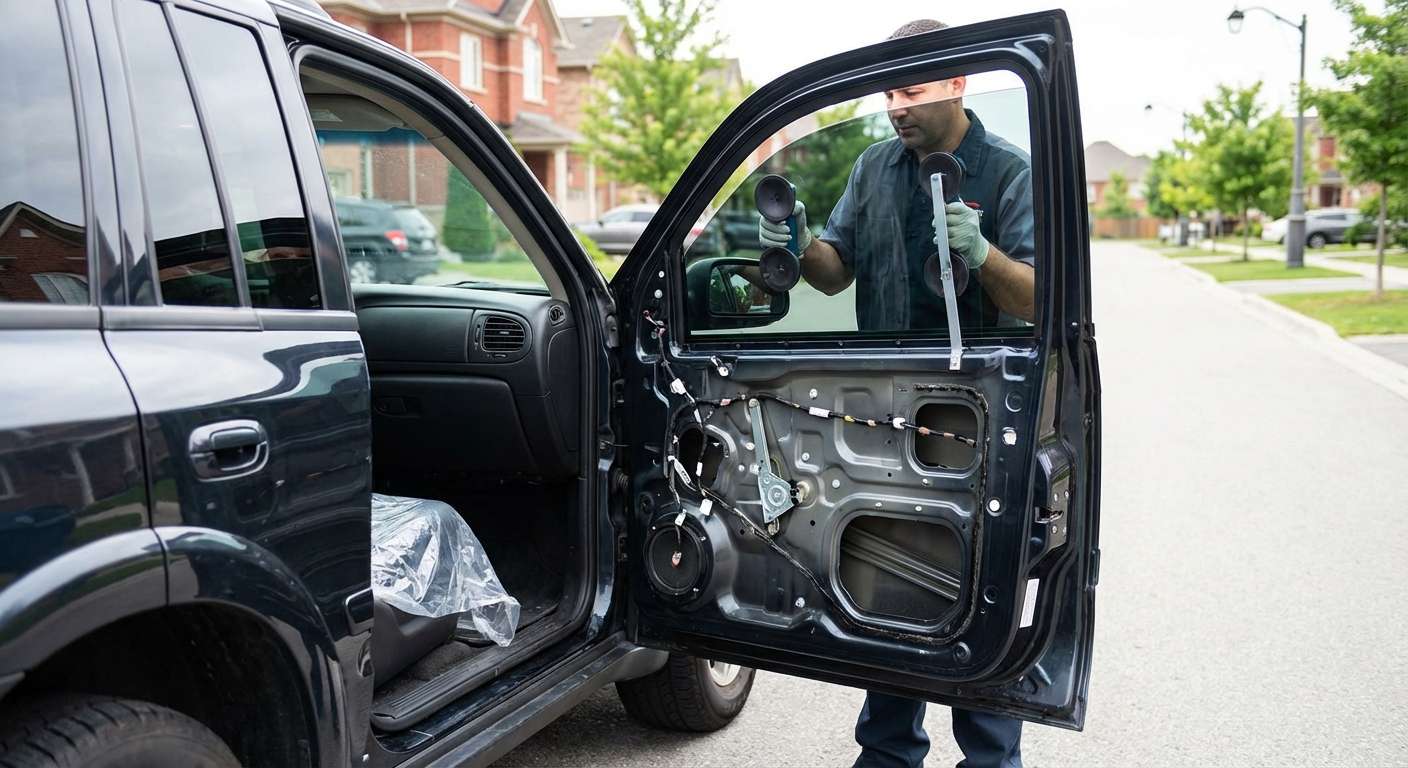
As a Master Technician, I adhere to a rigorous protocol when servicing the 2004-2007 Buick Rainier. A door glass replacement is significantly more complex than a windshield replacement because it involves dismantling the vehicle's interior. Below is our detailed, A-to-Z process for restoring your vehicle.
Phase 1: Site Preparation and Safety Protocols
Whether we are performing a mobile auto glass service in your driveway in Vaughan or at your office in Markham, safety is paramount. The process begins before we touch the vehicle.
- Interior Protection: We apply protective covers to your leather seats, steering wheel, and center console. The Buick Rainier often features wood-grain trim which is susceptible to scratches; we tape off these areas specifically to prevent accidental damage during tool usage.
- Exterior Shielding: To prevent scratches on the paintwork below the window line, we apply low-tack automotive masking tape and protective fender covers.
- Debris Containment: Before beginning removal, we stabilize any remaining glass in the window frame with adhesive film to prevent it from crumbling further during the door slam or panel removal.
Phase 2: Disassembly of the Door Panel
To access the glass mounting points, the interior door panel (card) must be removed. The 2004-2007 Rainier utilizes a combination of hidden screws and pressure clips.
- Hardware Removal: We carefully locate and remove the retention screws hidden behind the interior door handle bezel and inside the armrest pull cup. Using non-marring pry tools, we also remove the triangular trim piece near the side-view mirror (for front doors) or the rear quarter trim (for rear doors).
- Switch Disconnection: We gently pry up the master window switch control panel. The wiring harnesses on GM vehicles of this era can become brittle over time; we use specialized pick tools to release the locking tabs without breaking the connectors.
- Panel Separation: Using a wide-fork trim tool, we pop the pressure clips surrounding the perimeter of the door panel. The panel is then lifted upward to clear the lock rod and removed from the door frame.
Phase 3: The Critical "Clean-Out" Phase
This is the step that separates amateur shops from AlexWindshield professionals. When side glass breaks, thousands of cubes of tempered glass fall inside the door cavity.
- Vapor Barrier Management: We carefully peel back the weather-seal vapor barrier. Tearing this barrier leads to moisture entering the vehicle cabin later, causing mold or electrical issues. We preserve the butyl adhesive so it can be resealed perfectly.
- Vacuuming the Cavity: Using a high-powered industrial vacuum with a flexible crevice attachment, we reach deep into the bottom of the door shell. We vacuum every single shard of glass.
- Manual Debris Removal: Sometimes glass gets stuck in the grease of the window regulator tracks or the door drain holes. We manually inspect and clear these areas. Failure to do this results in a permanent "rattling" sound every time you close the door or drive over a bump. We ensure your Buick Rainier remains rattle-free.
Phase 4: Regulator Inspection and Glass Preparation
The Buick Rainier utilizes a window regulator system that clamps onto the bottom of the glass. We lower the regulator to the "service position" to access the mounting clamps.
- Debris Clearing from Tracks: We run a cleaning tool through the vertical rubber run channels (the tracks the window slides in). Any glass dust left here will scratch your new window immediately upon first use.
- Primer Application: If the new glass has metal attachment tabs (common on some rear windows), we ensure the bonding is secure. However, for most side windows, it is a clamp system. We inspect the rubber inserts in the clamps to ensure they are soft and pliable, replacing them if they are dry-rotted.
Phase 5: Installation of the New Glass
We source only OEM-equivalent glass that matches the thickness and tint of your original Buick equipment.
- Insertion Angle: The new glass is carefully maneuvered into the door frame. This requires a specific technique: the front of the glass is dipped in first at a steep angle, rotated to align with the vertical tracks, and then leveled out. This prevents scratching the B-pillar blackout tape or the exterior weatherstripping.
- Securing the Glass: Once the glass is seated in the regulator clamps, we hand-tighten the fasteners. We then power the window up and down to ensure it tracks perfectly straight and seals tightly at the top without binding. Once verified, we torque the bolts to manufacturer specifications.
Phase 6: Reassembly and Final Quality Control
The job isn't done until the vehicle looks untouched.
- Vapor Barrier Reseal: We re-adhere the moisture barrier, applying fresh butyl tape if necessary to ensure a waterproof seal.
- Panel Installation: The door panel is re-hung, ensuring the lock rod moves freely. All clips are snapped back into place, and screws are tightened.
- Switch Testing: We test the window operation multiple times, including the "auto-down" feature if equipped on the driver's side. We also verify the door locks and speaker functionality, as wiring can sometimes be disturbed during the process.
- Final Vacuum: We perform a final vacuum of the vehicle's interior carpets and seats to ensure no stray glass fragments remain.
Serving the Greater Toronto Area with Excellence
A broken side window leaves your vehicle vulnerable to weather and theft. You cannot afford to wait days for an appointment. AlexWindshield offers rapid response times across the entire Greater Toronto Area (GTA). We understand the specific local driving conditions and needs of our clients in:
- Vaughan: From the busy parking lots of Vaughan Mills to the residential driveways of Maple, our mobile units are constantly in the area.
- Richmond Hill: We service the entire Yonge Street corridor and surrounding neighborhoods, providing premium glass solutions right at your doorstep.
- Markham: Whether you are near the tech hubs or historic Unionville, our technicians can perform the replacement while you work or relax at home.
Our mobile service vans are fully equipped workshops on wheels. We bring the power, the lighting, and the tools necessary to perform a shop-quality replacement anywhere in the GTA, regardless of the season.
Why the Buick Rainier Requires Specialized Attention
Many generalist auto repair shops treat all side windows the same. However, the Buick Rainier (and the GMT360 platform) has specific drainage designs in the doors. If broken glass blocks the bottom drain holes, water will accumulate inside your door during the heavy rains common in Southern Ontario. This standing water can corrode the bottom of the door and destroy the window motor and speakers.
At AlexWindshield, our technicians are trained to specifically look for and clear these drain paths during the vacuuming phase. We don't just fix the window; we prevent future rust and electrical failure. This attention to detail is what defines a Master Technician's approach to auto glass.
Trust AlexWindshield for Your Buick Repair
Your Buick Rainier was built to provide a luxurious, quiet, and safe ride. Don't compromise those qualities with subpar glass or hasty installation techniques. When you choose AlexWindshield, you are choosing:
- Lifetime Warranty: We stand behind our workmanship. If you ever experience wind noise, water leaks, or loose glass due to our installation, we fix it for free for as long as you own the vehicle.
- Mobile Convenience: We come to you in Vaughan, Richmond Hill, Markham, and throughout the GTA at no extra hassle.
- Expertise: Our technicians are certified and experienced with the nuances of older luxury SUVs like the Buick Rainier.
Restore the safety and silence of your vehicle today. Contact AlexWindshield for a quote and experience the highest standard of auto glass replacement in Toronto.


