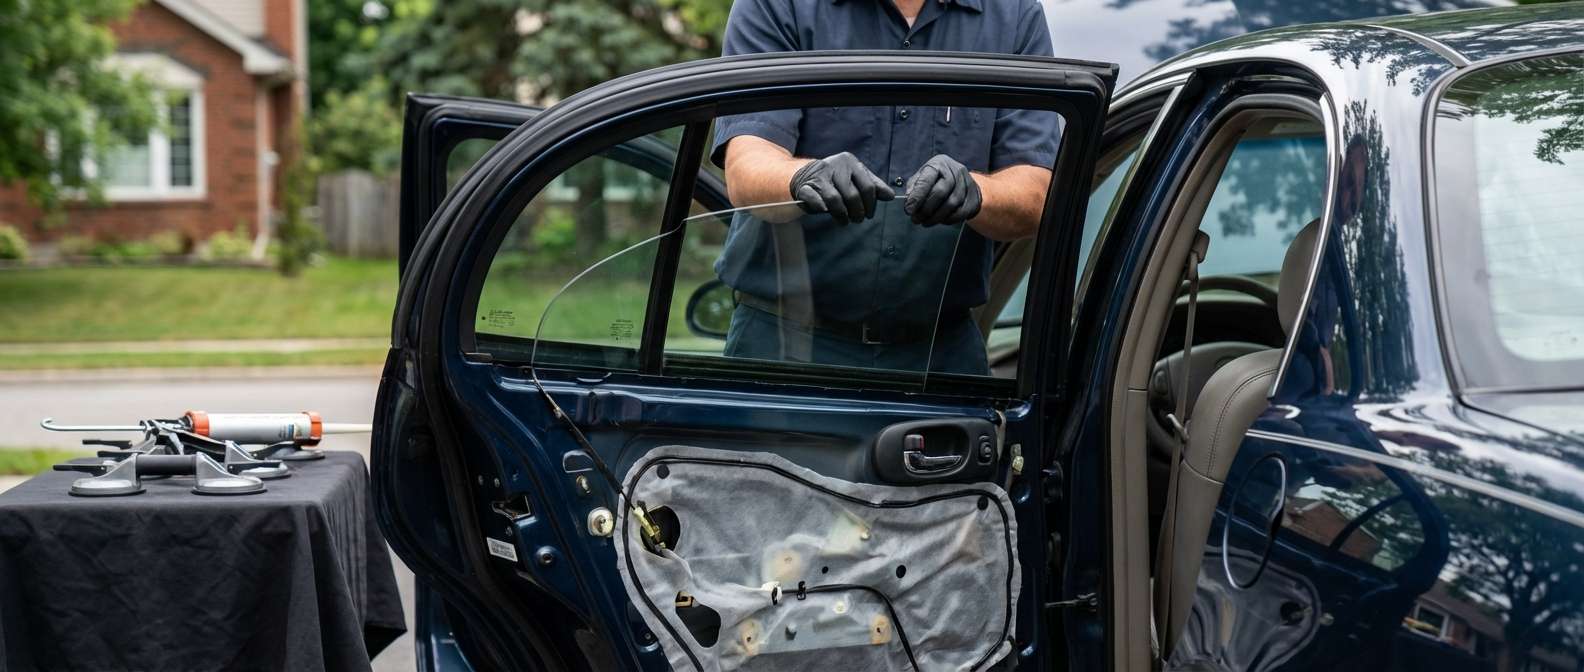
Restoring the Silence: Vent Glass Replacement for the 2000-2005 Buick LeSabre
The 2000-2005 Buick LeSabre stands as a testament to the golden era of full-size American sedans. Known for its bulletproof 3.8L Series II V6 engine and a ride quality that floats over imperfections, this vehicle was designed for one primary purpose: uncompromising comfort. However, that serene driving experience is instantly shattered when the vent glass—the small, triangular stationary window usually located in the rear door frame—is damaged. Unlike a simple chip in a windshield, a broken vent glass creates immediate vulnerability to weather, theft, and deafening wind noise.
At AlexWindshield, we understand that owners of these classic LeSabres are not just driving "old cars"; they are preserving a piece of automotive history. A generic repair job isn't enough. You require a Master Technician who understands the intricate door assemblies of early 2000s General Motors vehicles. Whether you are located in Vaughan, Richmond Hill, or Markham, our specialized team brings the repair shop to your driveway, ensuring your Buick is sealed, secure, and silent once again.
Understanding the Role of Rear Vent Glass in the Buick LeSabre
On the 2000-2005 Buick LeSabre, the rear door glass system is comprised of two distinct parts: the main "drop glass" (the window that rolls up and down) and the quarter vent glass. This smaller, triangular piece is stationary. While it may look insignificant compared to the windshield, it plays a critical structural role in the door frame. It helps guide the main window as it tracks up and down and provides the seal necessary to maintain cabin pressure and climate control.
Because this glass is tempered, it does not crack like a windshield when struck; it explodes into thousands of small, pebble-like shards. This safety feature prevents large, jagged daggers of glass from injuring occupants, but it creates a massive cleanup scenario inside the door panel. Replacing this specific part requires more than just gluing in a new piece of glass; it requires a comprehensive disassembly of the door’s interior ecosystem.
Step-by-Step Technical Replacement Protocol
As a Master Technician at AlexWindshield, I follow a rigorous, factory-spec protocol for every replacement. The following is our A-Z process for a Buick LeSabre vent glass replacement, ensuring that the structural integrity and aesthetic of your vehicle remain 100% intact.
Phase 1: Pre-Work Inspection and Interior Protection
Before a single tool touches your vehicle, we perform a pre-inspection. We check the operation of the window regulator (the motor that moves the main glass) to ensure the impact that broke the vent glass didn't damage the mechanical components. We then deploy protective covers over the leather or cloth seats, the steering wheel, and the exterior paint below the window line to prevent scratches from falling debris or tools.
Phase 2: Comprehensive Interior Door Panel Removal
To access the mounting points of the vent glass on a 2000-2005 LeSabre, the interior door card (panel) must be removed. This is a delicate process on older vehicles, as plastic clips can become brittle over time.
- Fastener Removal: We locate and remove the hidden screws, typically found behind the door release handle bezel, inside the armrest pull cup, and along the bottom edge of the panel.
- Switch Disconnection: We carefully pry up the power window switch bezel using non-marring nylon trim tools to avoid damaging the soft-touch plastics. The electrical harnesses are disconnected and inspected for corrosion.
- Panel Separation: Using a specialized trim tool, we pop the perimeter retention clips one by one. The door panel is then lifted upward to clear the lock rod and window seal, then set aside in a safe location.
- Vapor Barrier Management: We carefully peel back the weather-shield (vapor barrier) to expose the inner door cavity. This barrier is crucial for preventing moisture from entering your cabin and must be preserved.
Phase 3: Debris Mitigation and Vacuuming
This is the step that separates amateur shops from AlexWindshield professionals. When vent glass shatters, shards fall deep into the bottom of the door shell, inside the window run channels, and all over the rear seat.
- Interior Vacuuming: We use a high-powered industrial vacuum to remove all glass from the seats, floor mats, and carpet fibers.
- Door Cavity Cleaning: We insert a flexible vacuum attachment into the bottom of the door frame. Removing this glass is mandatory; failure to do so results in a permanent "rattle" every time you close the door or drive over a bump.
- Run Channel Clearing: We physically inspect the rubber channels where the main glass slides. Even a single shard of tempered glass left here can scratch your main window or cause the motor to burn out due to friction.
Phase 4: Extraction of the Damaged Assembly
The vent glass on the LeSabre is typically held in place by a combination of a dividing bar (the pillar separating the vent from the main glass) and urethane adhesive or bolts, depending on the specific trim level and manufacturing date.
- Divider Bar Manipulation: We loosen the bolts securing the vertical division bar. This allows us to shift the bar slightly, creating the necessary clearance to remove the remnants of the old vent glass assembly.
- Seal Separation: If the unit is encapsulated or bonded, we use a cold knife or oscillating tool to slice through the old urethane adhesive without damaging the pinch weld (the metal frame of the car).
- Rubber Gasket Inspection: We inspect the rubber encapsulation. If the new part comes as a "bare glass," we may need to transfer the gasket or install a new molding. However, for the LeSabre, we typically source high-quality aftermarket or OEM-equivalent parts that come with the encapsulation pre-attached for a perfect seal.
Phase 5: Surface Preparation and Priming
A leak-free installation relies entirely on chemical bonding. We cannot simply stick the new glass onto dirty metal.
- Pinch Weld Cleaning: We clean the metal frame where the glass sits, removing road grime, old adhesive, and dirt.
- Scuffing and Cutting: We trim the existing urethane bead down to a thin, level layer (approximately 1-2mm). This provides the best base for the new adhesive to bond to.
- Primer Application: Any areas of bare metal exposed during the removal process are treated with a specialized black automotive primer. This prevents rust formation—a common killer of older vehicles in the GTA due to road salt. Ideally, we also prime the glass edge (frit band) to protect the adhesive from UV degradation.
Phase 6: Urethane Application and Installation
We use only high-modulus, non-conductive Sika or DOW automotive urethane. This is the same industrial adhesive used in the factory assembly of the vehicle.
- V-Bead Application: We apply a high-profile V-bead of urethane directly to the glass assembly or the pinch weld, ensuring there are no gaps or air pockets.
- Setting the Glass: The new vent glass is carefully maneuvered into position. We ensure the rubber guides align perfectly with the divider bar to prevent wind noise.
- Torque and Tightening: Once the glass is seated in the adhesive, we re-tighten the divider bar bolts to manufacturer torque specifications. This clamps the glass in place while the adhesive cures.
- Functionality Test: Before closing up the door, we temporarily reconnect the window switch and cycle the main drop glass up and down. This ensures the divider bar is straight and the main window does not bind or drag against the new vent installation.
Phase 7: Reassembly and Final Quality Check
The final phase involves reversing the disassembly process. We re-adhere the vapor barrier, ensuring a watertight seal. The door panel is re-hung, taking care to align all plastic clips and the lock rod. All screws and fasteners are tightened securely. Finally, we clean the new glass inside and out with ammonia-free cleaner for a streak-free shine.
Mobile Service Across the GTA: Vaughan, Richmond Hill, and Markham
A broken window renders your car insecure and vulnerable to the unpredictable Canadian weather. You shouldn't have to drive a car with a shattered window to a shop. AlexWindshield specializes in premium mobile service.
Whether you are parked at your office in Markham, your home in Richmond Hill, or a job site in Vaughan, our mobile units are fully equipped workshops on wheels. We carry our own power sources, vacuums, and climate-controlled adhesive warmers to ensure the installation can be performed anywhere in the Greater Toronto Area (GTA). We respect your time and your property, arriving within scheduled windows and handling the logistics so you can continue your day uninterrupted.
The AlexWindshield Advantage: Lifetime Warranty
Choosing a service provider for your Buick LeSabre 2000-2005 is a decision based on trust. We don't just fix glass; we restore safety. We are so confident in the technical proficiency of our Master Technicians and the quality of our glass and adhesives that we offer a comprehensive Lifetime Warranty on our workmanship.
This warranty covers you against:
- Air Leaks: No whistling noises at highway speeds.
- Water Leaks: Your interior stays dry, guaranteed.
- Molding Issues: We ensure trim pieces stay secure.
Don't let a broken vent glass compromise the comfort of your classic Buick. Contact AlexWindshield today for a quote and experience the premier auto glass service in the GTA. Let us get you back on the road with crystal clear vision and peace of mind.


