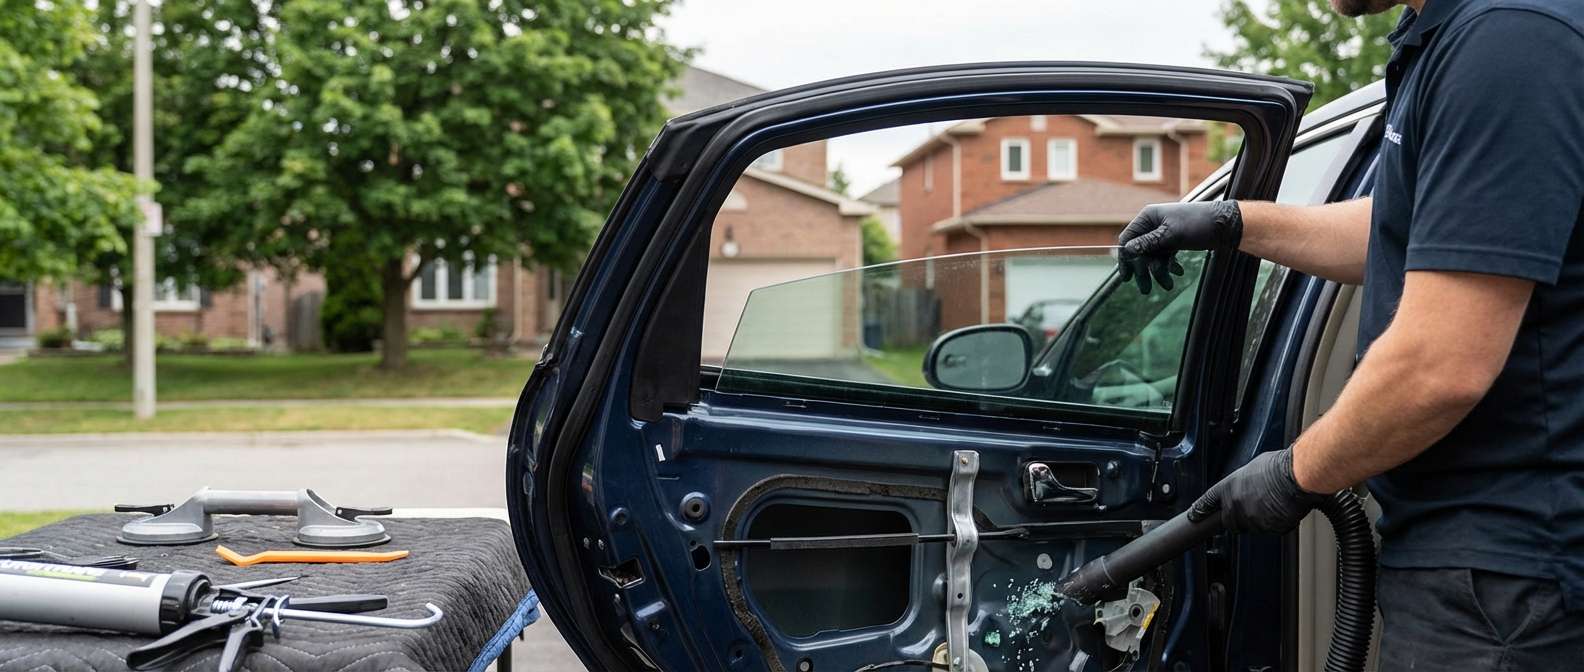
Restoring the Silence: Vent Glass Replacement for Buick LaCrosse 2005-2009
The first generation of the Buick LaCrosse (2005-2009) marked a significant turning point for General Motors, introduced as the successor to the Regal and Century. One of the defining characteristics of this specific model was Buick’s heavily marketed "QuietTuning" technology. Engineers went to great lengths to reduce cabin noise, using acoustic laminate glass, specific sound-deadening materials in the doors, and improved seals to create a library-quiet ride. However, when your rear vent glass or front quarter glass is shattered, that carefully engineered tranquility is instantly destroyed, replaced by wind noise, moisture, and security vulnerabilities.
At AlexWindshield, we understand that a broken vent glass is more than just a cosmetic issue; it compromises the structural integrity of your vehicle's security system and ruins the driving experience. As a Master Technician, I have performed countless replacements on the W-body platform, and I know the specific intricacies required to replace the fixed glass on a 2005-2009 Buick LaCrosse correctly.
Mobile Auto Glass Services Across the Greater Toronto Area
Whether you are parked in your driveway in Vaughan, at your office in Richmond Hill, or visiting friends in Markham, a broken car window is a major inconvenience. You shouldn't have to drive a vehicle filled with shattered glass to a shop. AlexWindshield brings the repair shop to you.
Our fully equipped mobile units service the entire Greater Toronto Area (GTA). We specialize in on-site replacements that meet the same strict safety standards as a factory installation. We understand the local climate and road conditions, ensuring that the urethane and seals we use are perfectly suited for Ontario’s weather extremes.
Understanding the Complexity of Vent Glass Replacement
Many vehicle owners assume that the vent glass (the small, triangular, non-moving piece of glass usually located in the rear door) is the easiest and cheapest window to replace because of its size. This is a common misconception. In reality, replacing a vent glass on a Buick LaCrosse is often more labor-intensive than replacing the main drop glass.
The vent glass is structurally integrated into the door frame via a division bar (the pillar that separates the moving window from the fixed vent). To replace it, the entire door internal assembly must be dismantled to manipulate this channel. This requires precision, patience, and the right tools to avoid damaging the window regulator or the door’s electronics.
The AlexWindshield Master Technician Process: Step-by-Step
At AlexWindshield, we do not cut corners. Below is the detailed, A-to-Z protocol we follow when replacing the vent glass on your 2005-2009 Buick LaCrosse. This process ensures your vehicle is returned to you clean, safe, and as quiet as the day it left the factory.
Phase 1: Site Preparation and Safety Protocols
- Vehicle Inspection: We begin by photographing the damage and inspecting the door frame for any scratches or dents caused by the impact that broke the glass.
- Interior Protection: Before touching the glass, we cover your vehicle’s seats, center console, and floor mats with heavy-duty protective covers. The 2005-2009 LaCrosse often features plush leather or velour seating; protecting these materials from glass dust and adhesive is our top priority.
- Exterior Taping: We apply automotive-grade masking tape around the window frame to protect the exterior paint from accidental scratches during the removal of the old glass and rubber molding.
Phase 2: Disassembly and Door Panel Removal
To access the mounting points for the vent glass, the interior door panel (card) must be removed. This is a delicate process on older vehicles (15+ years old) as plastic clips can become brittle.
- Hardware Removal: We locate and remove the hidden retention screws. On the LaCrosse, these are typically found behind a small cover plate inside the interior door release handle and at the bottom of the door pull cup.
- Switch Disconnection: We carefully pry up the power window switch bezel and disconnect the wiring harnesses.
- Panel Separation: Using a specialized non-marring plastic trim tool, we pop the perimeter retention clips of the door panel. We lift the panel upwards to clear the lock rod and weatherstripping, setting it aside in a safe location.
- Vapor Barrier Management: We carefully peel back the factory weather shield (vapor barrier) to expose the inner door shell. It is vital to preserve the adhesive on this barrier to ensure the door remains watertight after reassembly.
Phase 3: Critical Glass Cleanup
This is where AlexWindshield separates itself from budget competitors. Vent glass is tempered; when it breaks, it explodes into thousands of cubes that fall deep into the door shell.
- Door Cavity Vacuuming: We insert a high-powered industrial vacuum nozzle deep into the bottom of the door shell. We manipulate the vacuum to reach corners where glass shards accumulate. If left behind, these shards will rattle every time you close the door or listen to bass-heavy music.
- Speaker and Drain Check: We inspect the door speaker (glass often gets stuck in the cone) and ensure the water drain holes at the bottom of the door are not clogged with glass debris.
- Interior Cabin Cleaning: We thoroughly vacuum the carpets, seats, and any crevices where glass may have flown inside the cabin.
Phase 4: Removal of the Division Bar and Old Glass
The vent glass on the LaCrosse is held in place by the division bar (run channel) and rubber encapsulation.
- Lowering the Main Window: We reconnect the window switch temporarily to lower the main drop glass, relieving tension on the channels.
- Releasing the Run Channel: We pull the rubber run channel out of the top and back of the door frame to access the screws securing the division bar.
- Unbolting the Division Bar: We remove the bolts (usually 10mm) located at the top of the door frame and inside the door shell that secure the division bar.
- Extraction: We shift the division bar forward. This creates enough clearance to wiggle the old vent glass frame (or the remaining rubber gasket) out of the door. Any remaining urethane or sealant is carefully scraped away from the body pinch weld to ensure a clean bonding surface.
Phase 5: Installation of the New Vent Glass
We use only OEM-quality glass that matches the tint and contour of your original Buick specifications.
- Surface Priming: If the replacement part requires urethane bonding (common on quarter glasses), we apply a high-grade automotive primer to the vehicle's metal frame to prevent rust and ensure a molecular bond.
- Adhesive Application: We apply a bead of high-modulus, non-conductive urethane adhesive. This adhesive is critical for structural rigidity and preventing water leaks.
- Setting the Glass: The new vent glass is carefully maneuvered into the door frame. We slide the division bar back into position, ensuring the rubber seals of the vent glass mate perfectly with the bar.
- Securing Hardware: The division bar bolts are re-installed and torqued to factory specifications. We check the alignment to ensure the gap between the vent glass and the main window is perfectly parallel.
- Run Channel Re-installation: The rubber run channel for the main window is pressed back into the division bar. We use a silicone spray lubricant to ensure the rubber seats correctly without folding.
Phase 6: Reassembly and Quality Control
- Operational Check: Before putting the door panel back on, we test the main window operation. It must move up and down smoothly without binding against the newly installed division bar or vent glass.
- Vapor Barrier Re-sealing: The weather shield is pressed back into place to seal the door interior.
- Panel Installation: The door panel is re-hung, clips are snapped into place, and all screws are tightened. The window switch is reconnected and tested one final time.
- Final Polish: We clean the new glass inside and out with professional-grade glass cleaner, ensuring it is streak-free.
Why Specific Knowledge of the Buick LaCrosse Matters
The 2005-2009 Buick LaCrosse utilizes a specific type of encapsulated glass assembly. Generic auto glass technicians who rush through jobs often damage the rubber gaskets surrounding the vent glass or fail to align the division bar correctly. Misalignment leads to wind noise (whistling at highway speeds) and water leaks that can damage your door speakers and window motors.
At AlexWindshield, our Master Technicians are trained on the specific tolerances of GM W-body vehicles. We ensure that the "QuietTuning" you love about your Buick is preserved. We service all trim levels, including the CX, CXL, and the performance-oriented CXS.
The AlexWindshield Guarantee
We stand behind our craftsmanship with an industry-leading warranty. When you choose us for your vent glass replacement in Vaughan, Richmond Hill, Markham, or anywhere in the GTA, you are covered.
Our Lifetime Warranty Covers:
- Water Leaks: If your window ever leaks due to our installation, we fix it for free.
- Air Noises: We guarantee a seal that eliminates wind noise caused by improper installation.
- Workmanship: Any issues related to the assembly of your door or the glass bonding are covered for as long as you own the vehicle.
Book Your Mobile Service Today
Don’t let a broken vent glass compromise the security and comfort of your Buick LaCrosse. Trust the experts who treat your car with the respect it deserves. We offer same-day or next-day appointments to get you back on the road safely.
Contact AlexWindshield today to schedule your mobile glass replacement. We handle the insurance paperwork, we come to you, and we clean up every shard of glass.
Call AlexWindshield – The GTA's Trusted Auto Glass Experts.


