Restoring the Bauhaus Silhouette: Specialized Sunroof Replacement for Audi TT (2008-2015)
The Audi TT (Mk2/8J) is more than just a sports coupe; it is a rolling testament to Bauhaus design principles—minimalist, functional, and undeniably stylish. The sweeping roofline is the signature of this vehicle, creating an aerodynamic profile that cuts through the wind. However, when the structural integrity of that roofline is compromised by a shattered or cracked sunroof, the vehicle loses both its aesthetic appeal and its safety. Unlike a standard sedan, the sunroof on a 2008-2015 Audi TT is an integral part of the vehicle’s rigidity and driving experience.
At AlexWindshield, we understand that replacing the glass on a German sports car requires a level of precision that goes beyond general auto repair. You cannot simply glue a new pane in place and hope for the best. The complex interplay of the motorized tracks, the tight tolerances of the aluminum and steel chassis, and the delicate interior electronics demands the touch of a Master Technician. If you are driving in the Greater Toronto Area (GTA) and facing sunroof issues, our team provides the definitive solution for restoring your Audi TT to showroom condition.
The Critical Importance of OEM Quality Sunroof Glass
For the 2008-2015 Audi TT, the sunroof is not merely a window; it is a shield against the elements and a safety component during a rollover event. Using aftermarket glass that does not meet Original Equipment Manufacturer (OEM) specifications can lead to disastrous results, including wind noise, water leaks, and even spontaneous shattering due to incorrect curvature or tempering.
We utilize only OEM-equivalent or better glass that matches the specific tint, thickness, and curvature of the Audi TT 8J chassis. This ensures that the glass sits perfectly flush with the roof panel, maintaining the vehicle’s aerodynamics and preventing the dreaded "whistling" sound at high speeds. Furthermore, our glass meets all safety standards for tempered automotive glass, ensuring it breaks into blunt, granular chunks rather than dangerous shards if an impact occurs.
Step-by-Step Technical Process: A Master Technician’s Approach
Replacing a sunroof on an Audi TT is a labor-intensive process that requires patience and specialized tools. As a Master Technician at AlexWindshield, I follow a rigorous protocol to ensure the replacement is performed flawlessly. Below is the detailed, step-by-step procedure we employ for the 2008-2015 Audi TT.
Step 1: Site Preparation and Interior Protection
Before a single tool touches the vehicle, we prioritize the protection of your luxury interior. The Audi TT often features Nappa leather seats and high-quality dashboard materials that are susceptible to scratches and dust.
- We apply heavy-duty protective covers to the seats, steering wheel, and center console.
- A protective film is applied to the exterior paint surrounding the sunroof aperture to prevent accidental scratches from glass removal tools or debris.
- If the glass has shattered, we lay down industrial-grade drop cloths to catch any falling debris during the removal of the remaining frame.
Step 2: Debris Containment and Vacuuming
If your sunroof has shattered, tempered glass shards are likely scattered throughout the cabin, inside the headliner, and within the sunroof tracks. This is a critical stage that amateur shops often overlook.
- We utilize a high-powered industrial vacuum to remove visible glass from the seats, carpets, and dashboard.
- Crucially, we inspect the sunroof rails and drainage channels. Glass shards lodged here can destroy the motor mechanism or block water drainage, leading to flooded floorboards later.
- We use compressed air to dislodge hidden fragments from the crevices of the track mechanism before vacuuming a second time.
Step 3: Headliner and Trim Management
On the Audi TT, accessing the sunroof mounting points often requires partial or full lowering of the headliner. This is a delicate process as the headliner board is fragile and can crease easily.
- We carefully remove the overhead console, sun visors, and A-pillar/B-pillar trims using non-marring pry tools.
- We disconnect the electrical harnesses for the interior lighting and the sunroof motor control.
- The headliner is gently lowered just enough to access the mounting bolts of the sunroof glass assembly without causing structural damage to the fabric backing.
Step 4: Removal of the Old Glass/Frame
With access secured, we proceed to remove the damaged component. Whether it is a fixed glass panel or a moving moonroof, the removal method varies slightly but prioritizes the preservation of the track mechanism.
- For bonded glass, we use a specialized oscillating cutout tool or cold knife to slice through the old urethane bead without scratching the metal pinch weld.
- For bolted glass (moving mechanisms), we carefully unscrew the torx bolts securing the glass to the track arms.
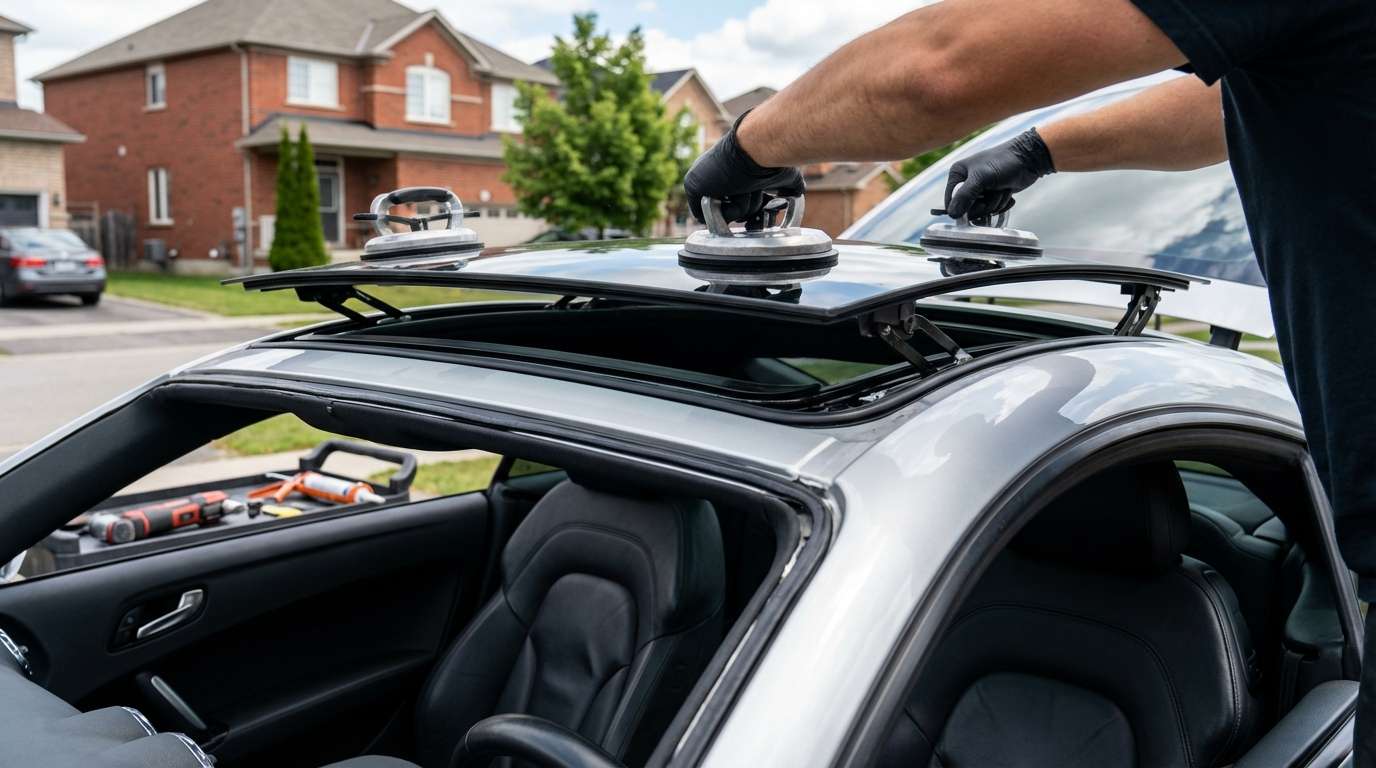
- The old glass is lifted away with suction cups to ensure a safe extraction.
Step 5: Surface Preparation and Pinch Weld Analysis
This is the most important step for preventing leaks and rust. The metal surface where the new glass or seal sits must be clinically clean.
- We trim the old adhesive down to a thin, uniform layer (typically 1-2mm) to serve as a bonding base.
- Any scratches on the pinch weld caused by the shattering glass or removal process are treated with a rust-inhibiting primer immediately to prevent future corrosion.
- The bonding surface of the new glass is cleaned with an alcohol-based activator to remove any oils or release agents from the manufacturing process.
Step 6: Primer and Adhesive Application
We do not use generic glue. We use high-modulus, non-conductive polyurethane adhesive specifically designed for European vehicles.
- A black primer is applied to the glass ceramic band (the black border) to protect the adhesive from UV degradation.
- We apply a high-viscosity urethane bead using a specialized caulking gun that ensures a consistent triangular bead profile. This shape prevents air pockets and ensures a watertight seal upon compression.
Step 7: Precision Installation and Alignment
Installing the new glass on an Audi TT requires exact alignment. If the glass sits too high, it creates wind noise; too low, and it causes water pooling.
- Using dual-suction lifting tools, two technicians carefully lower the new glass onto the track or pinch weld.
- We adjust the glass height to be flush or slightly lower (0.5mm) than the roofline at the front, and slightly higher at the rear, per Audi factory specifications to minimize wind turbulence.
- Once aligned, the mounting bolts are tightened to the specific torque settings required by Audi, or the glass is taped down to cure if bonded.
Step 8: Motor Initialization and Calibration
A new sunroof often confuses the vehicle’s electronic control unit (ECU). The "anti-pinch" safety feature and one-touch open/close functions must be reset.
- We perform a manual initialization procedure, cycling the sunroof through its full range of motion (tilt, slide open, slide close) while holding the switch to teach the motor the new resistance values and stop points.
- We verify that the glass seals tightly against the weatherstripping in the closed position.
- We conduct a high-pressure water test to certify that the installation is 100% waterproof before reassembling the interior trim.
Why AlexWindshield is the Authority in the GTA
When you own a vehicle as meticulously engineered as the Audi TT, you need a service provider who respects that engineering. AlexWindshield is not a generic "quick-fix" shop; we are specialists in auto glass solutions for luxury and performance vehicles. Our commitment to excellence is reflected in our workflow, our tools, and our results.
We recognize that Audi TT owners in the Greater Toronto Area value their time. Driving across the city with a broken sunroof is dangerous and inconvenient. That is why we have optimized our mobile service to bring the workshop to you. Whether you are at home or your office, our mobile units are fully equipped with power inverters, lighting, and all necessary tools to perform a factory-grade replacement on-site.
Serving Vaughan, Richmond Hill, and Markham
While we cover the entire GTA, we have a particularly strong presence in the northern districts. If you are located in Vaughan, near the Vaughan Mills area or Major Mackenzie Drive, our mobile technicians can typically reach you within hours. For clients in Richmond Hill and Markham, we offer same-day service options to ensure your vehicle is secured against the erratic Canadian weather immediately.
We understand the local driving conditions—from the construction debris on Highway 407 to the winter salt spray on Highway 7. Our installation techniques and adhesive choices are tailored to withstand these harsh environments, ensuring your sunroof remains secure and leak-free regardless of the season.
The AlexWindshield Guarantee: Lifetime Warranty
Confidence in our craftsmanship allows us to offer what many competitors cannot: a Lifetime Warranty on our workmanship. This covers you against any leaks, air noises, or installation-related defects for as long as you own your Audi TT.
When we replace your sunroof, we are restoring your vehicle’s safety bubble. We take that responsibility seriously. From vacuuming the tiniest shard of tempered glass from your carpet to calibrating the motor for that perfect seal, we handle every detail.
Don't let a broken sunroof compromise the beauty and safety of your Audi TT.
Contact AlexWindshield today. We are the trusted experts for Audi TT sunroof replacement in Toronto, Vaughan, Richmond Hill, and Markham. Experience the difference of a Master Technician’s touch and drive with confidence again.


